Carpentry and power tools are not something that are new to me. I use both regularly as a prop designer. But when given the task of using NO fasteners, I immediately jumped to joinery, something entirely new to me. As someone who learned woodworking through theatre (where I’ve been trained that “done is beautiful”), I’ve never had the opportunity to explore a method that is time consuming.
As soon as we were given our little chunks of wood I noticed two things:
1. I loved that the bark was still included in our unrefined piece of wood. I’m used to plywood, not something that looks fresh off a tree.
2. The shape of our chunk was super awkward – the width and the length were working against my task to make a “container” and the natural curve of the trunk also provided a challenge.
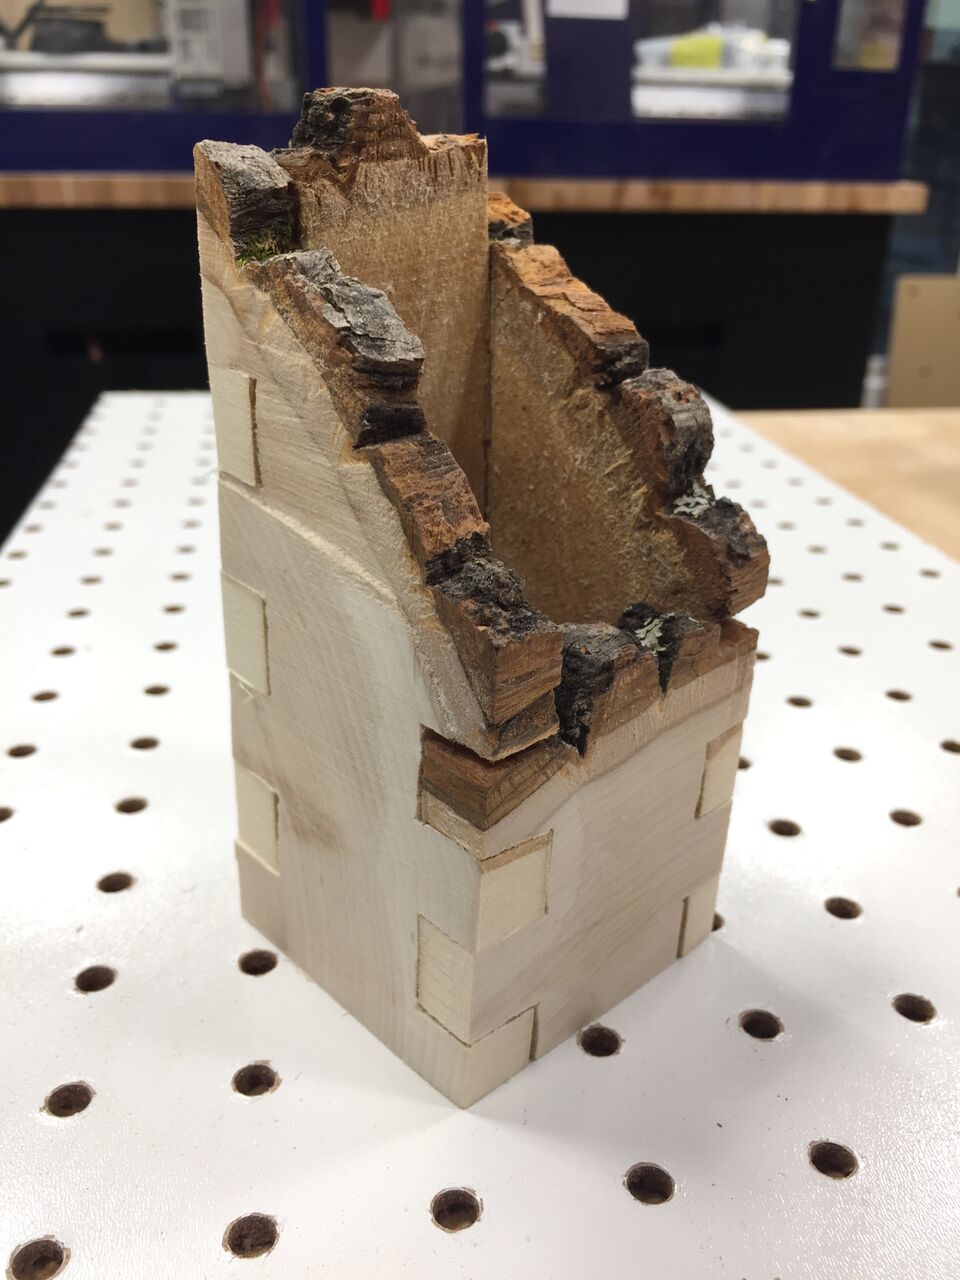
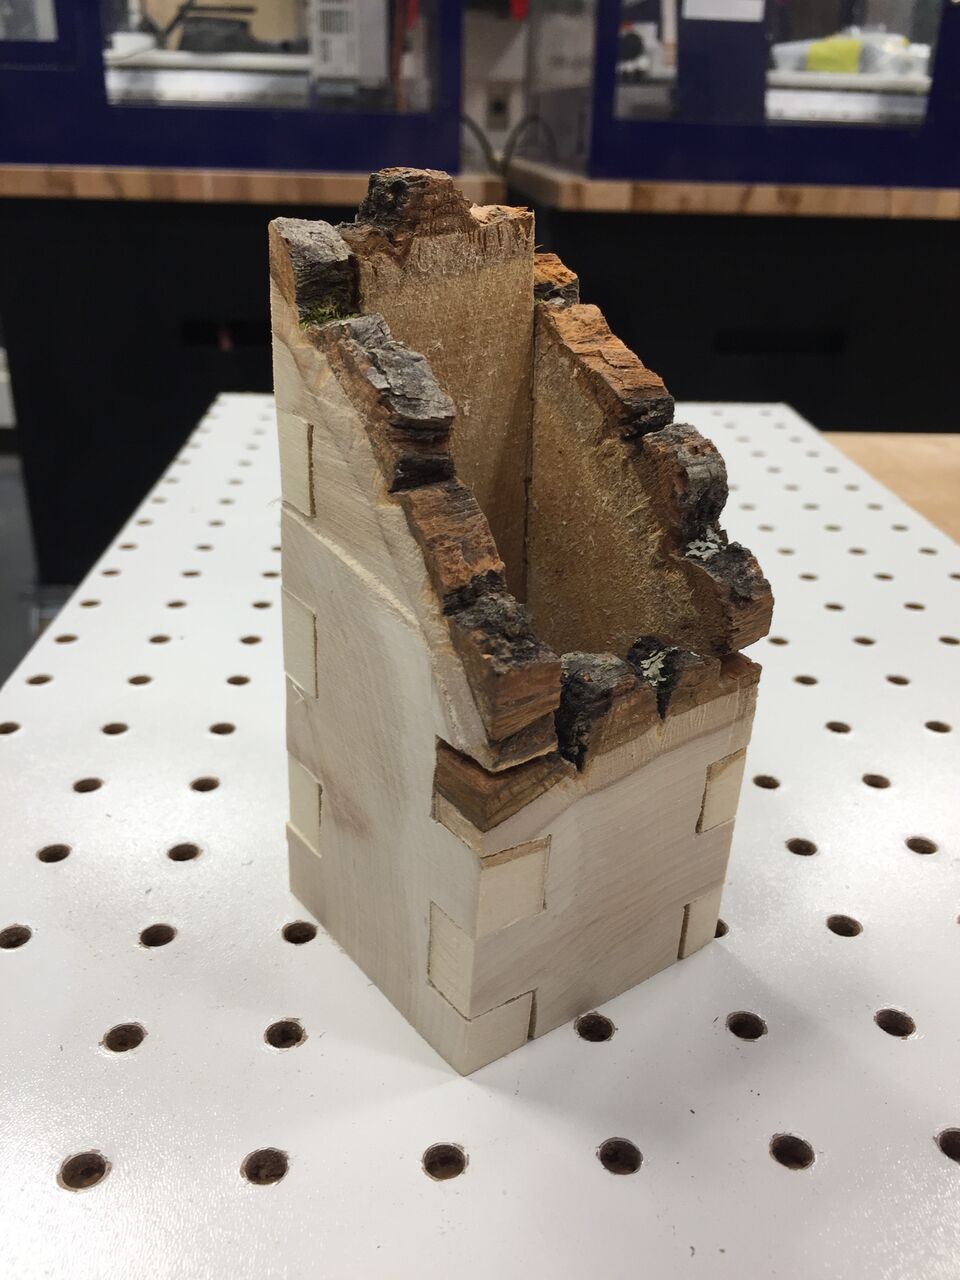
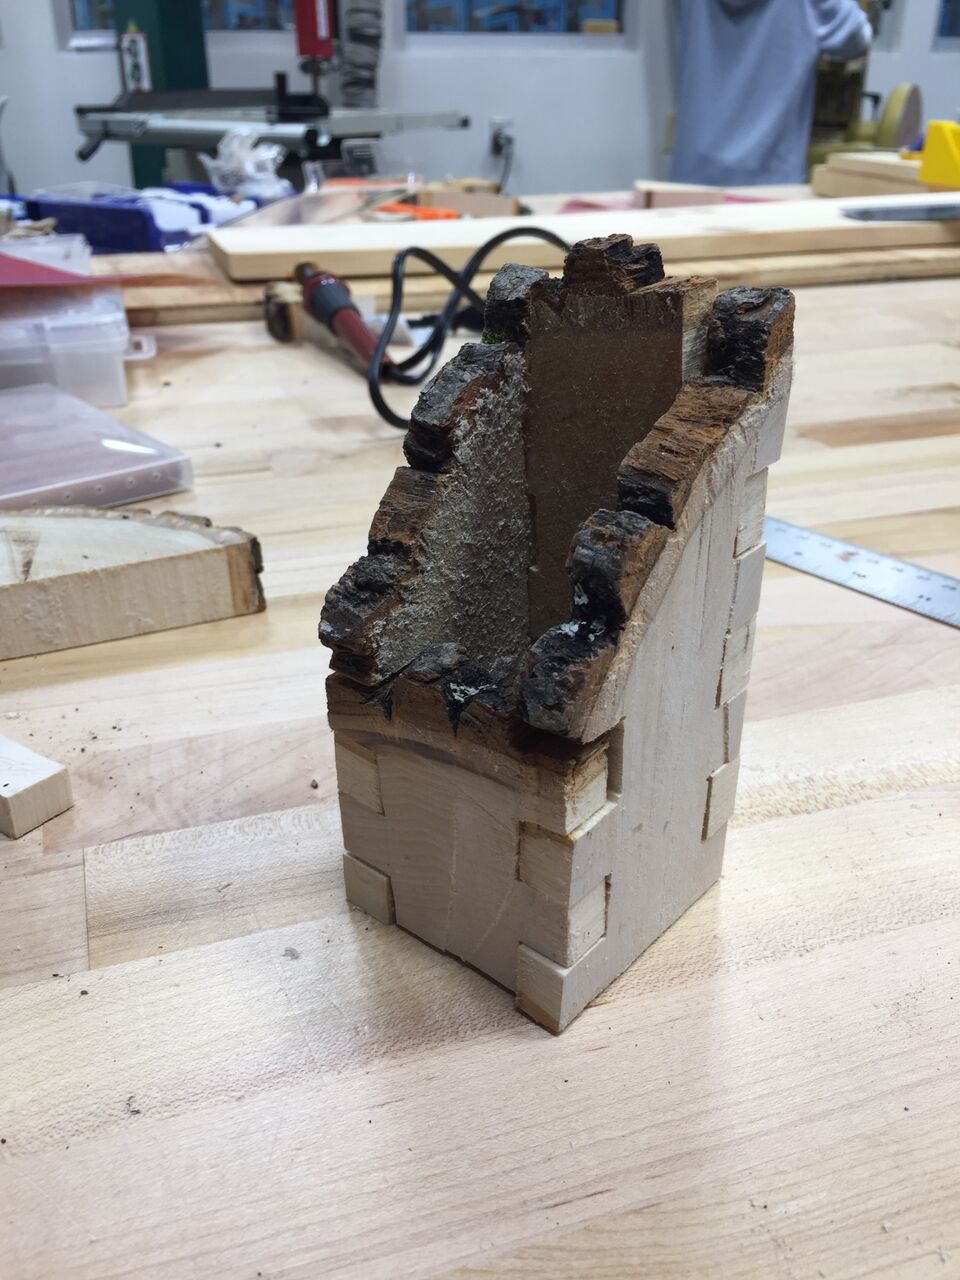
I decided to embrace the natural element – The bark and darker tree ring were my favorite part and I wanted to make this the focal point of my container. I kept the bark and the curve in my design.

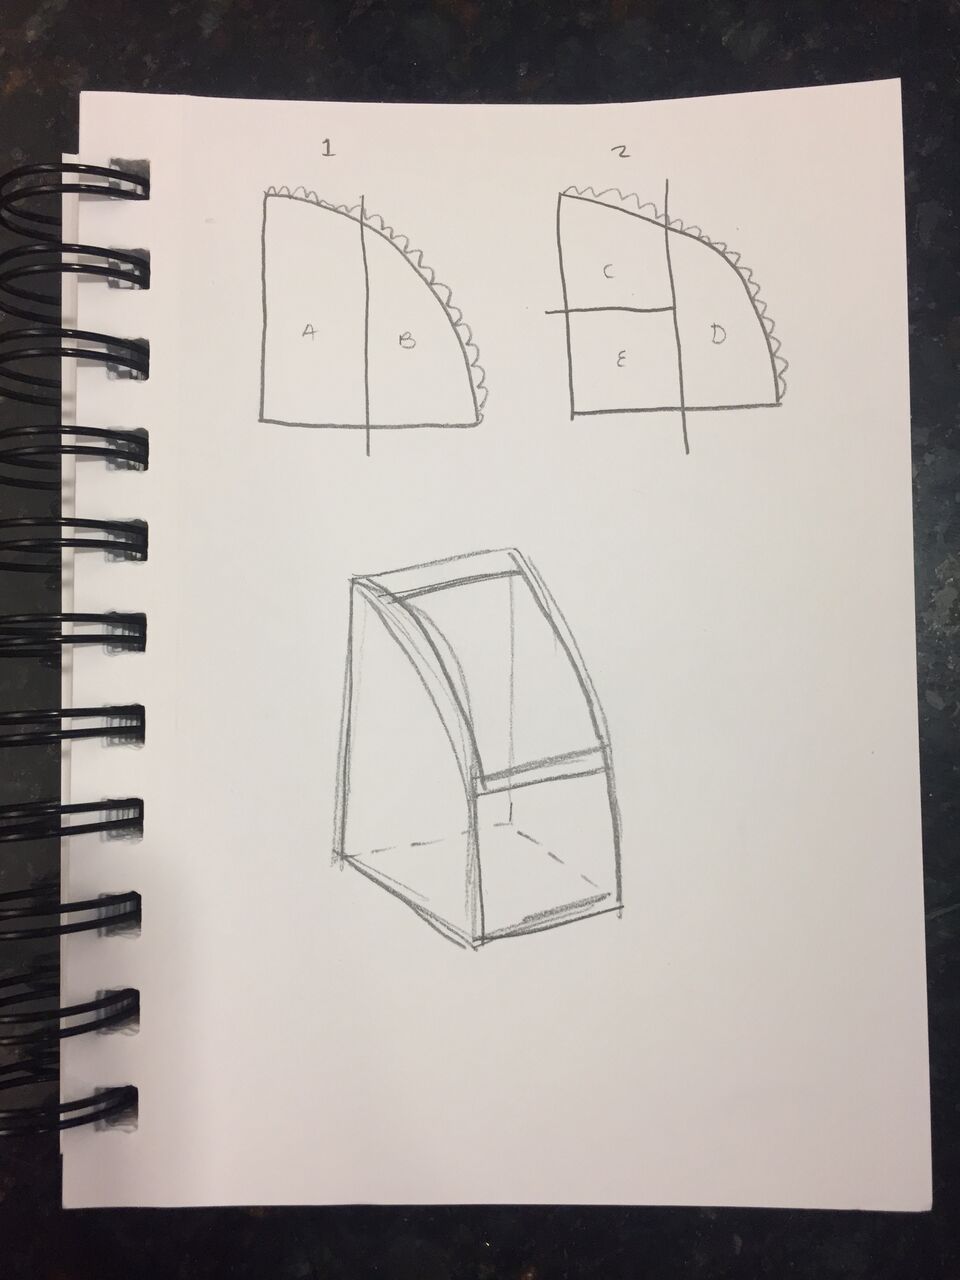
To counter the weird shape of our wood chunk, I decided to split my piece widthwise. I did this with the hand saw and spent 30 minutes hacking away at all four sides of the piece. This left me with a lot of inconsistencies in my two new pieces. But I looked past this, and decided I’d sand it all later.
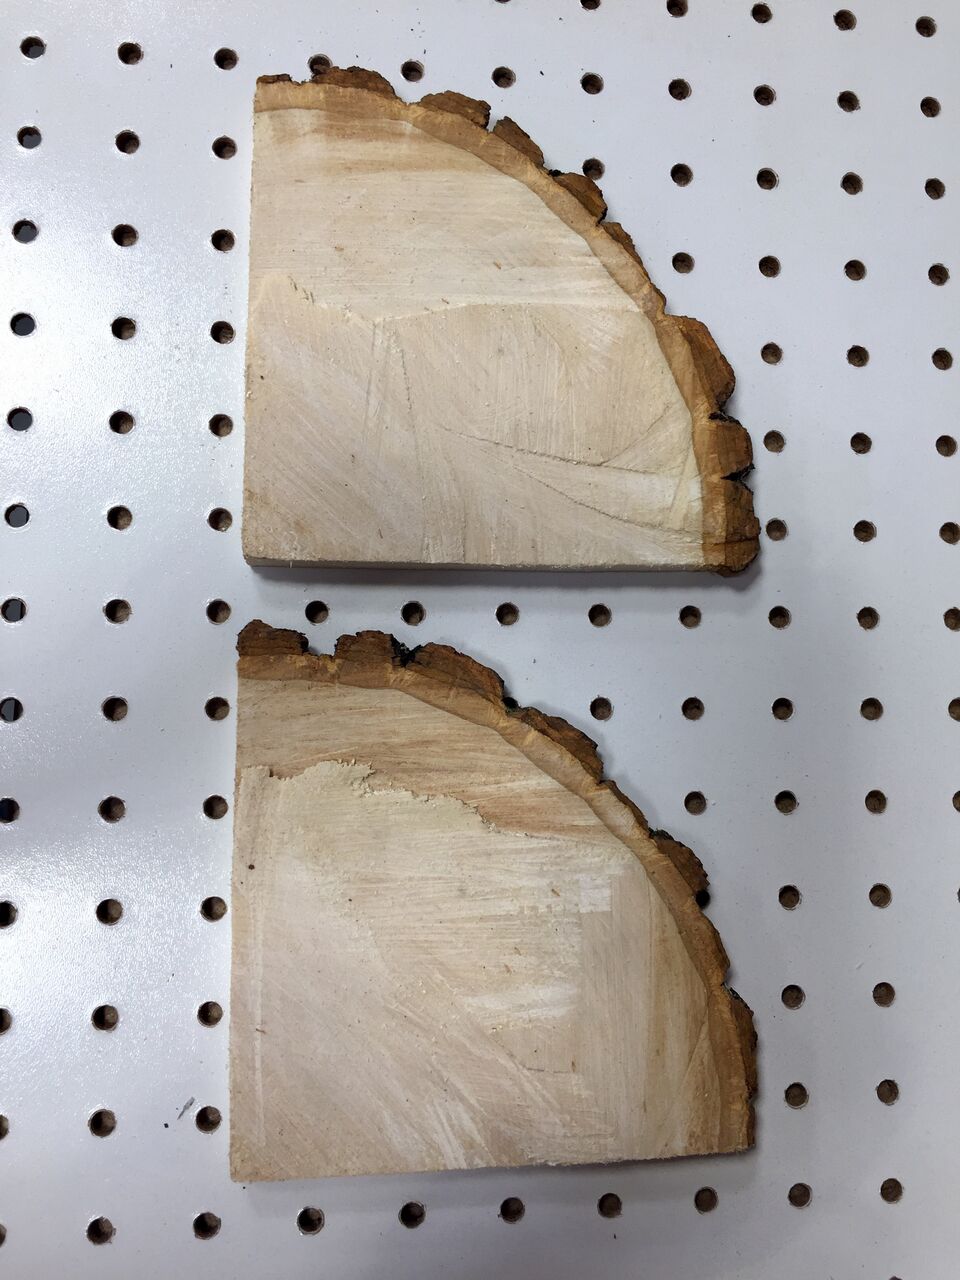
I turned my two pieces into four pieces. I stacked the two on top of each other and ran them through the band saw, giving me four pieces. My research on “box joints” taught me that parallel sides should be identical. By cutting both pieces together, I could ensure my pieces would be the same size. I then lined all my pieces up and took to cutting the joints. It was a lot of trial and error due to the variations in the wood I was using. A professional would have made a jig, and cut out his joints using a dato blade on the table saw to get the desired effect of joints that are precisely the same size and distance apart. A Natalie Carney was freehanding on the scroll saw. But this is where my woodworking experience came in handy most. I would cut the joints out and make adjustments as needed. There are a lot of imperfections that a master carpenter might scoff at, but I felt very accomplished with my pretty good joints. I was able to cut my joints and put everything together in less than hour and a half.

The bottom of my pencil holder was a bit of an after-thought. After I finished the four walls, I thought, “Oh god, I didn’t design a bottom.” So I took the one remaining piece I had, used the container to trace the approximate size needed for the bottom and cut it out on the scroll saw. When it didn’t fit exactly, I sanded the edges until it fit and I was happy with the way it looked. Then I used the belt sander to finish the piece. The finishing step took a total of 20 minutes. I made the choice to not decorate or embellish my piece to allow the bark to stand out and speak for itself. I didn’t want to take attention away from the natural beauty of the wood.
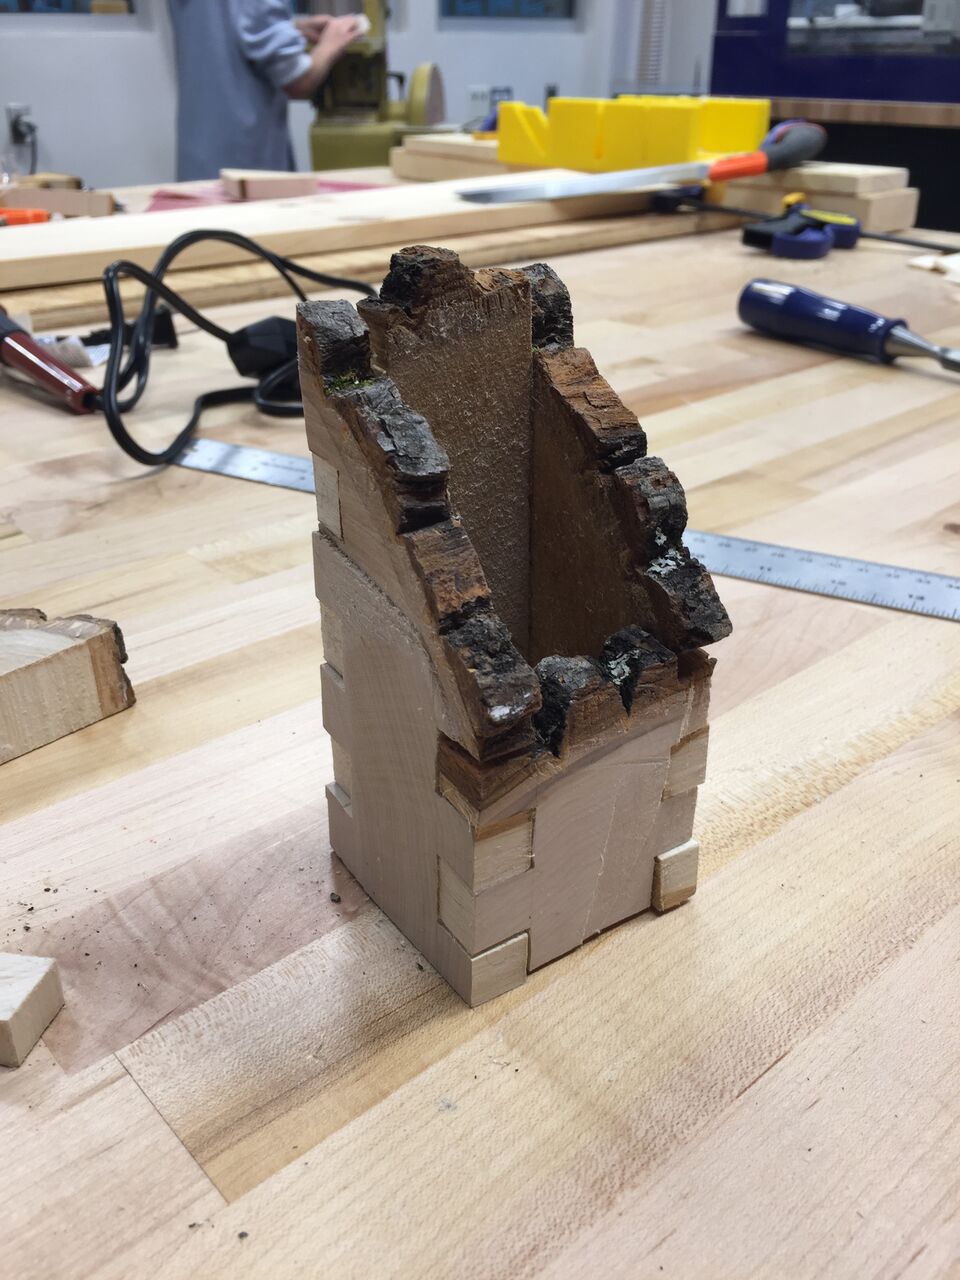
I present to you my pencil cup! I decided this was to function as a pencil cup after I put it all together, which I guess is a little backwards. But I put my focus on using the material to make the best “something” I could make, and then gave it its function. Working with the limitations of this project asked me to do a lot of planning beforehand, and to take extra care to make sure everything fit together. I found this project very relaxing and I don’t think some of my classmates felt that way. I am so impressed with the time and innovation they went through to avoid using power tools. This project gave me the chance to experiment with a method of woodworking I don’t think I ever would have attempted. Not only do we never have time to “play” in theatre work, but I have always assumed joinery was too complicated for a basic carpenter like myself. Turns out it just take a little focus and planning, and you can get a sweet little creation that serve a purpose too!