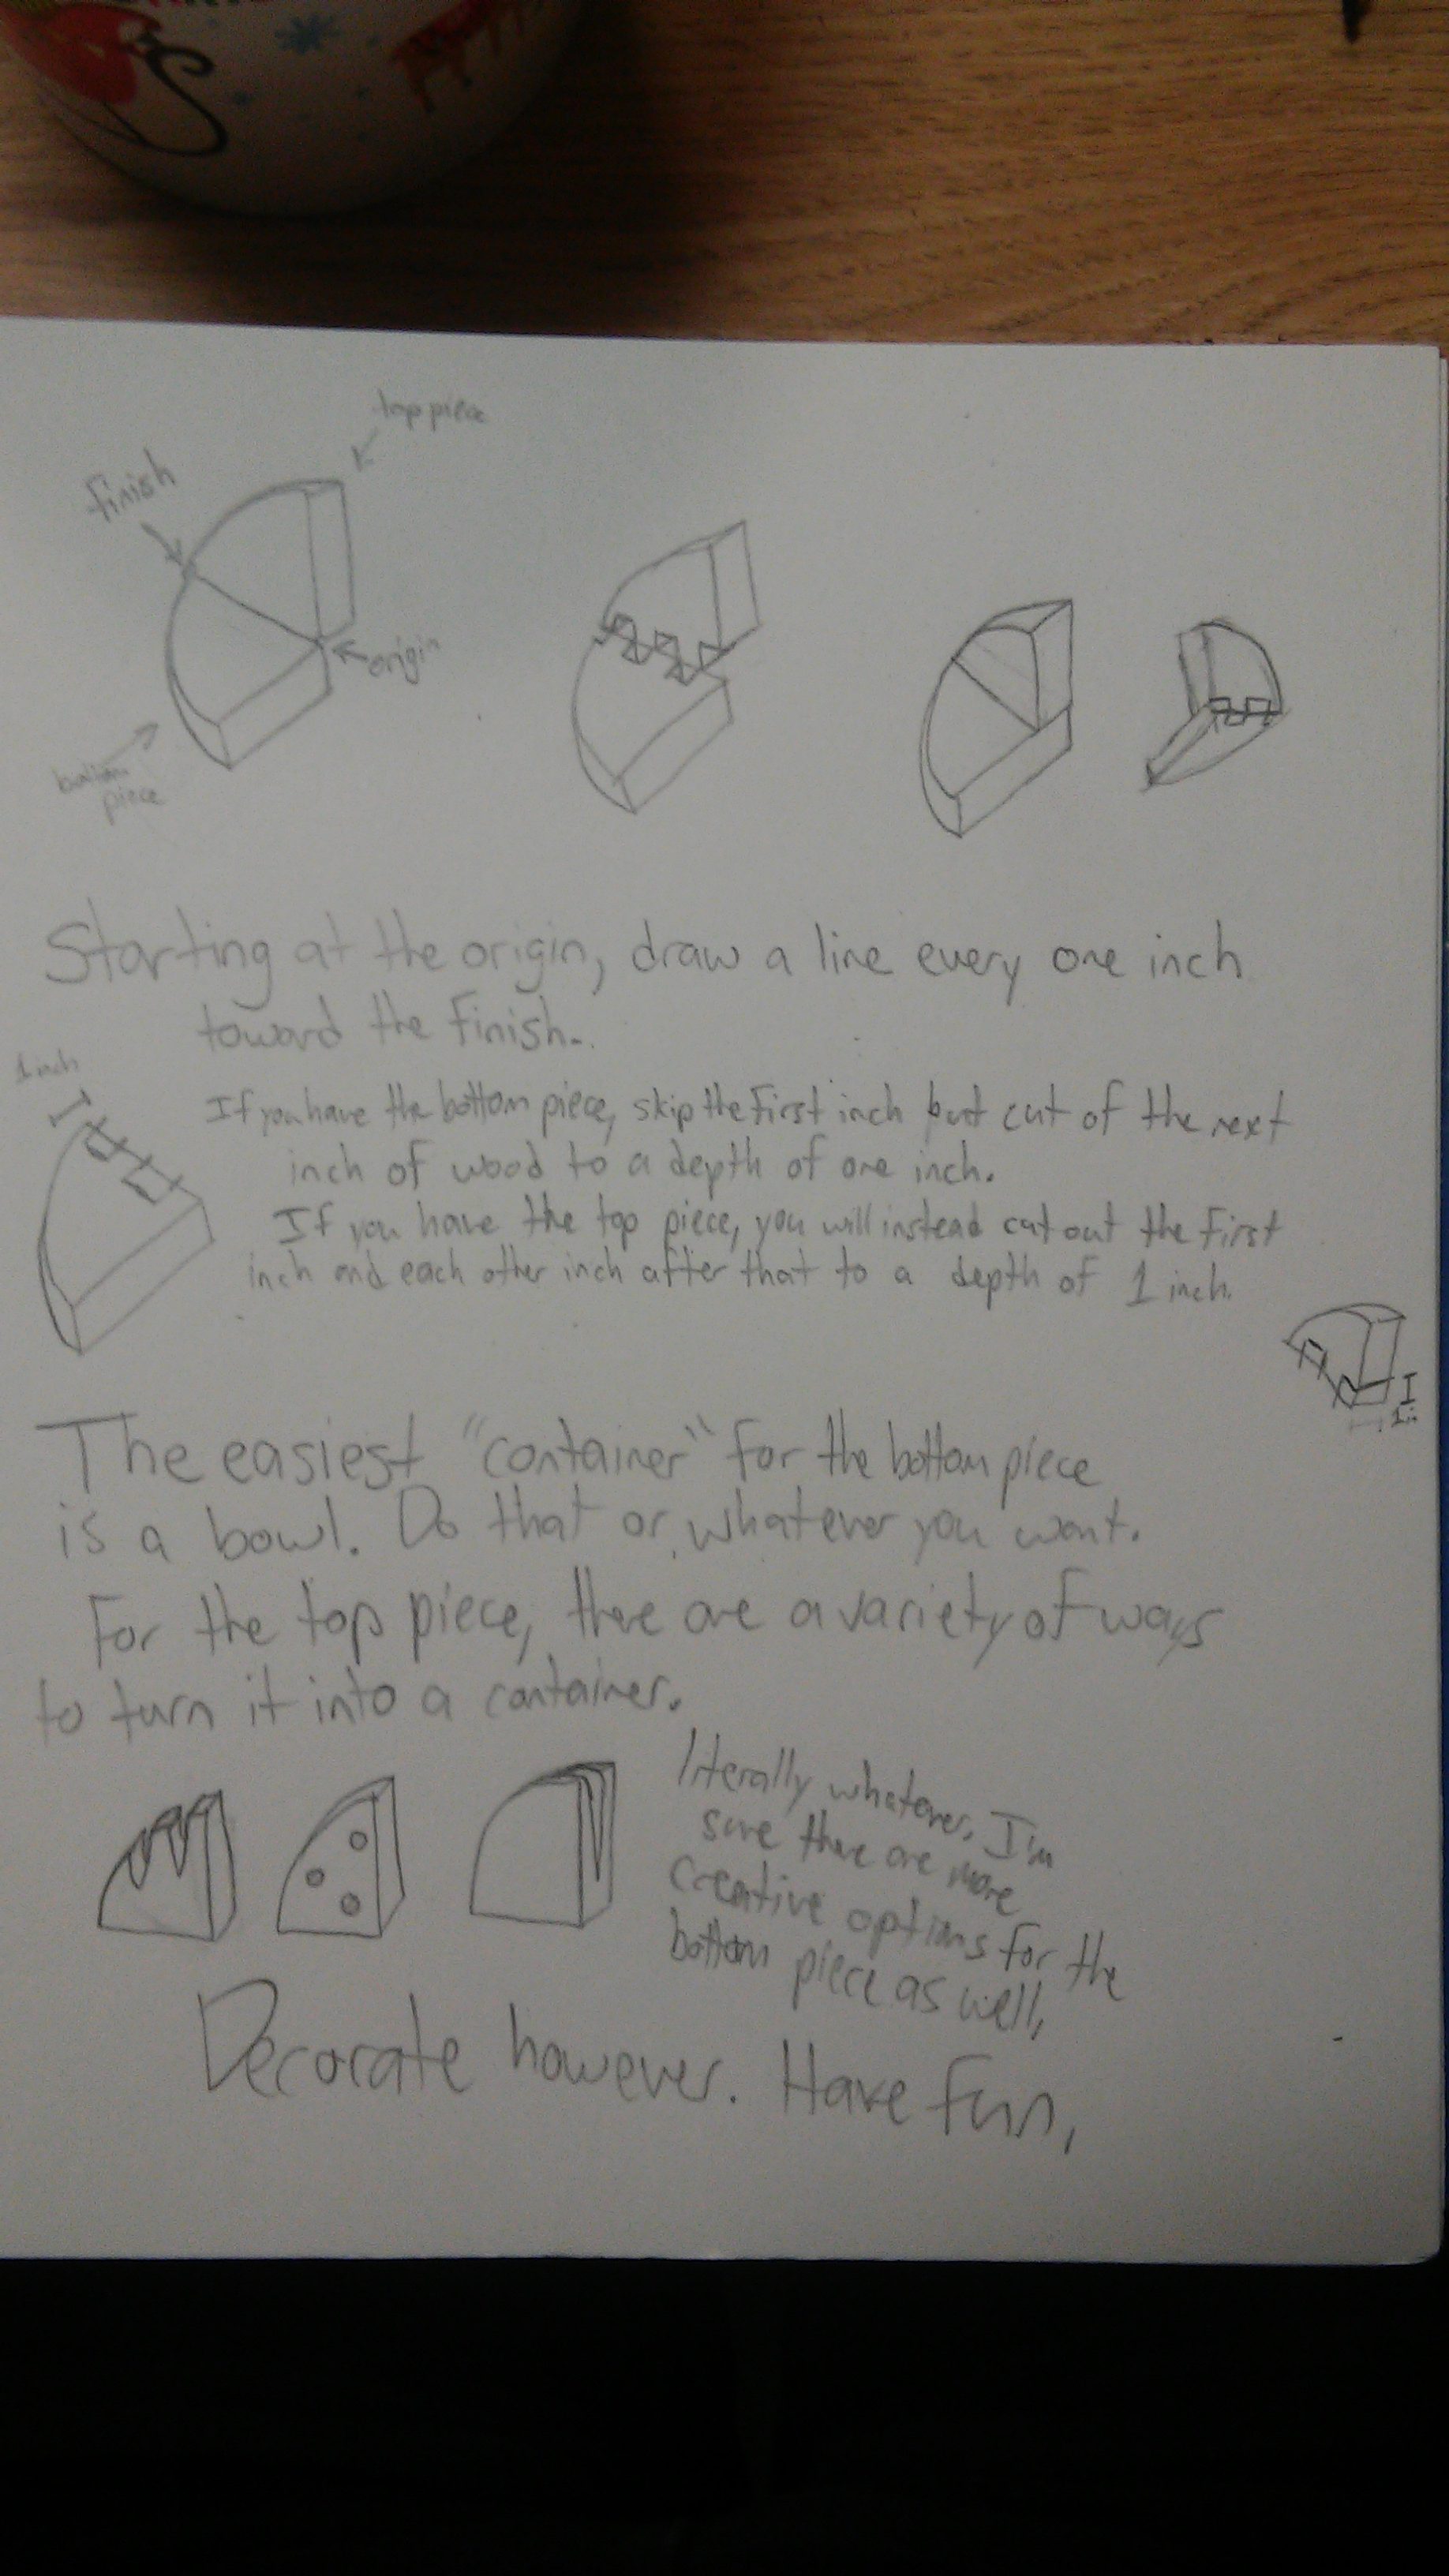
Gabrielle and I began this project knowing we wanted our projects to not just speak to one another but to actually connect. I drafted an idea, knowing that we were starting with wedge shapes and wanting them to connect one straight edges. This would have been a lot more difficult if we wanted to connect the pieces on the curved edge, and I wanted the straight edges to be more of foundations to make the curve more appealing. From the beginning, I wholly intended to keep my curve even though I knew that it wouldn’t drastically change the shape of the piece. I was concerned that it might not make the piece look very transformed, but at the end of the day, I’d made up my mind. It’s worth noting that I wrote up this plan then sent it to my partner via text since our schedules didn’t line up well for meeting in person.
I made sure before I actually put the tools to work that I had an idea of what I was doing, so like any good novice, I asked for advice. I called my dad who was very used to working with wood as a hobby for decades. He warned me about fragility and to not make any pieces too thin in a soft wood. Also to not use a hammer for that specific reason.
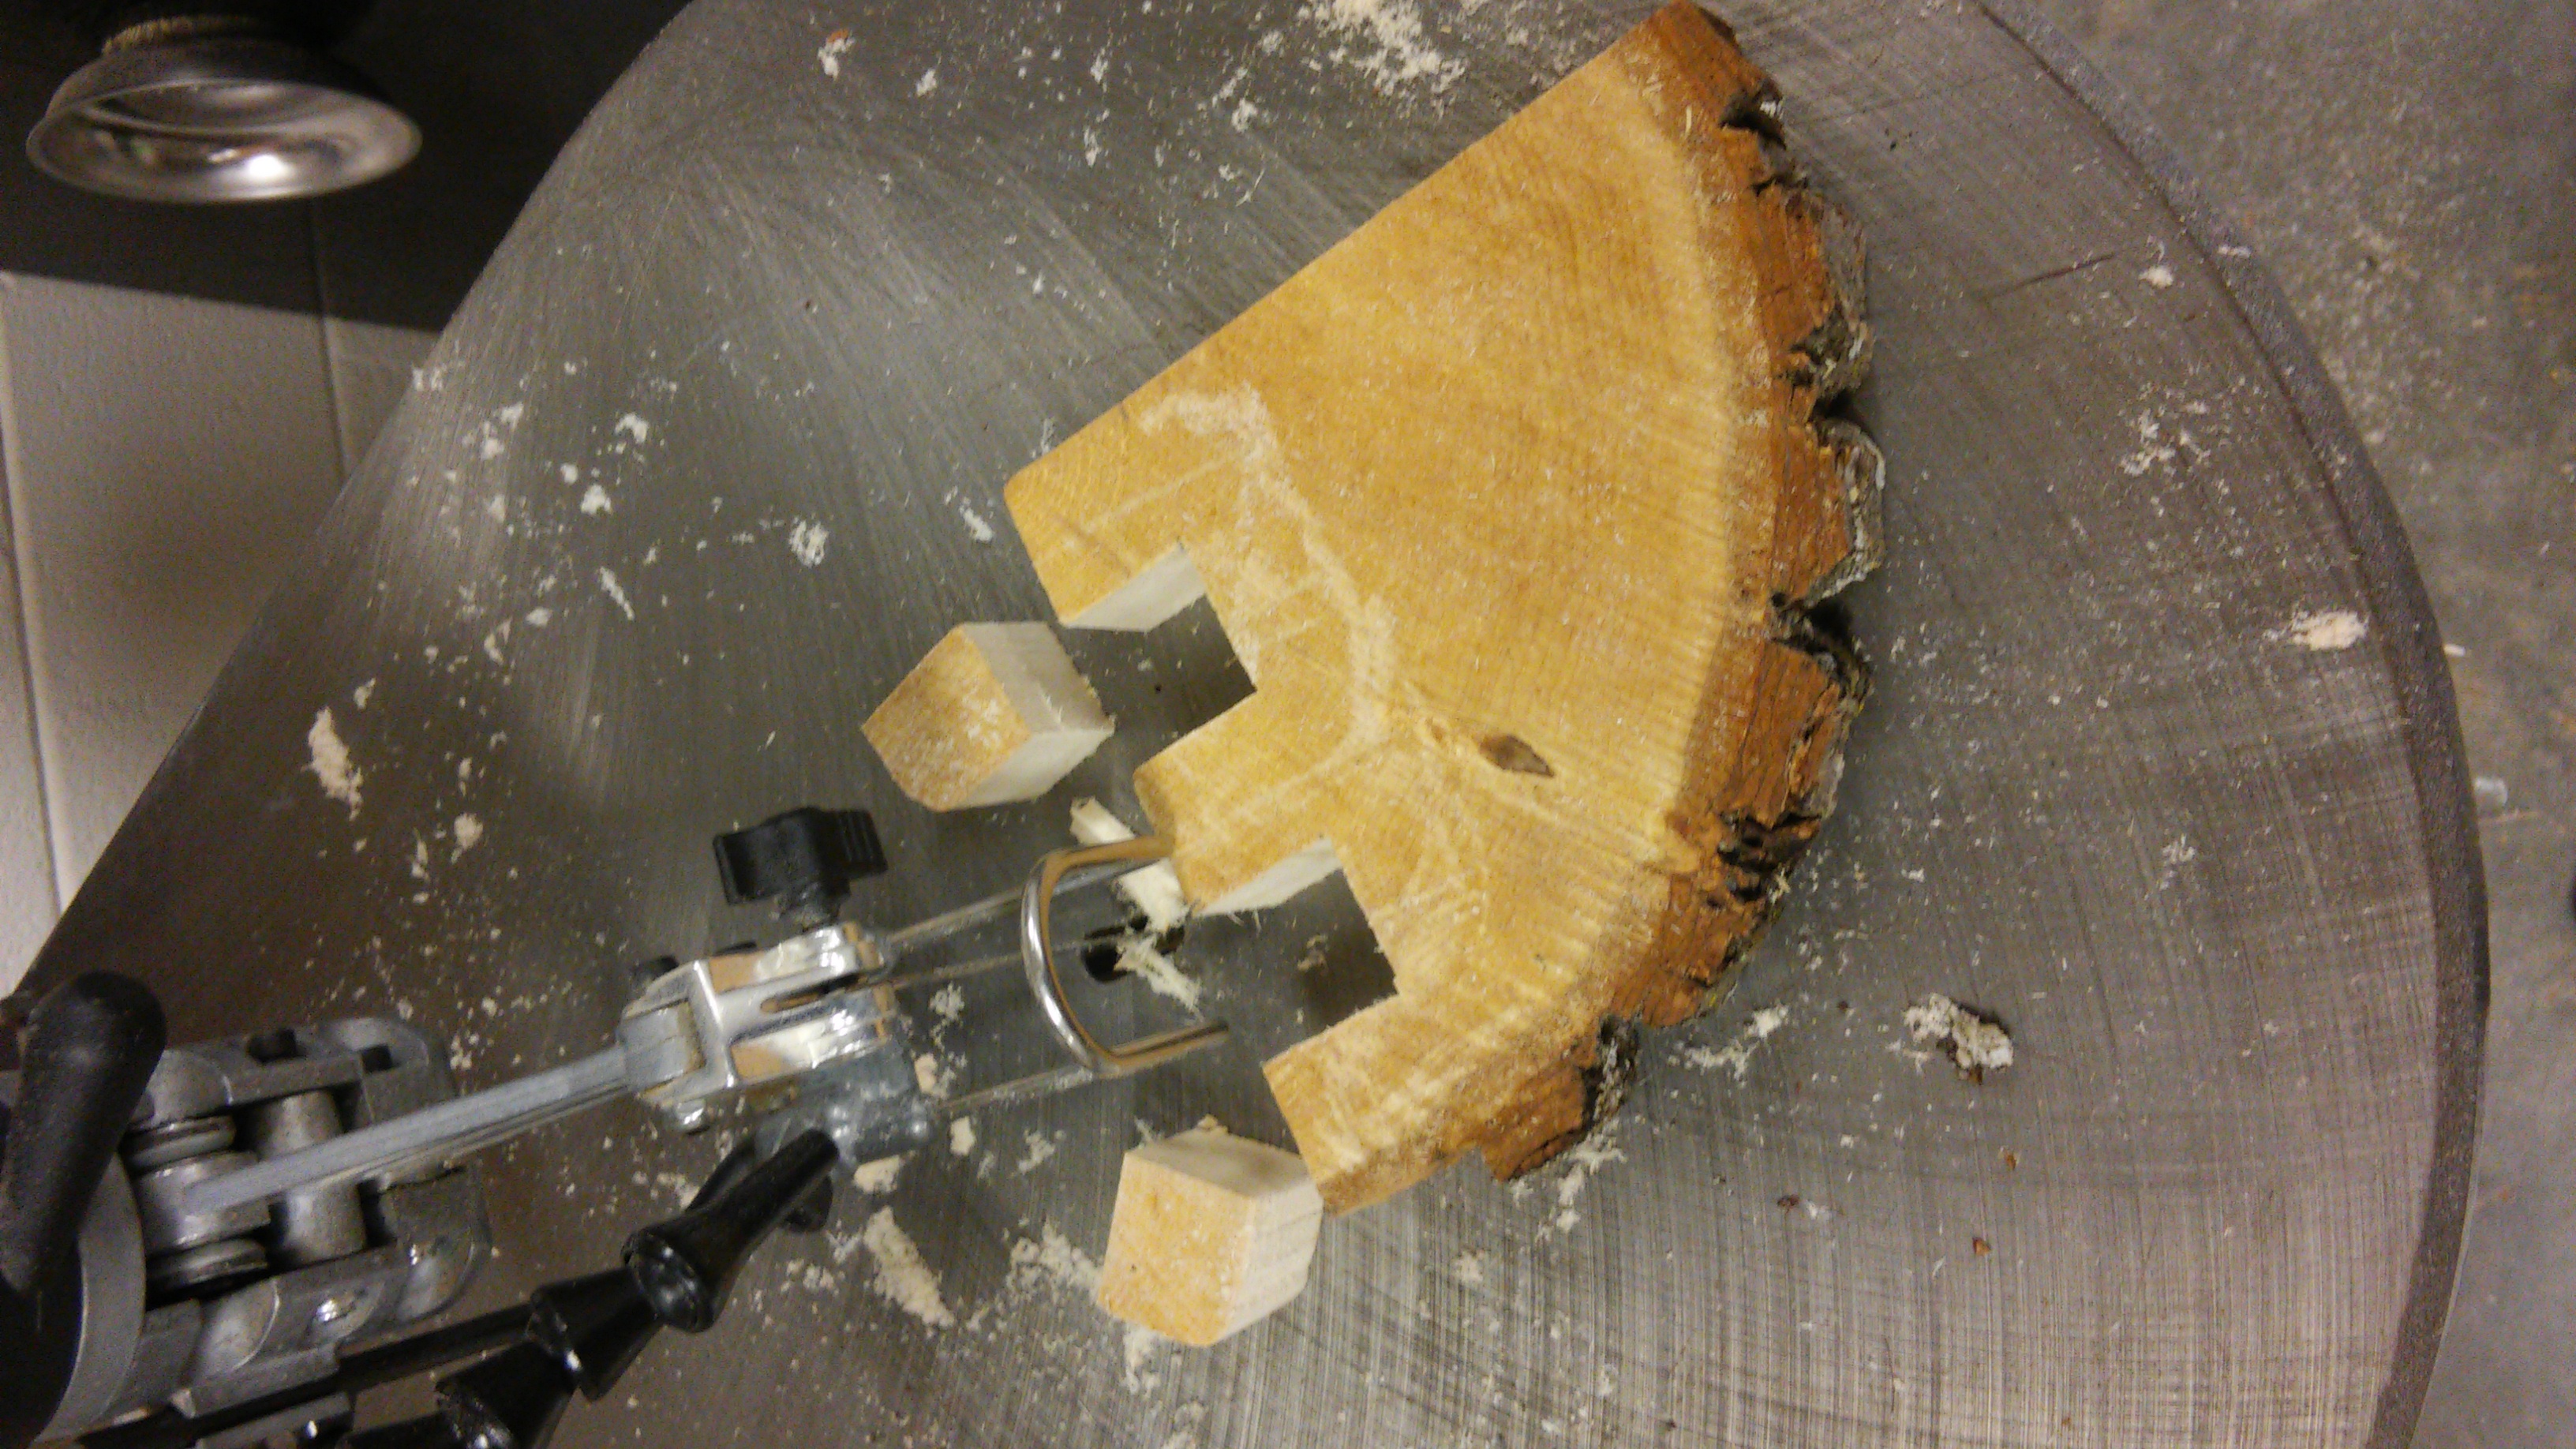
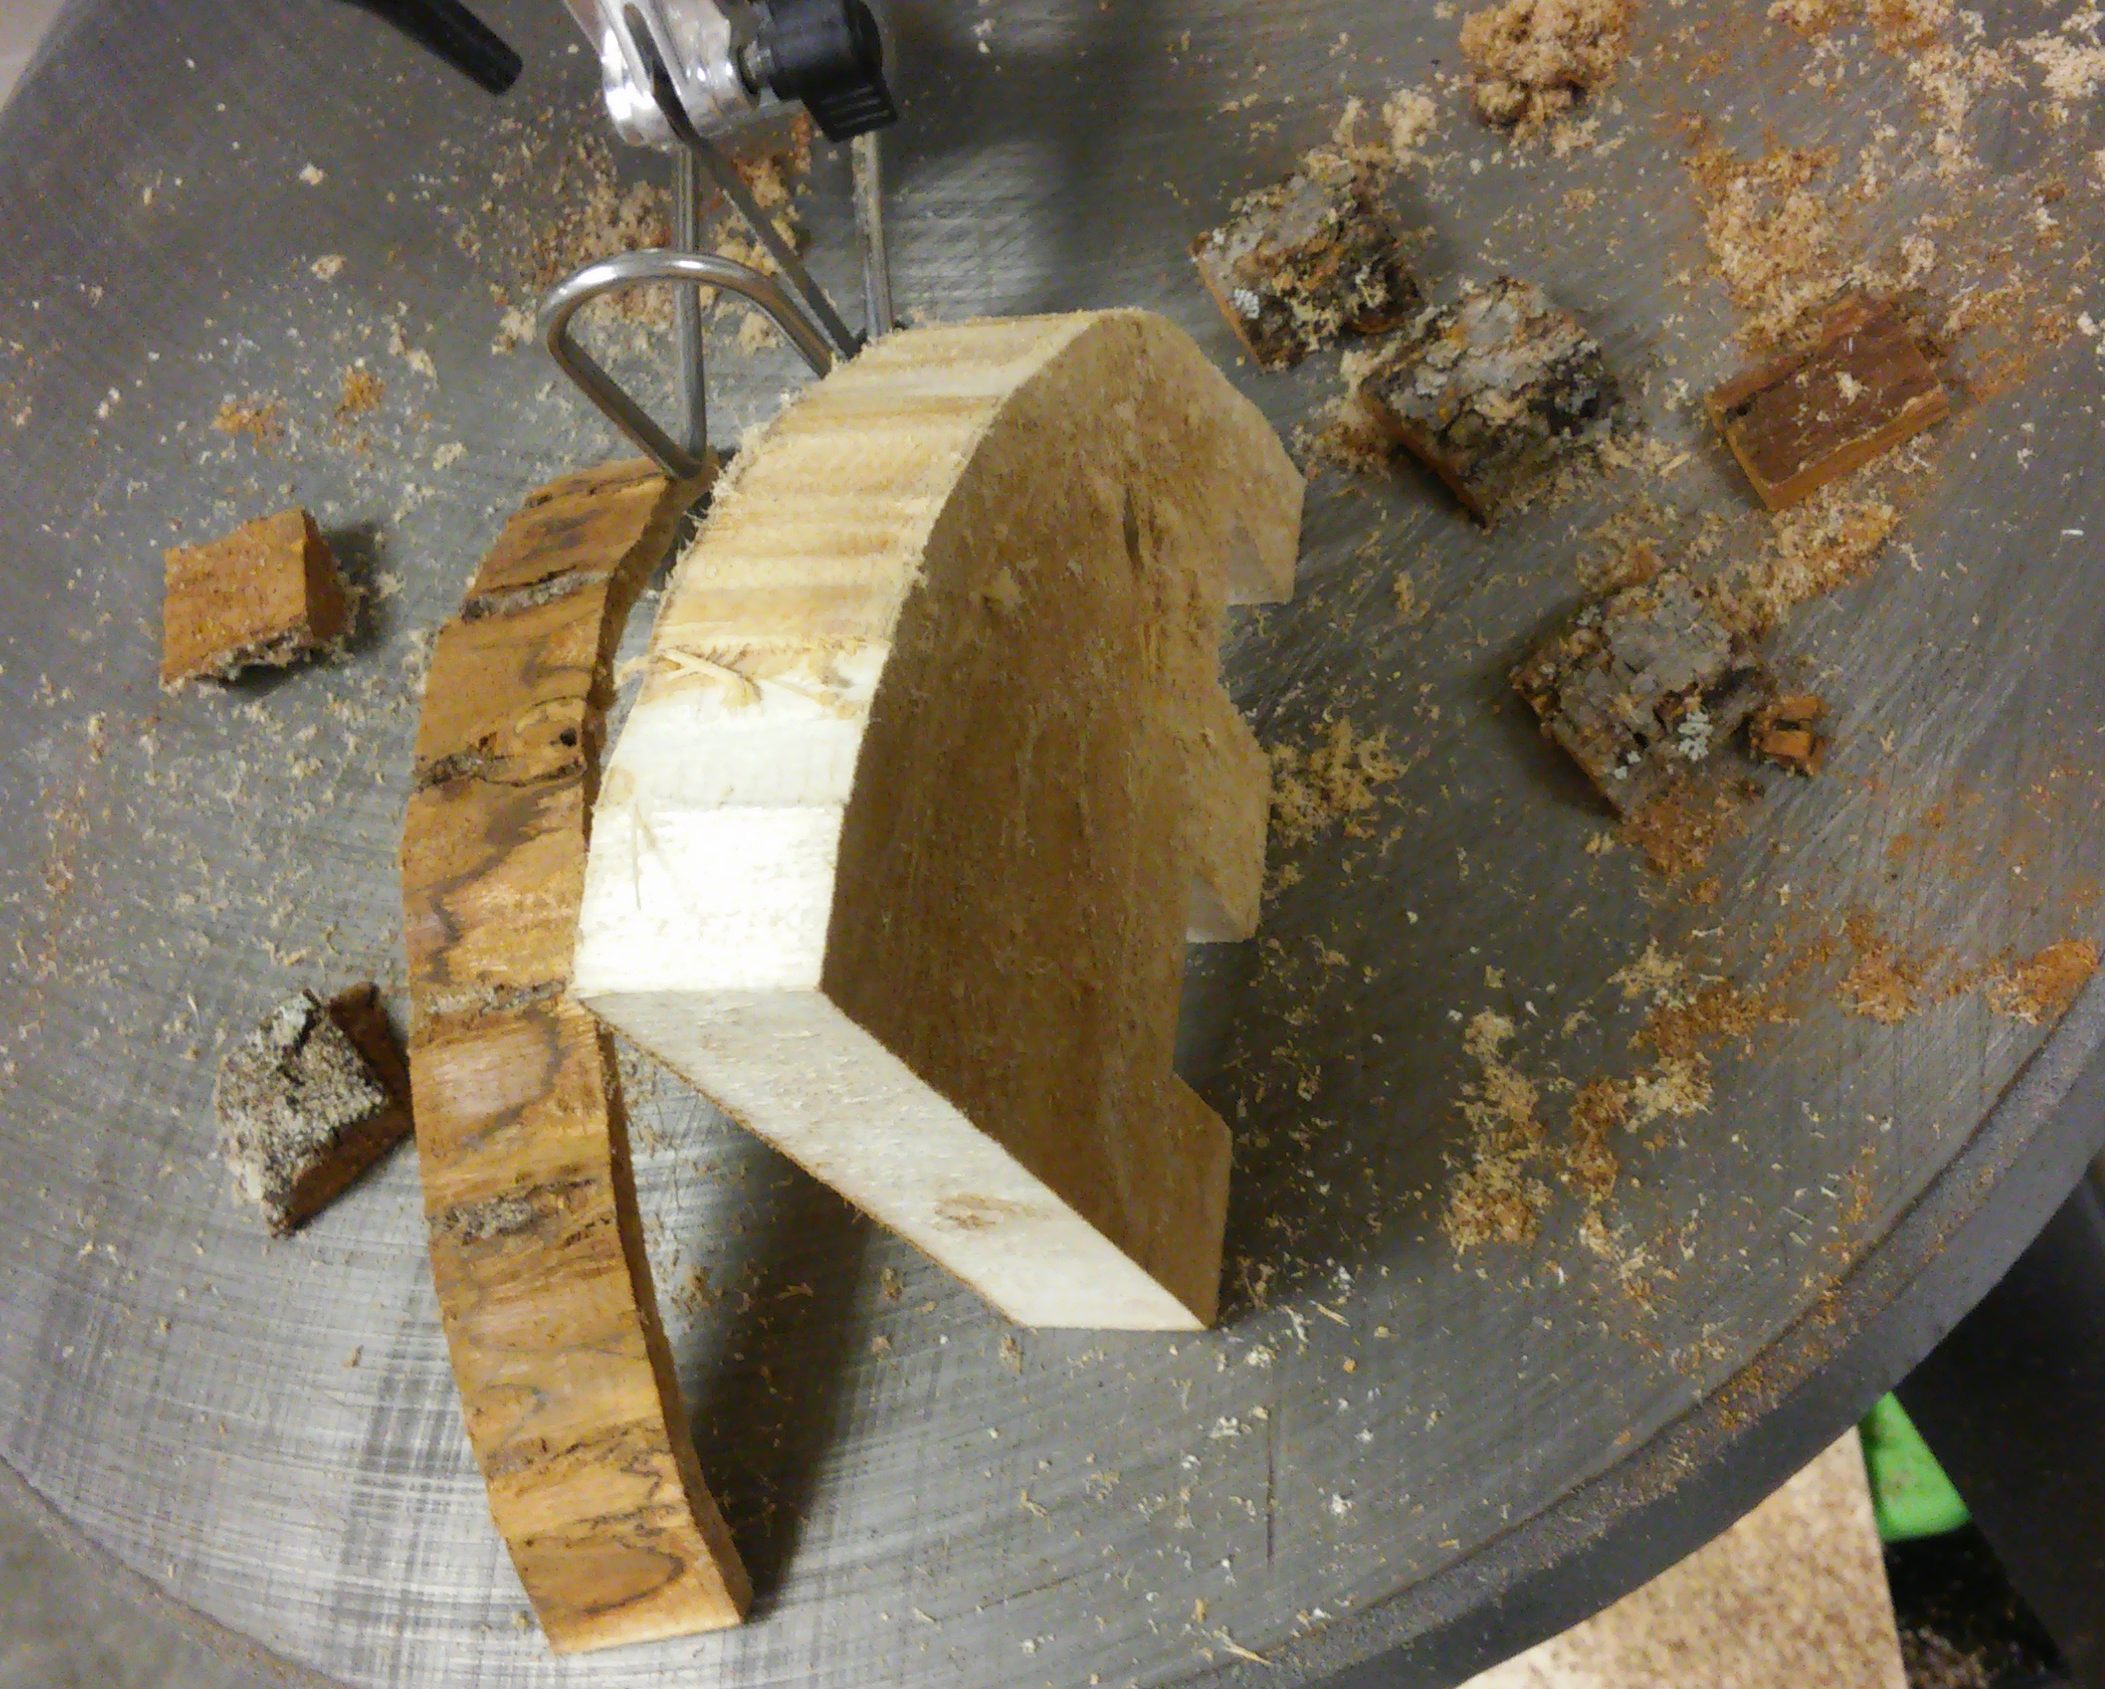
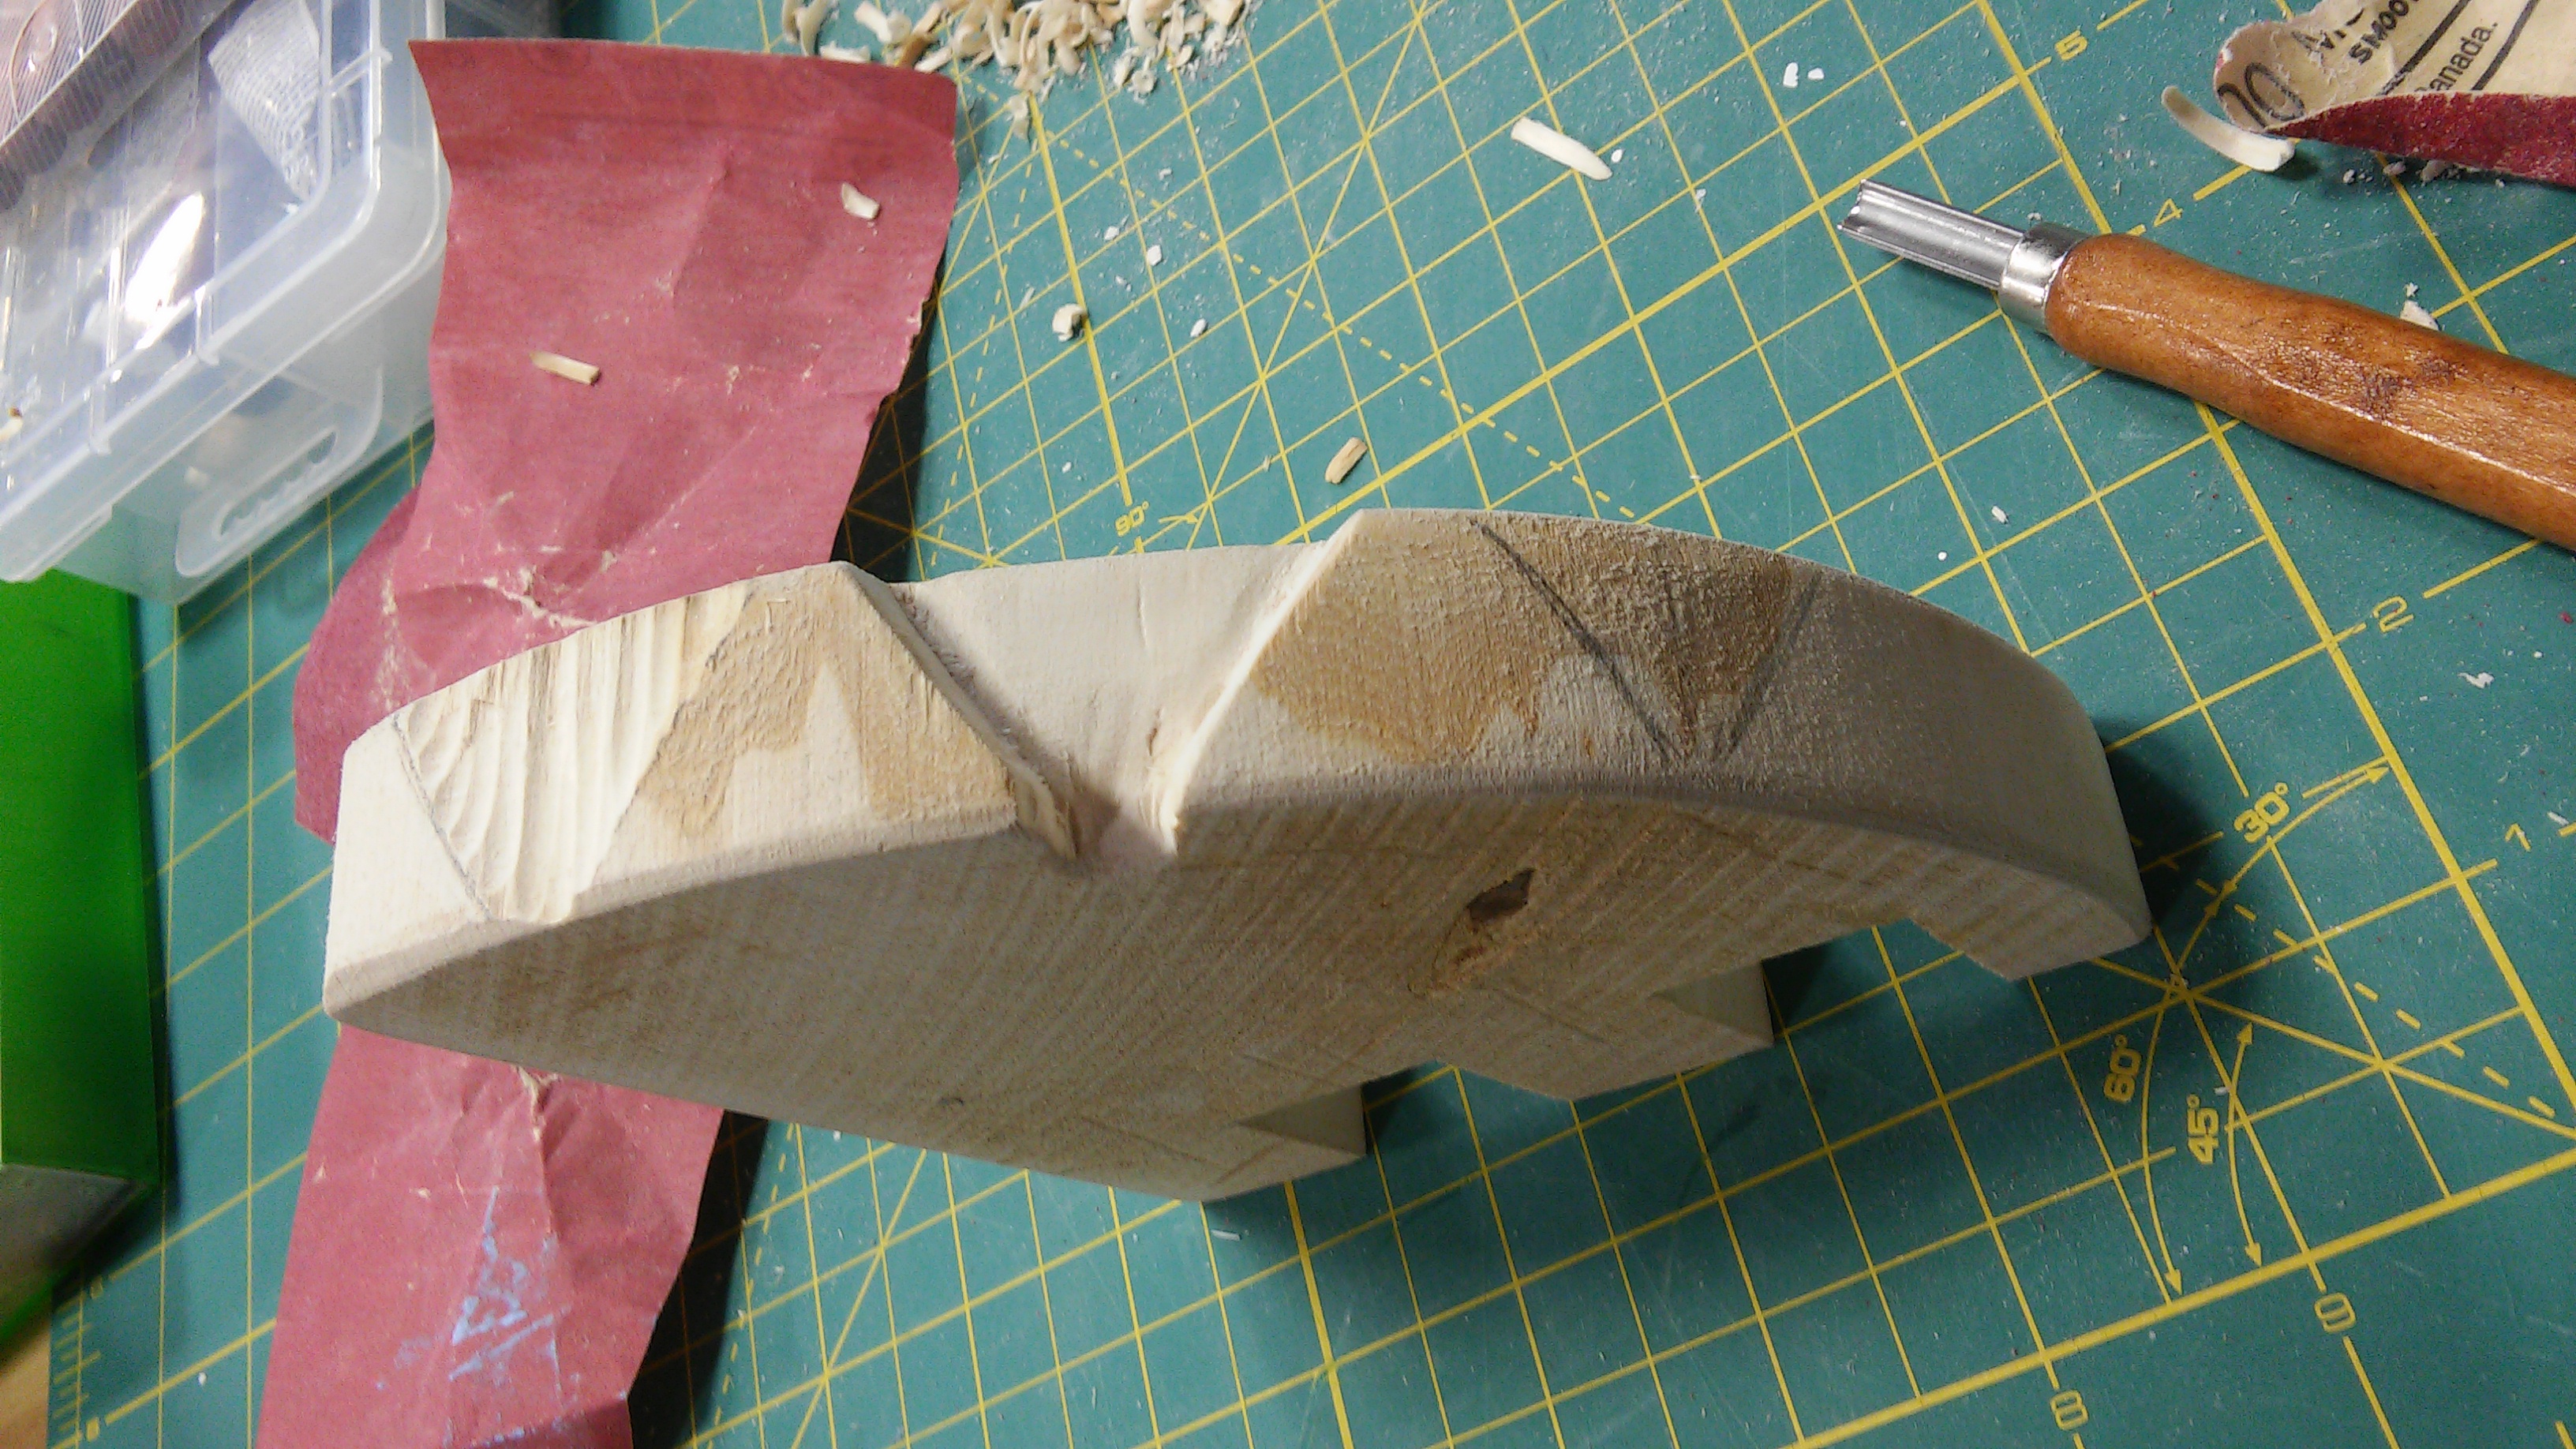
When it came to setting my ideas into motion, I asked for advice from BEAM staff. Jess was a huge help on getting me started, advising that I start with a scroll saw to cut the basic shape. I drew the one-inch-by-one-inch lines on the wood then followed them with the scroll saw to get the correct right angles. The scroll saw doesn’t do ninety-degree angles, but it does turn, and I was able to use it to make curved indentions then go back in and cut them out properly.
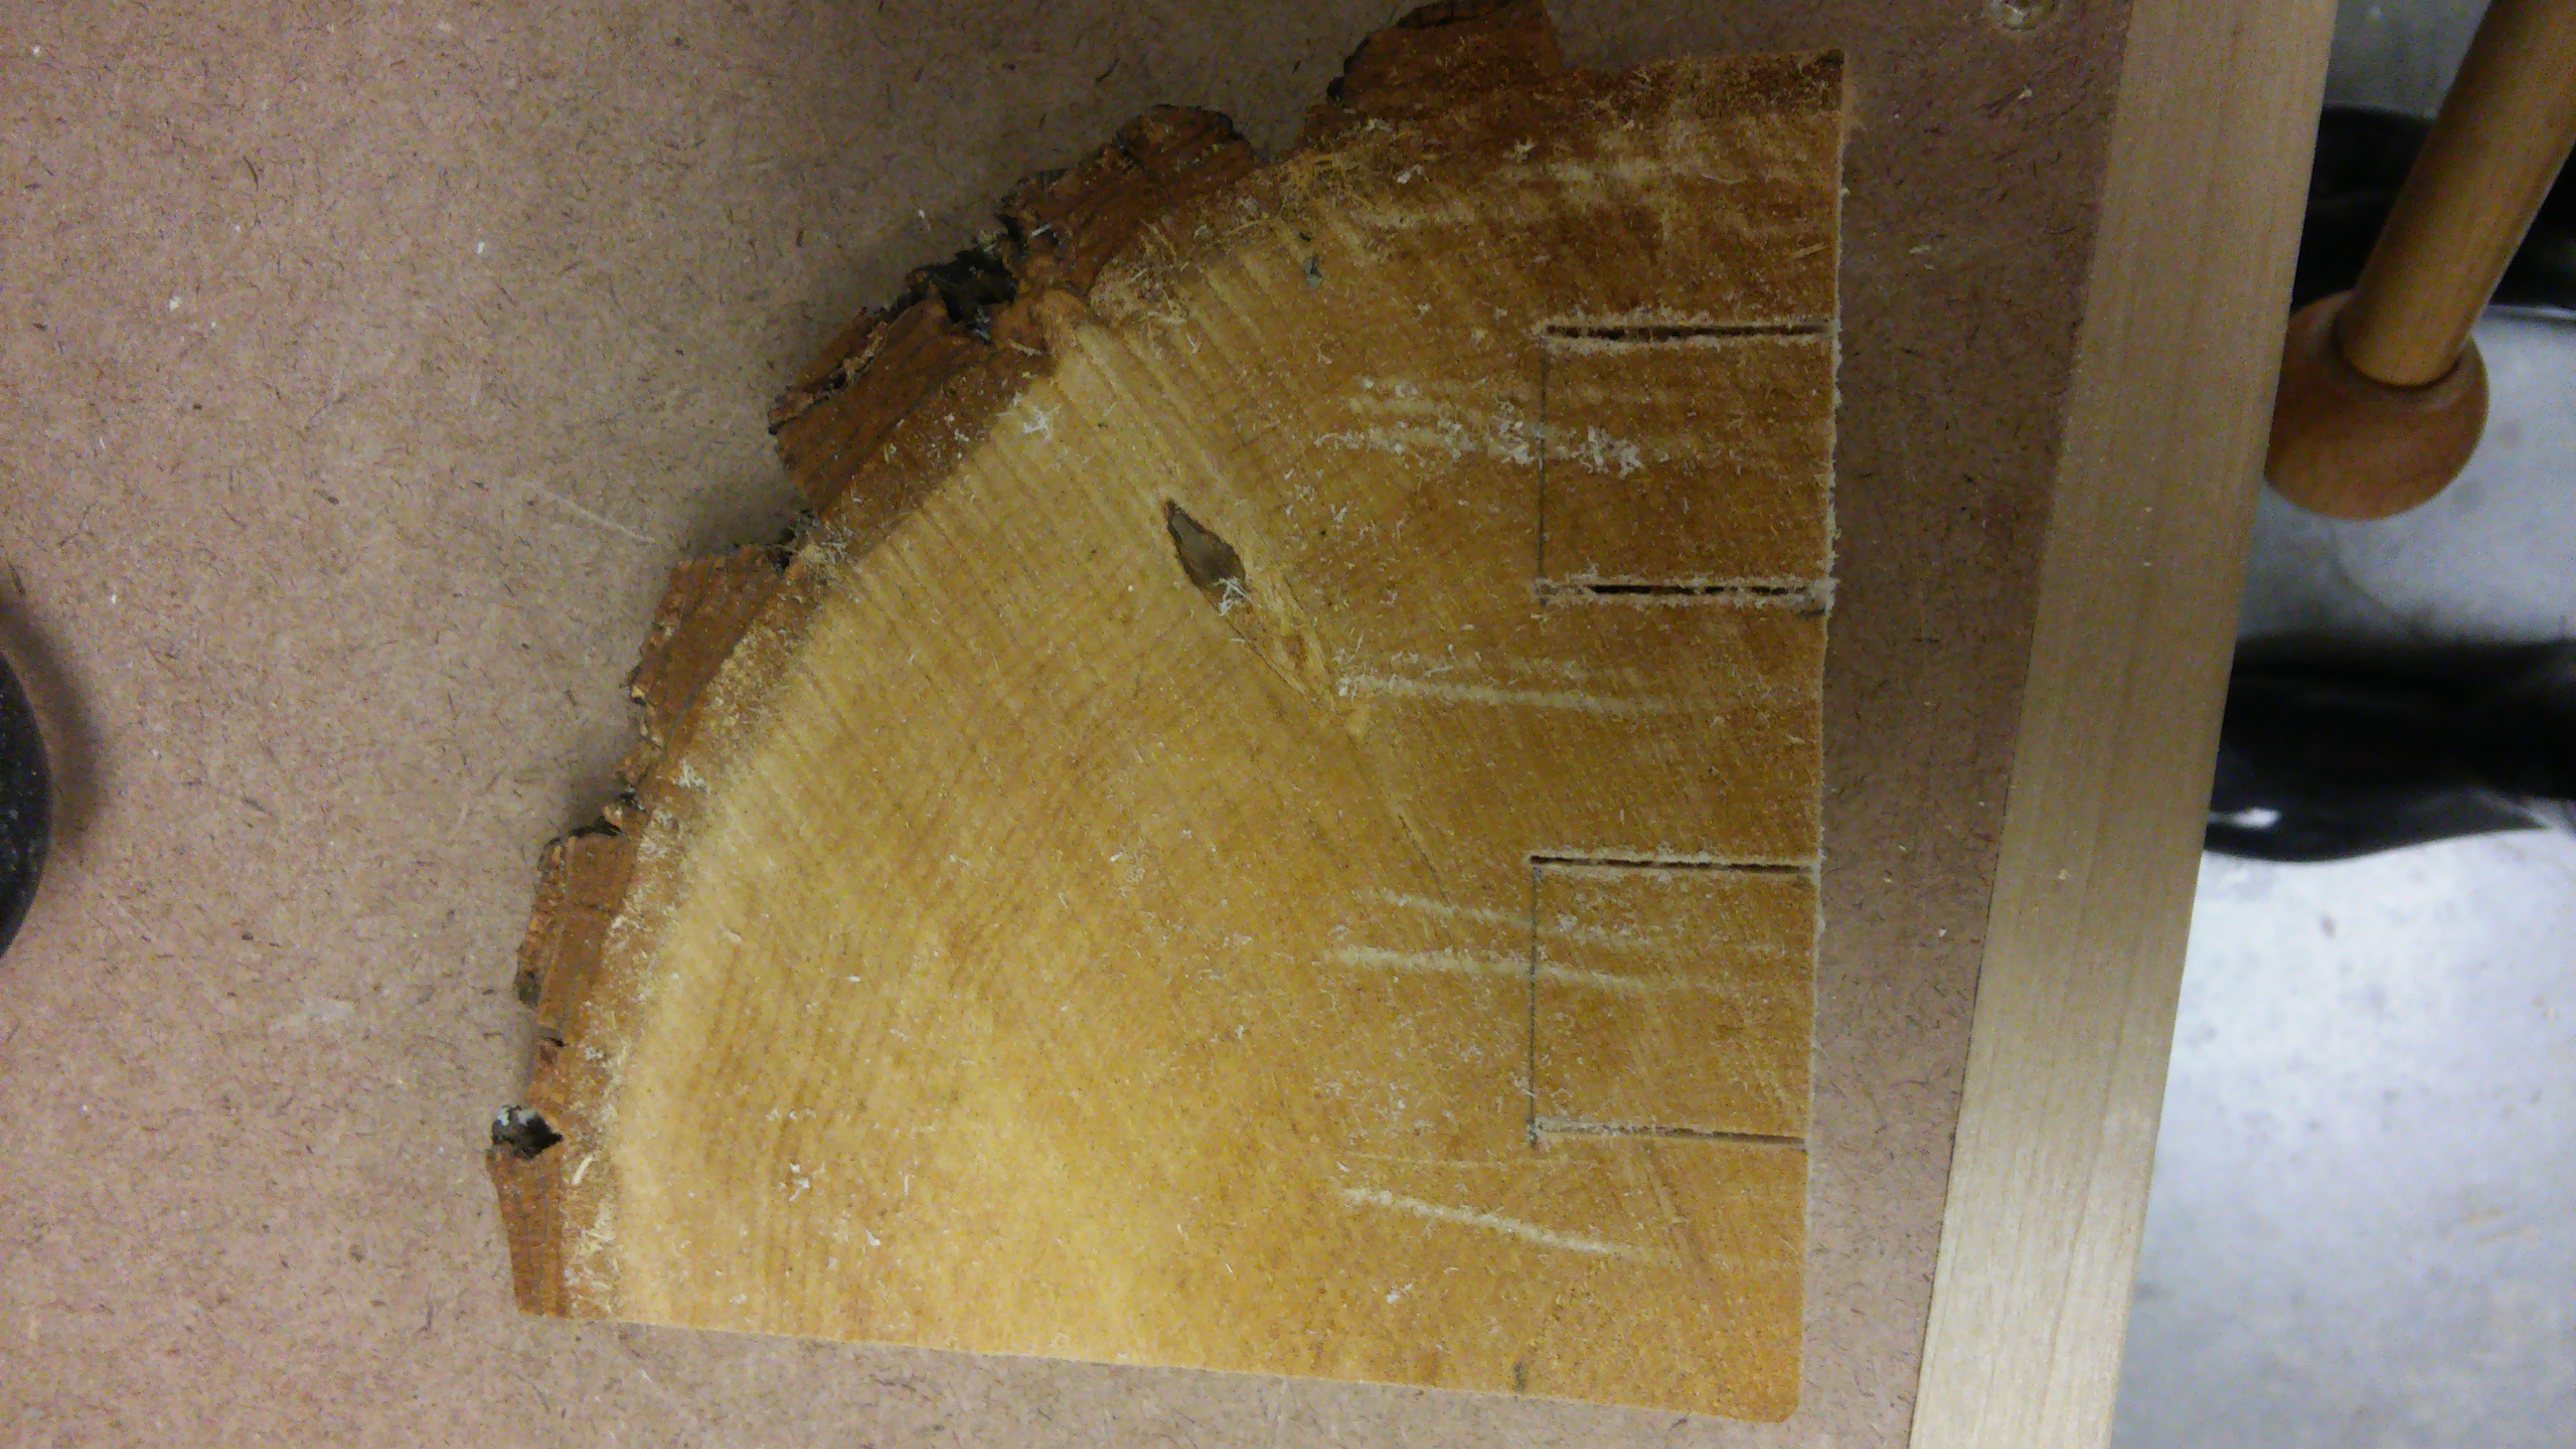
Those scrapes visible alongside the cuts are the safety bar that held the piece down scraping across the soft wood. Fortunately, this was the side with the knot in it that wouldn’t end up being the face of the project. Which was a happy accident since I hadn’t considered which side I wanted yet.
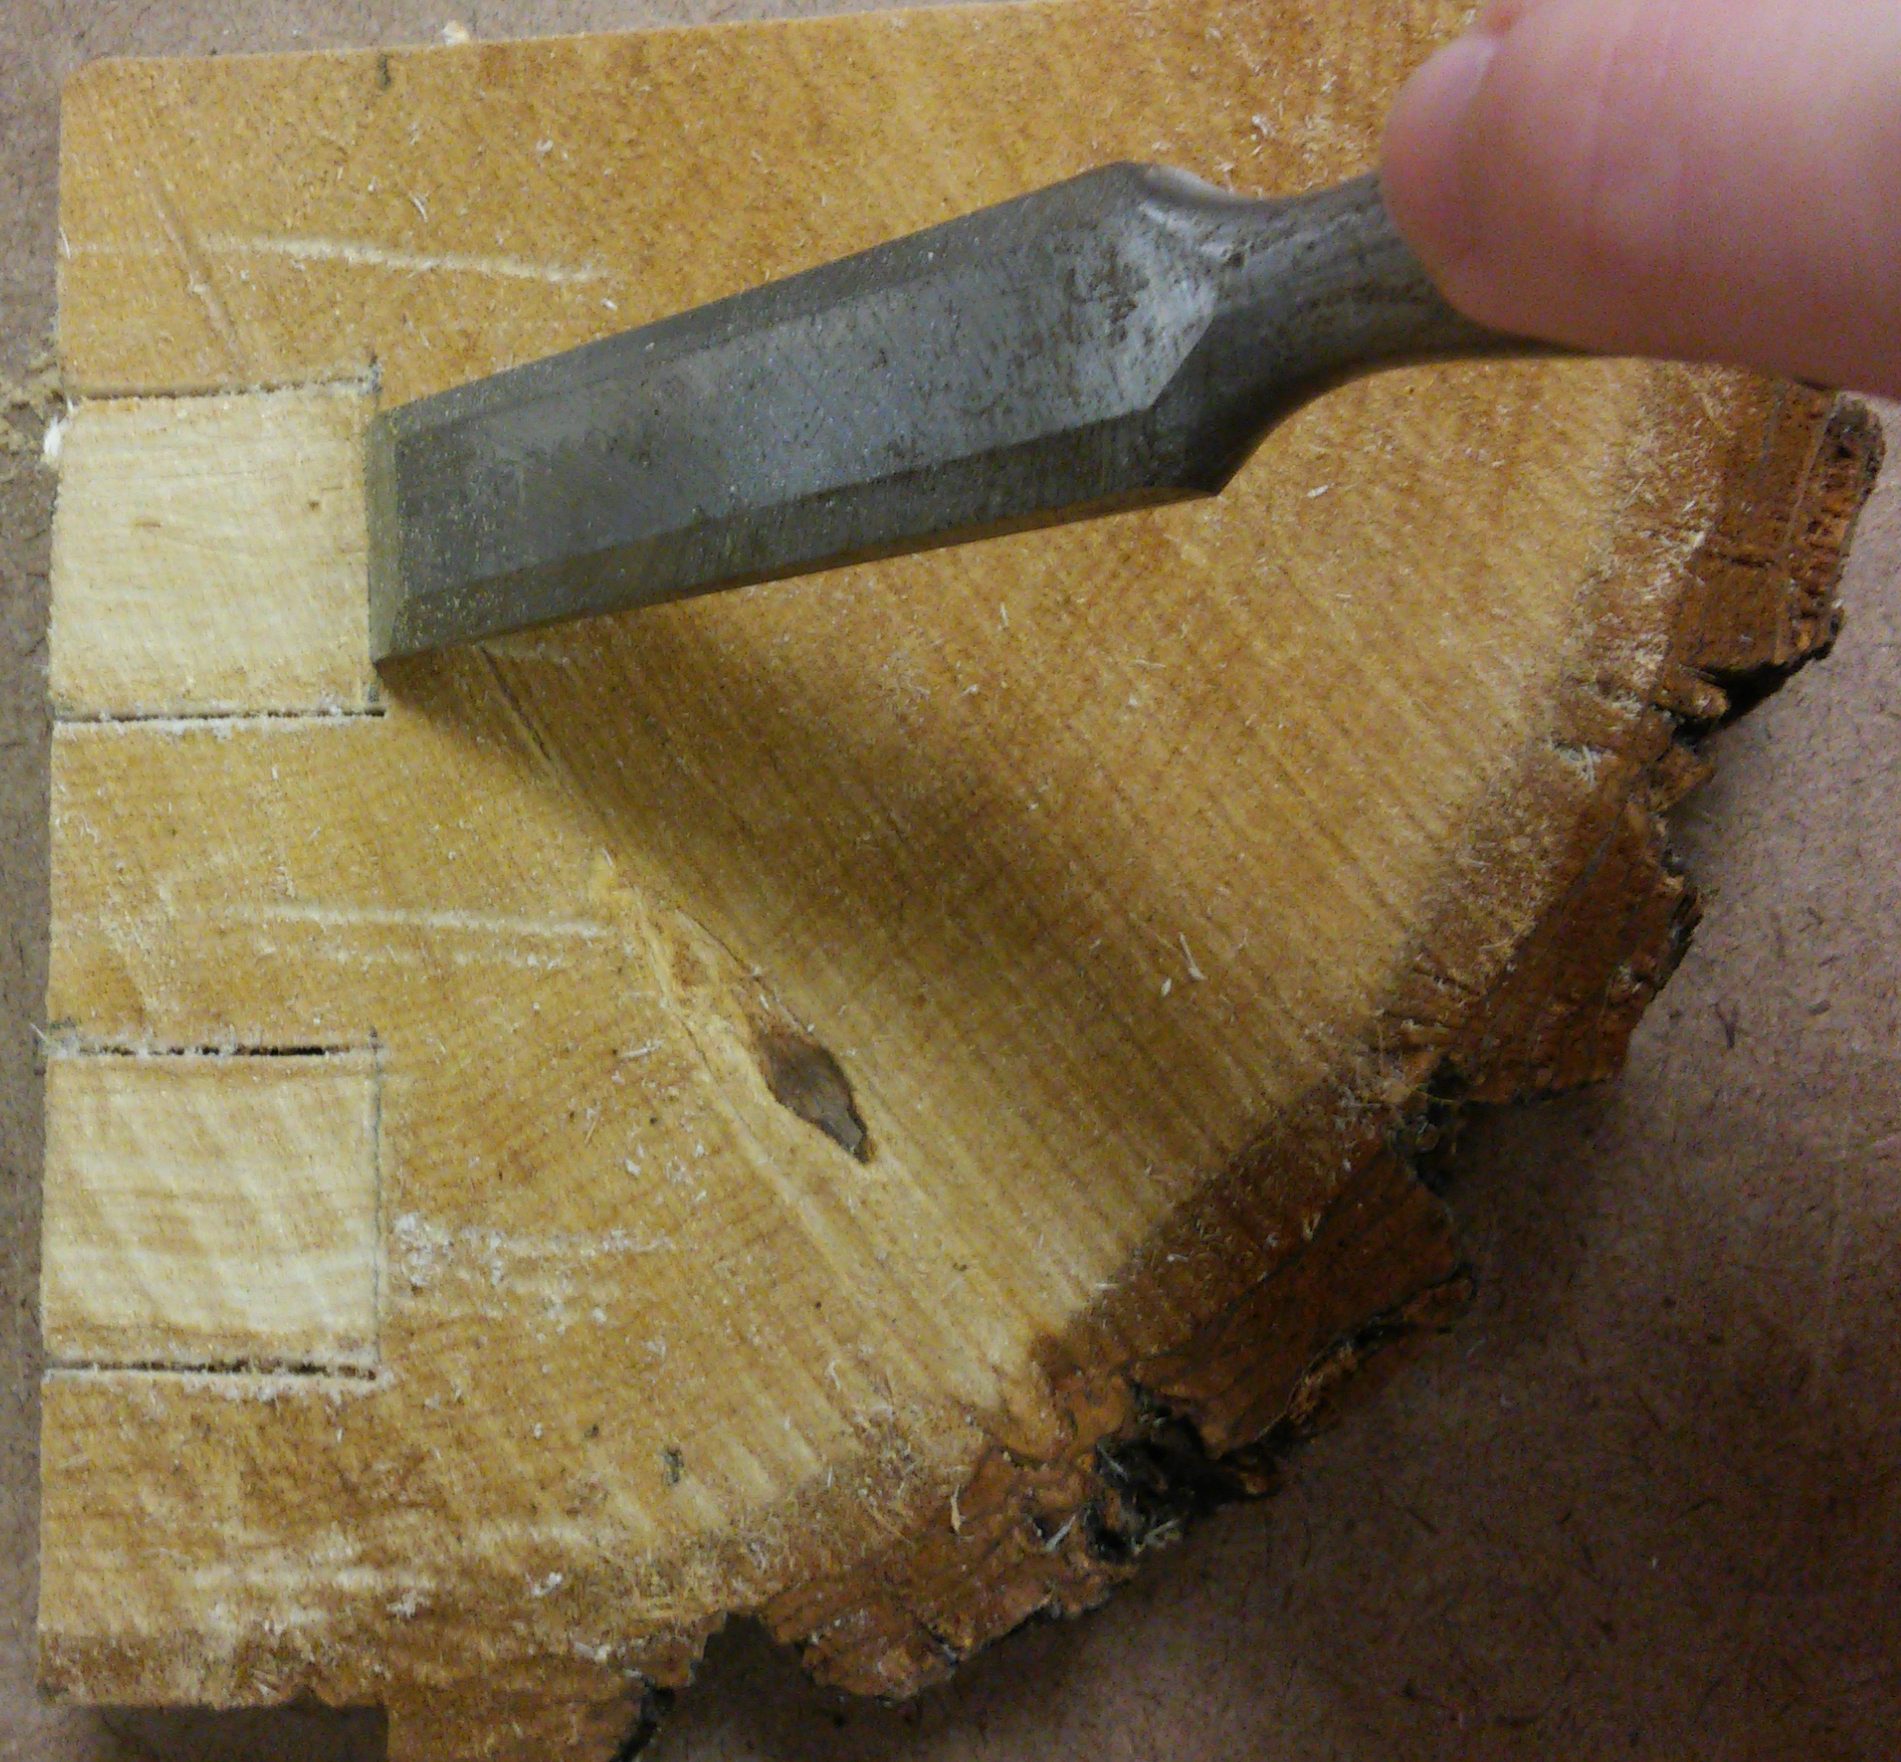
This part of the process was done in Hanes where the hand chisels weren’t. Instead I tried to carve out the insertions with lathe chisels which didn’t remotely pretend to work. That’s when it was actually suggested to me to finish the cut-outs with the scrolls saw.
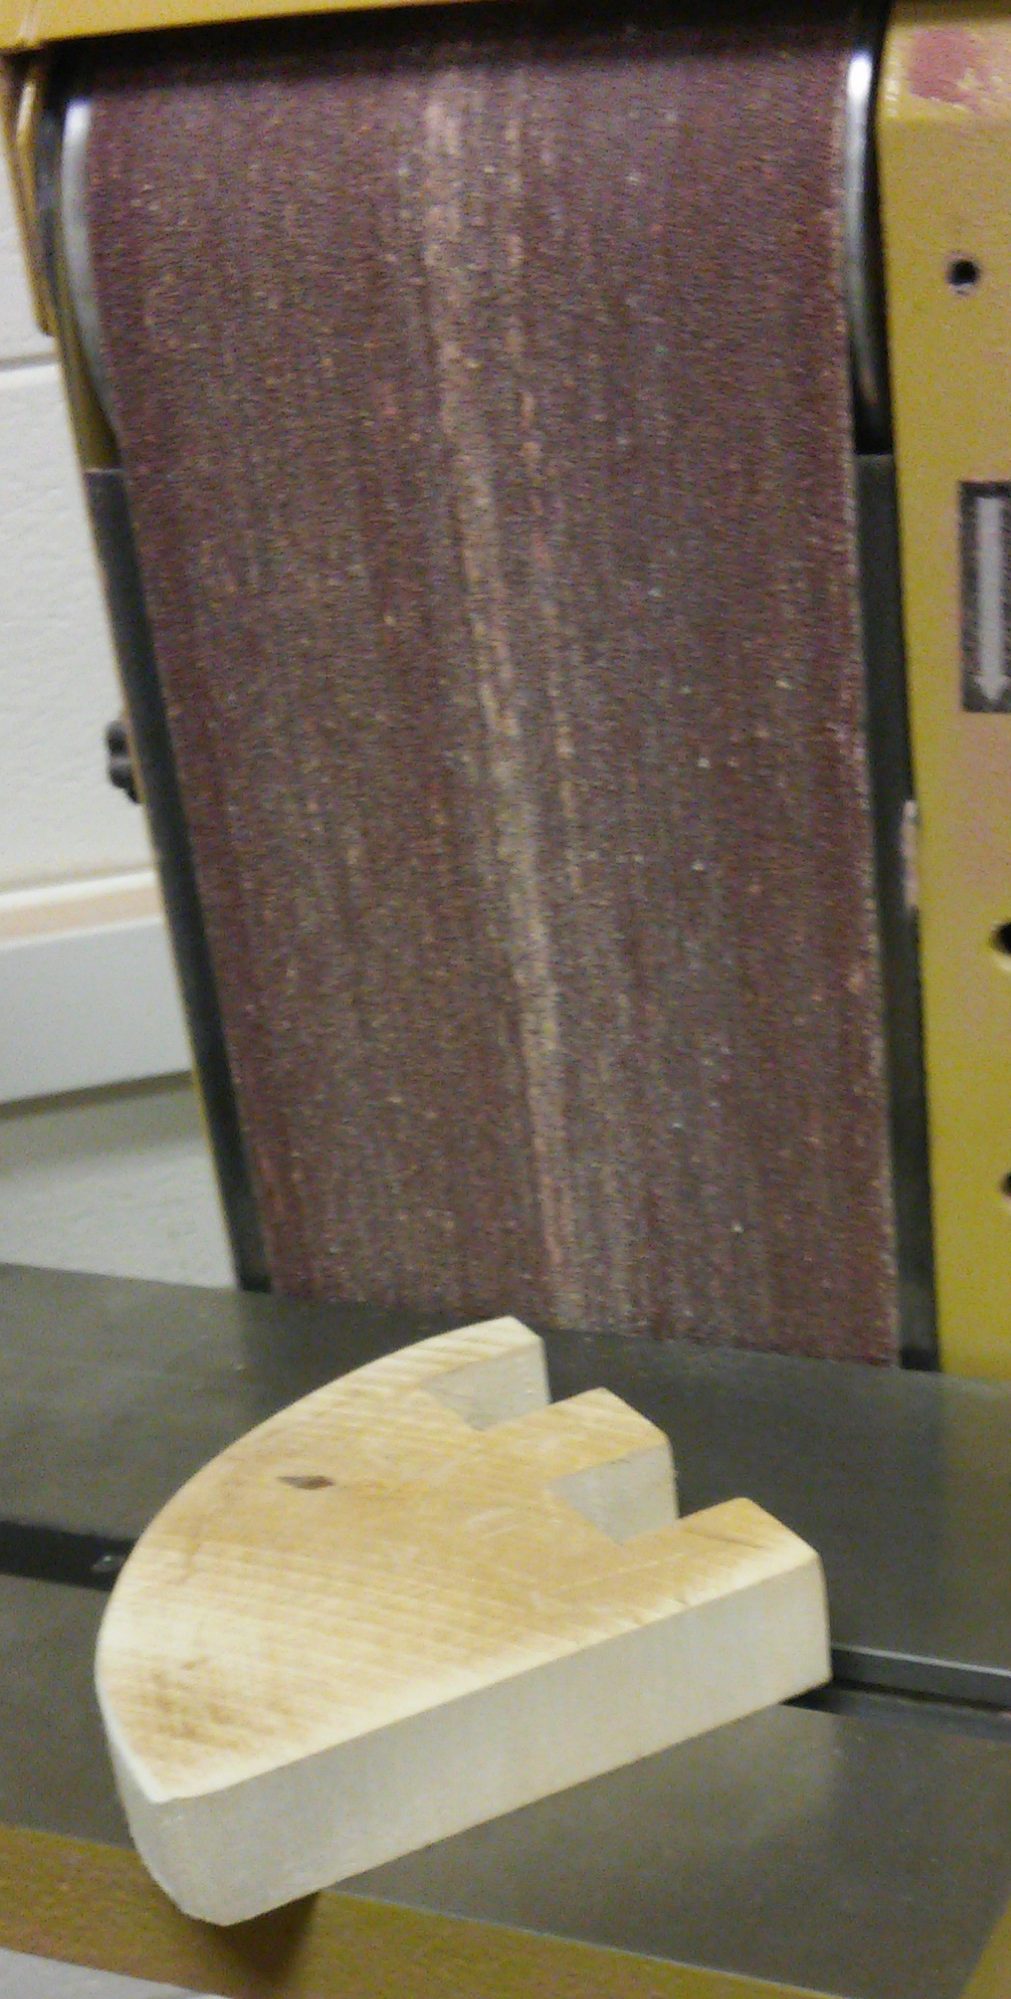
I contemplated for a long time whether to remove the bark and phloem, that dark ring just inside the bark. I really liked the appearance and texture, but it just made a mess in my backpack turning transportation and would be difficult to transform after, so I decided to just cut that off with the scroll saw as well. Then I sanded it with the belt sander for the nice, smooth curve and faces that I wanted.
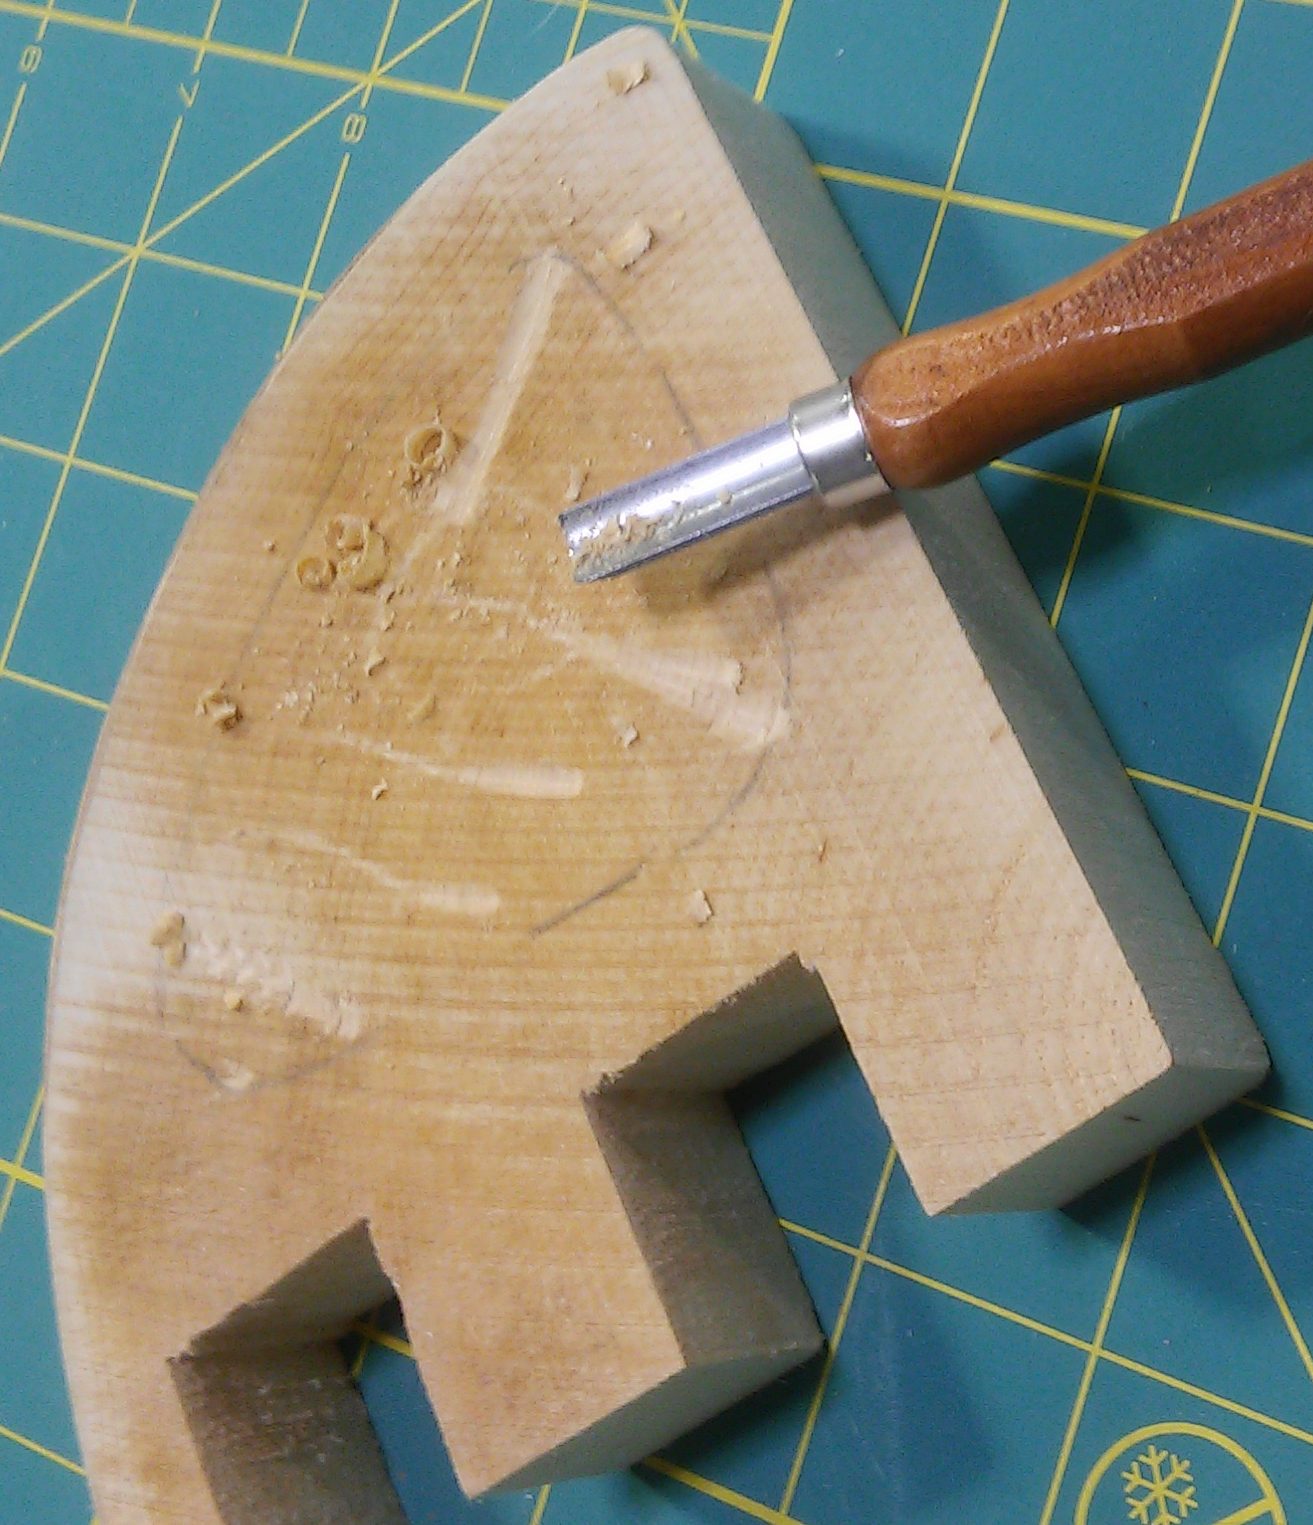
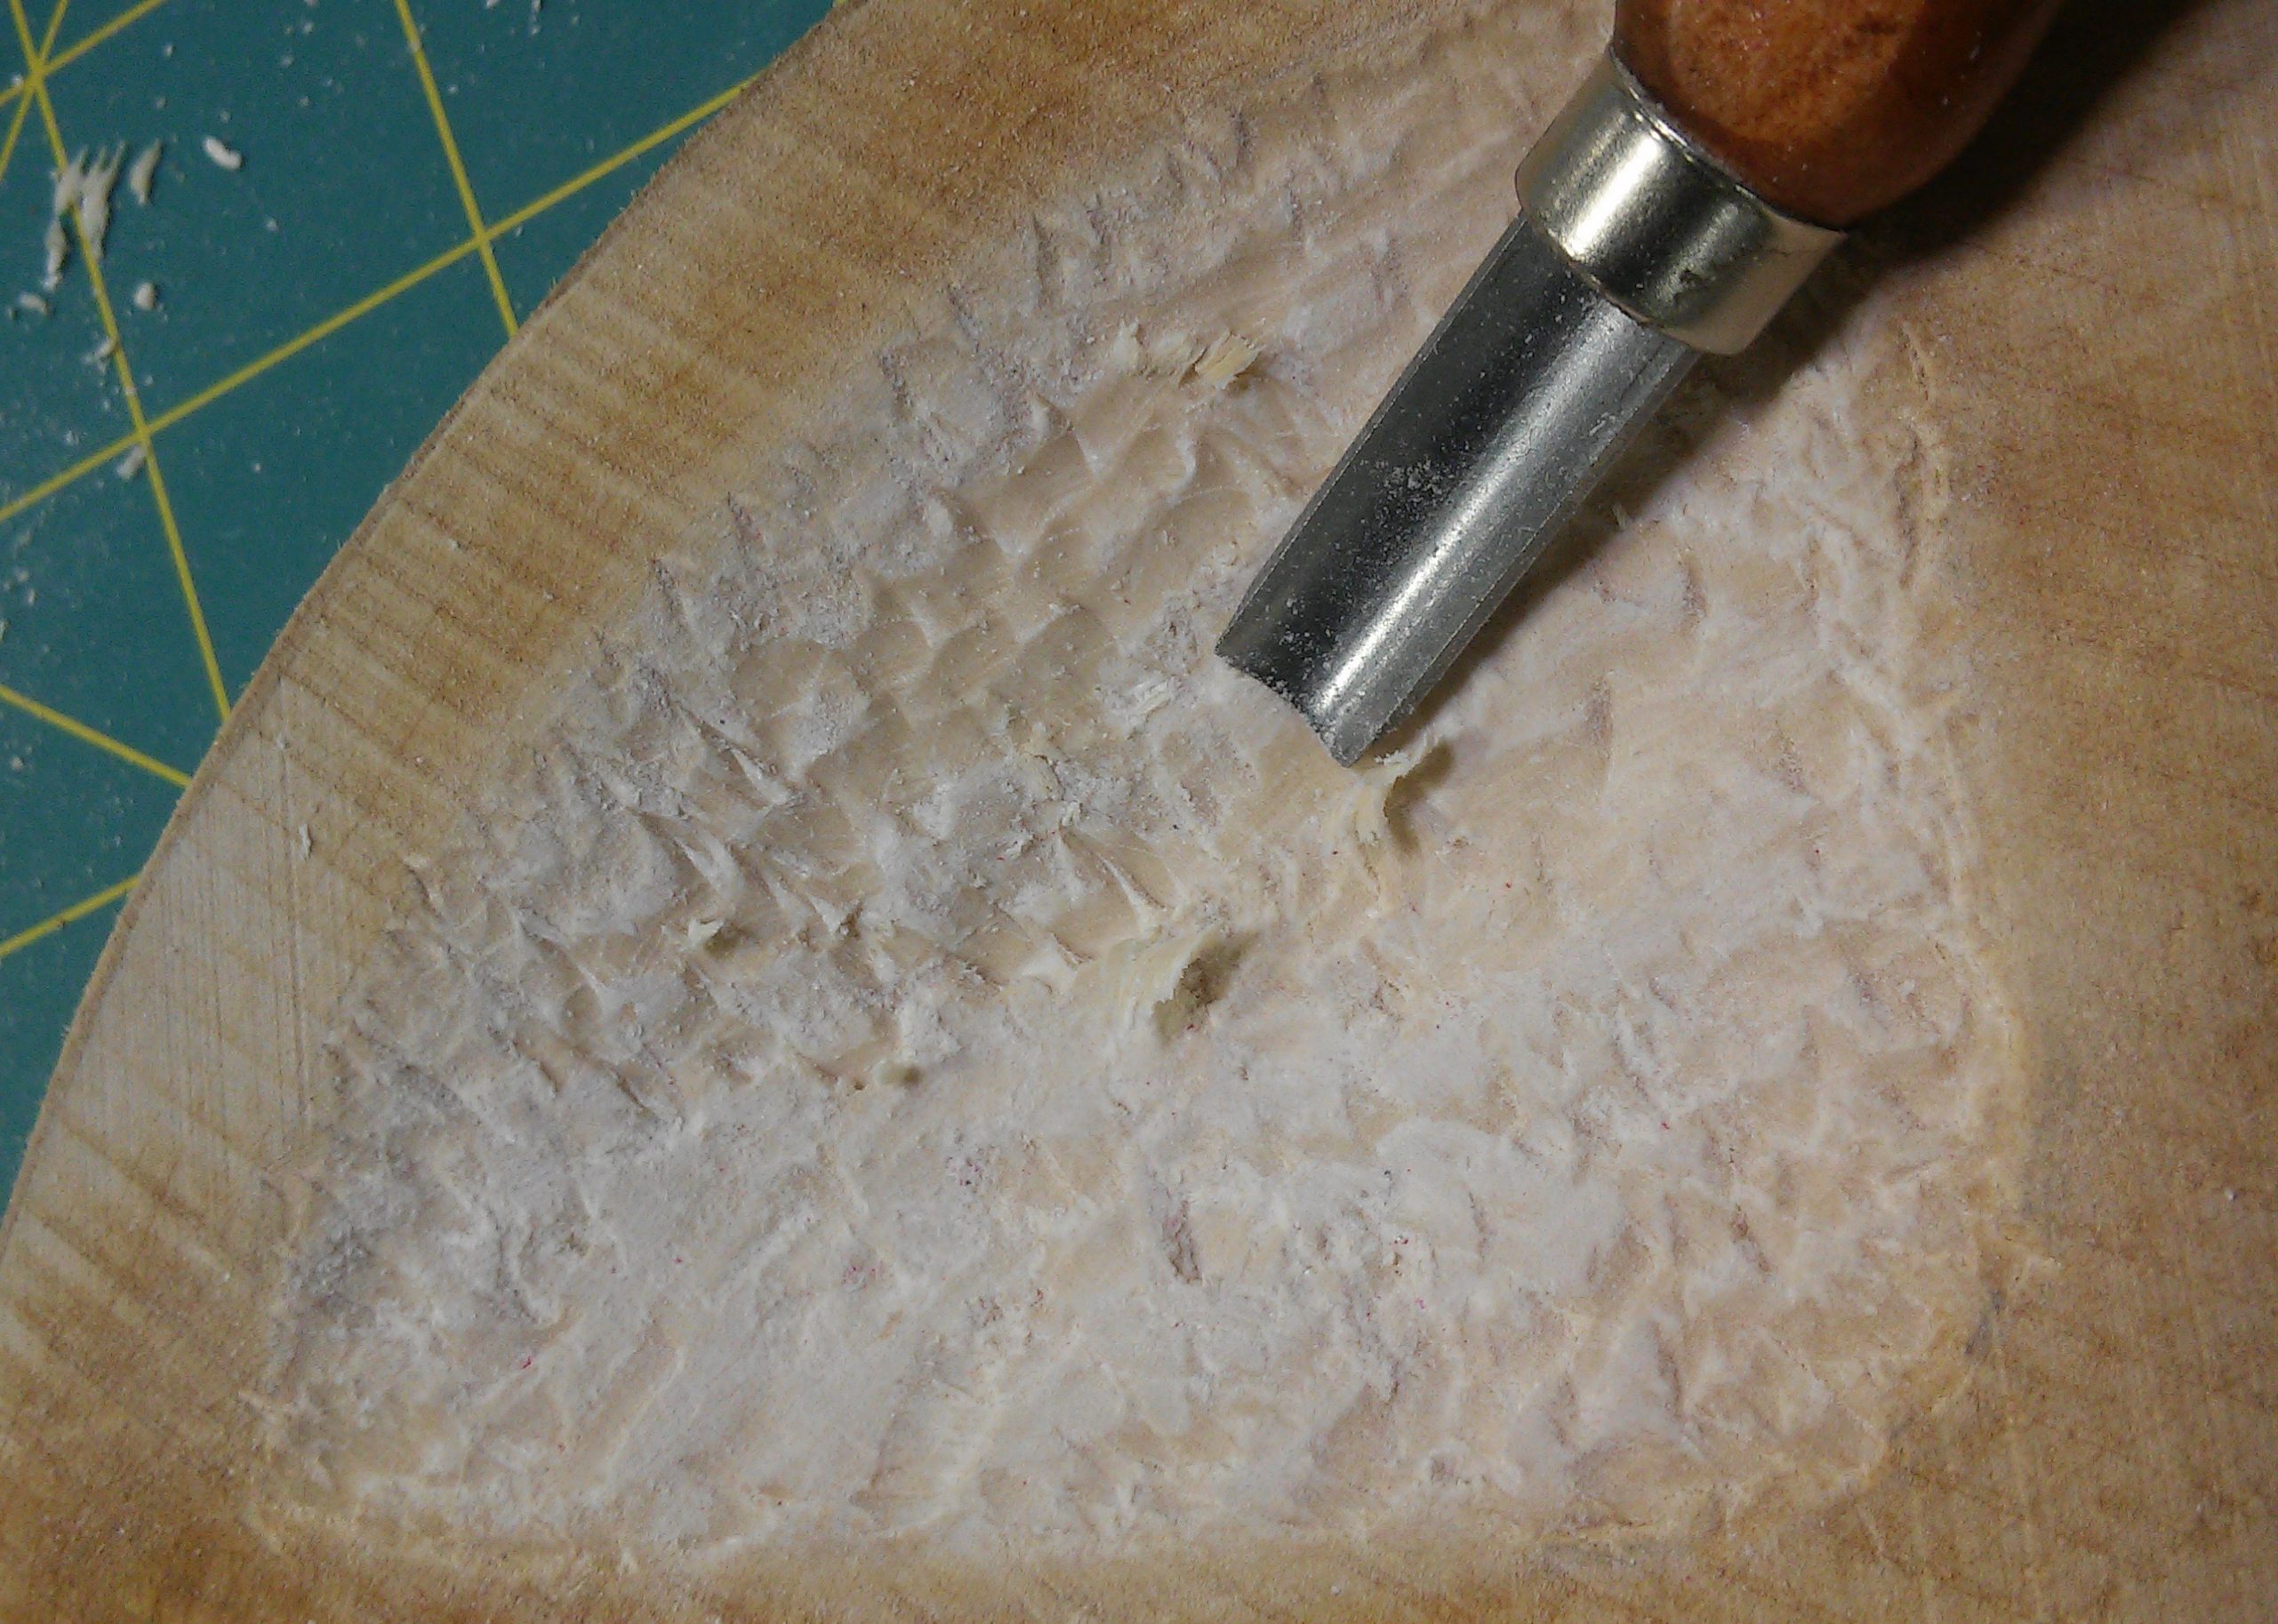
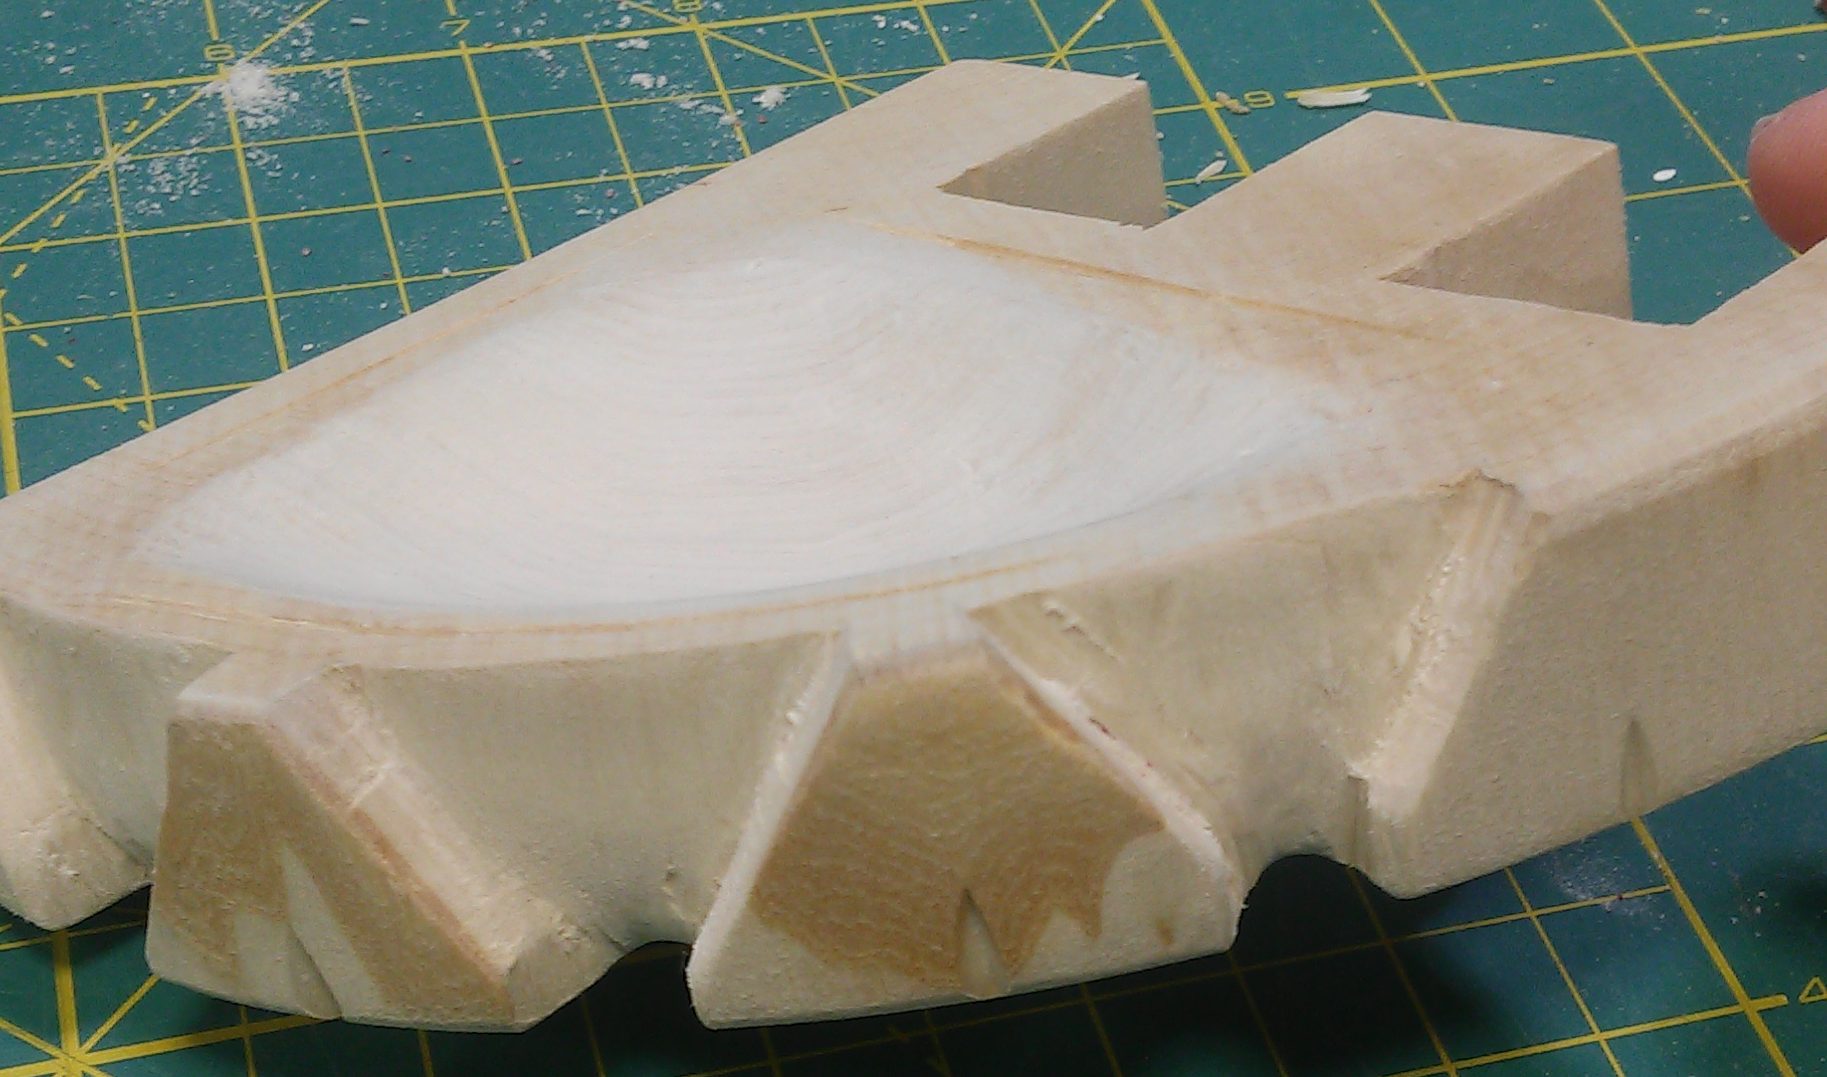
I knew from the beginning that if I had the bottom piece of this project that I would want to turn it into a bowl. And since Gabrielle said she liked the top piece, I was going to make my bowl (though there was some weird miscommunication at some point because she thought that I was going to make both the top and bottom pieces… I hope that didn’t ruin whatever she’d originally wanted to do. Our communication wasn’t the best, honestly). So the plan for making the bowl necessitated that I get chisels that were meant to be worked with by hand. So I moved to Murray and sat down for the next several hours trying to carve as deep of a basin as I had patience for, knowing that I was working on the cross grain. Bass wood may be a soft wood, but no wood is easy to work with on the cross grain compared to the true grain. My efforts, like many others who also tried to chisel the cross grain, were arduous, to say the least. The best luck I had was carving with the cross grain in arcs. Later when I got some depth, it became a lot easier when I was able to dig down with the true grain before trying to chip my way across the surface.
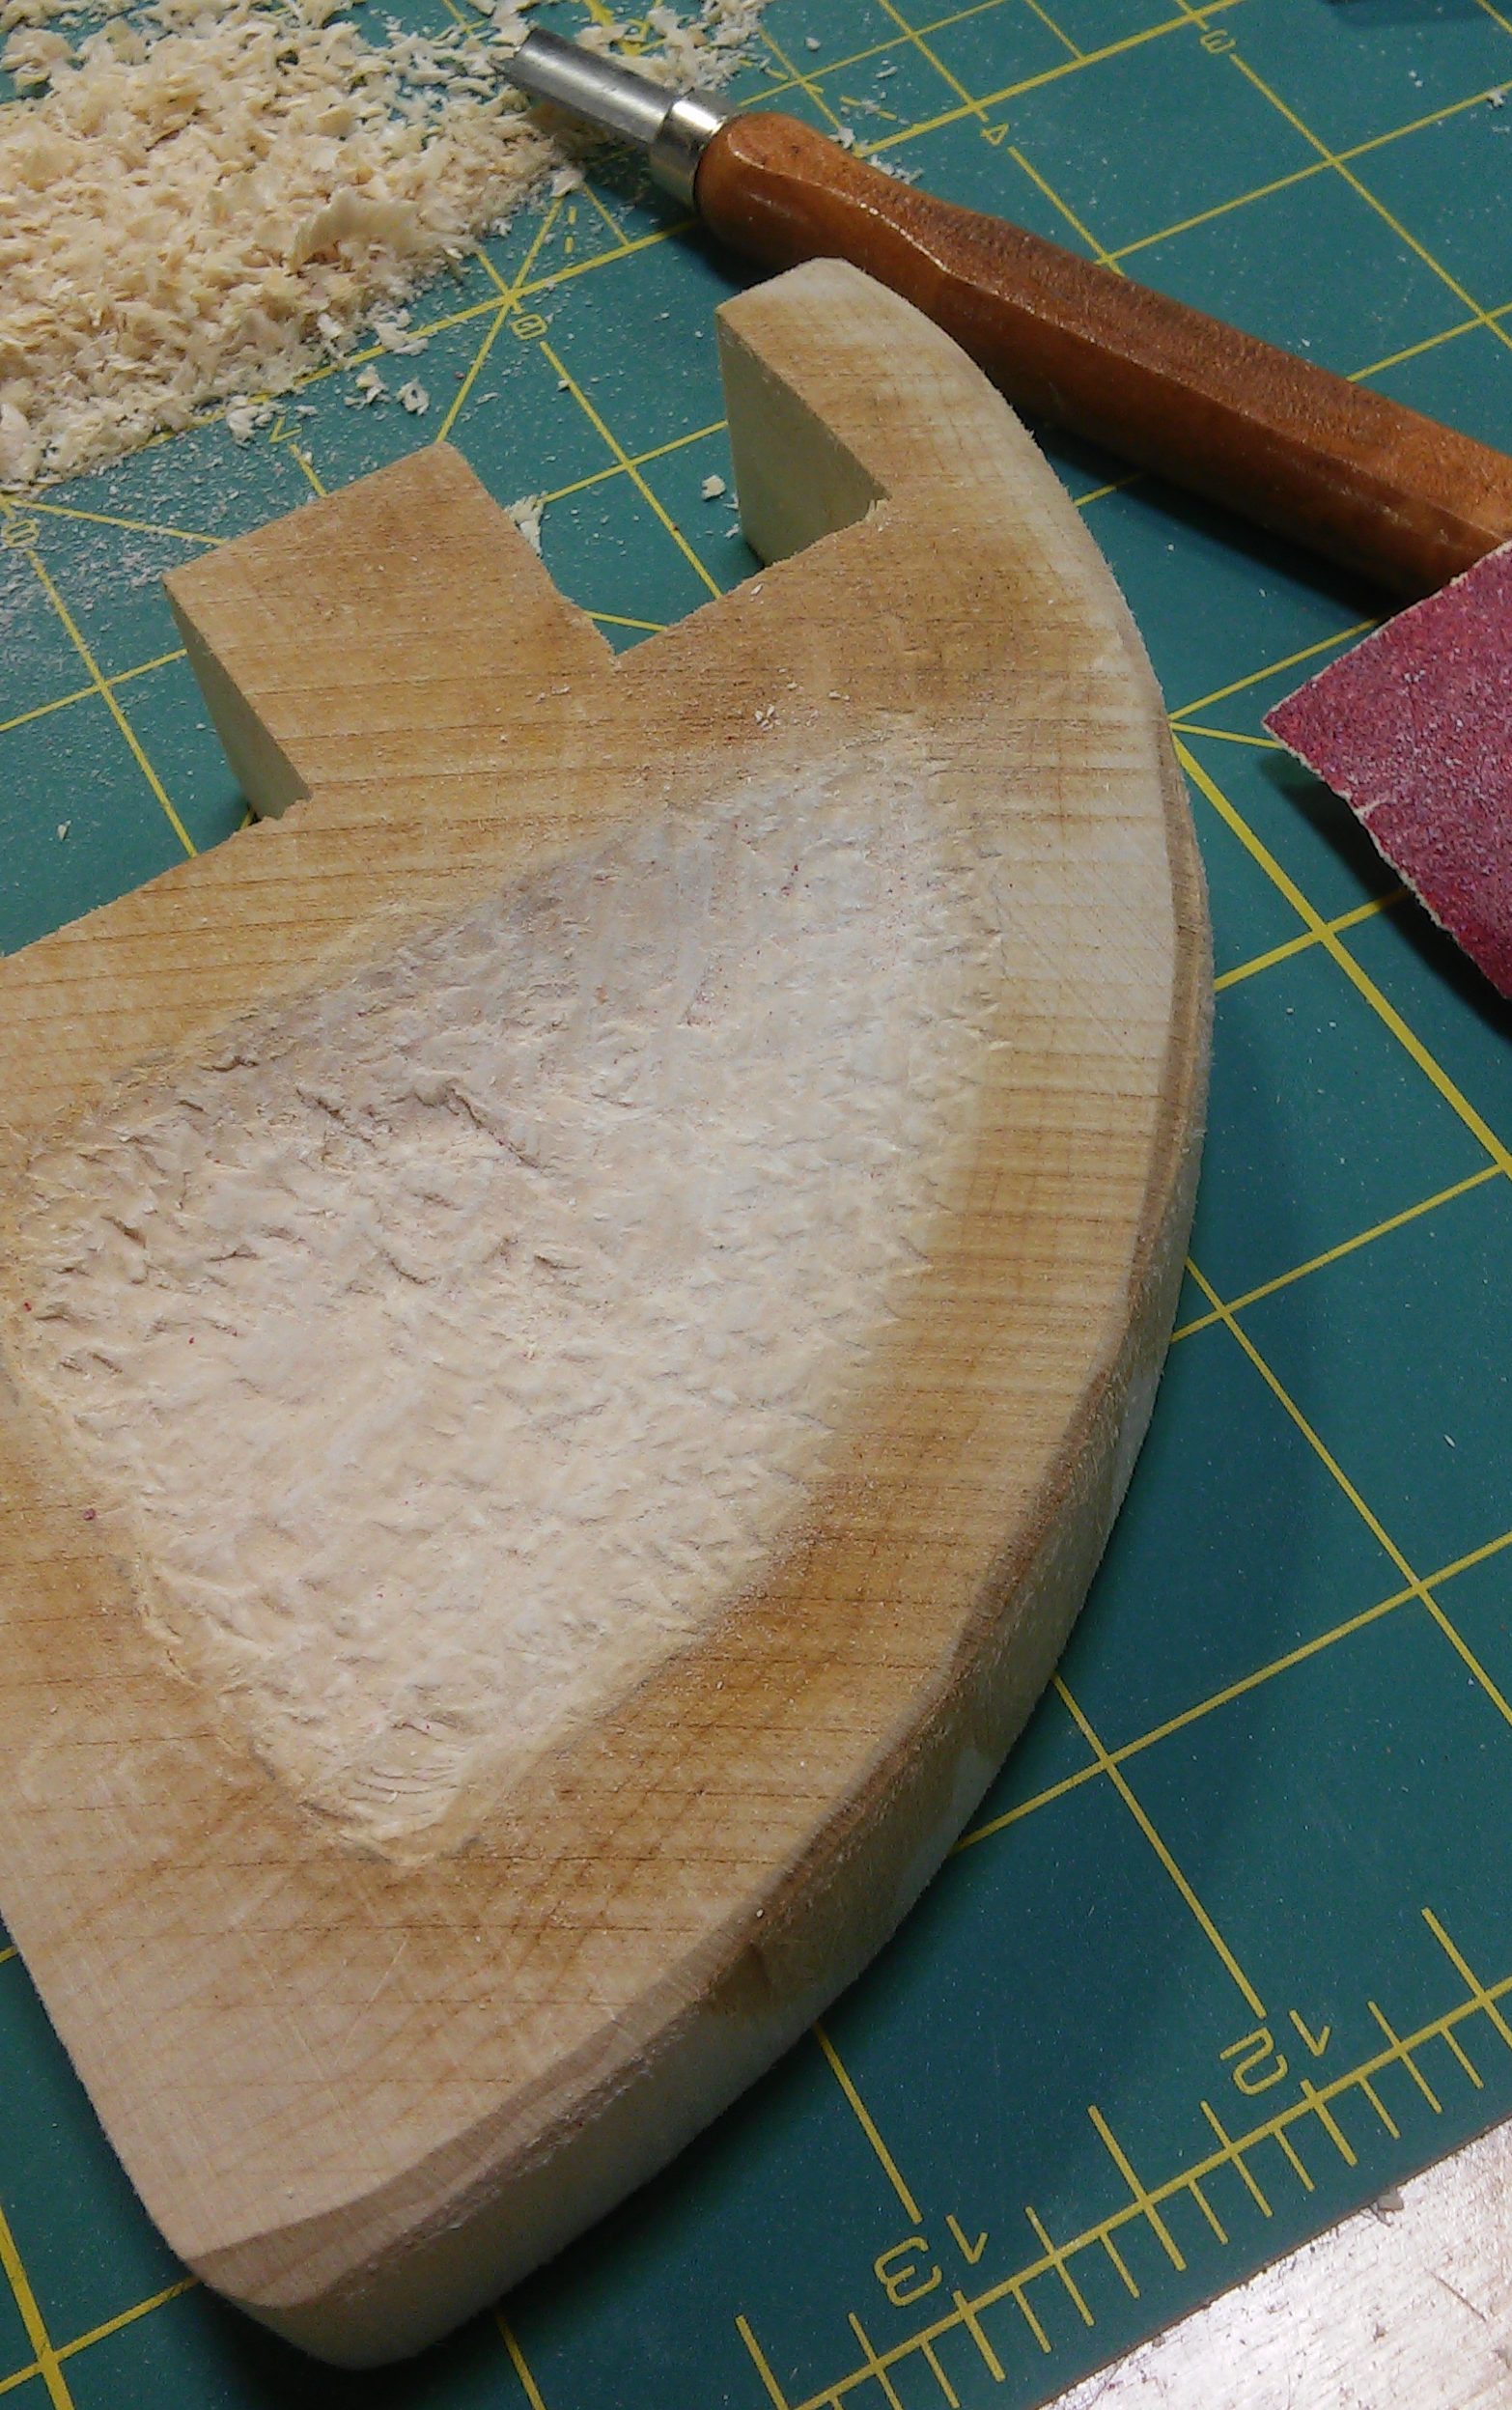
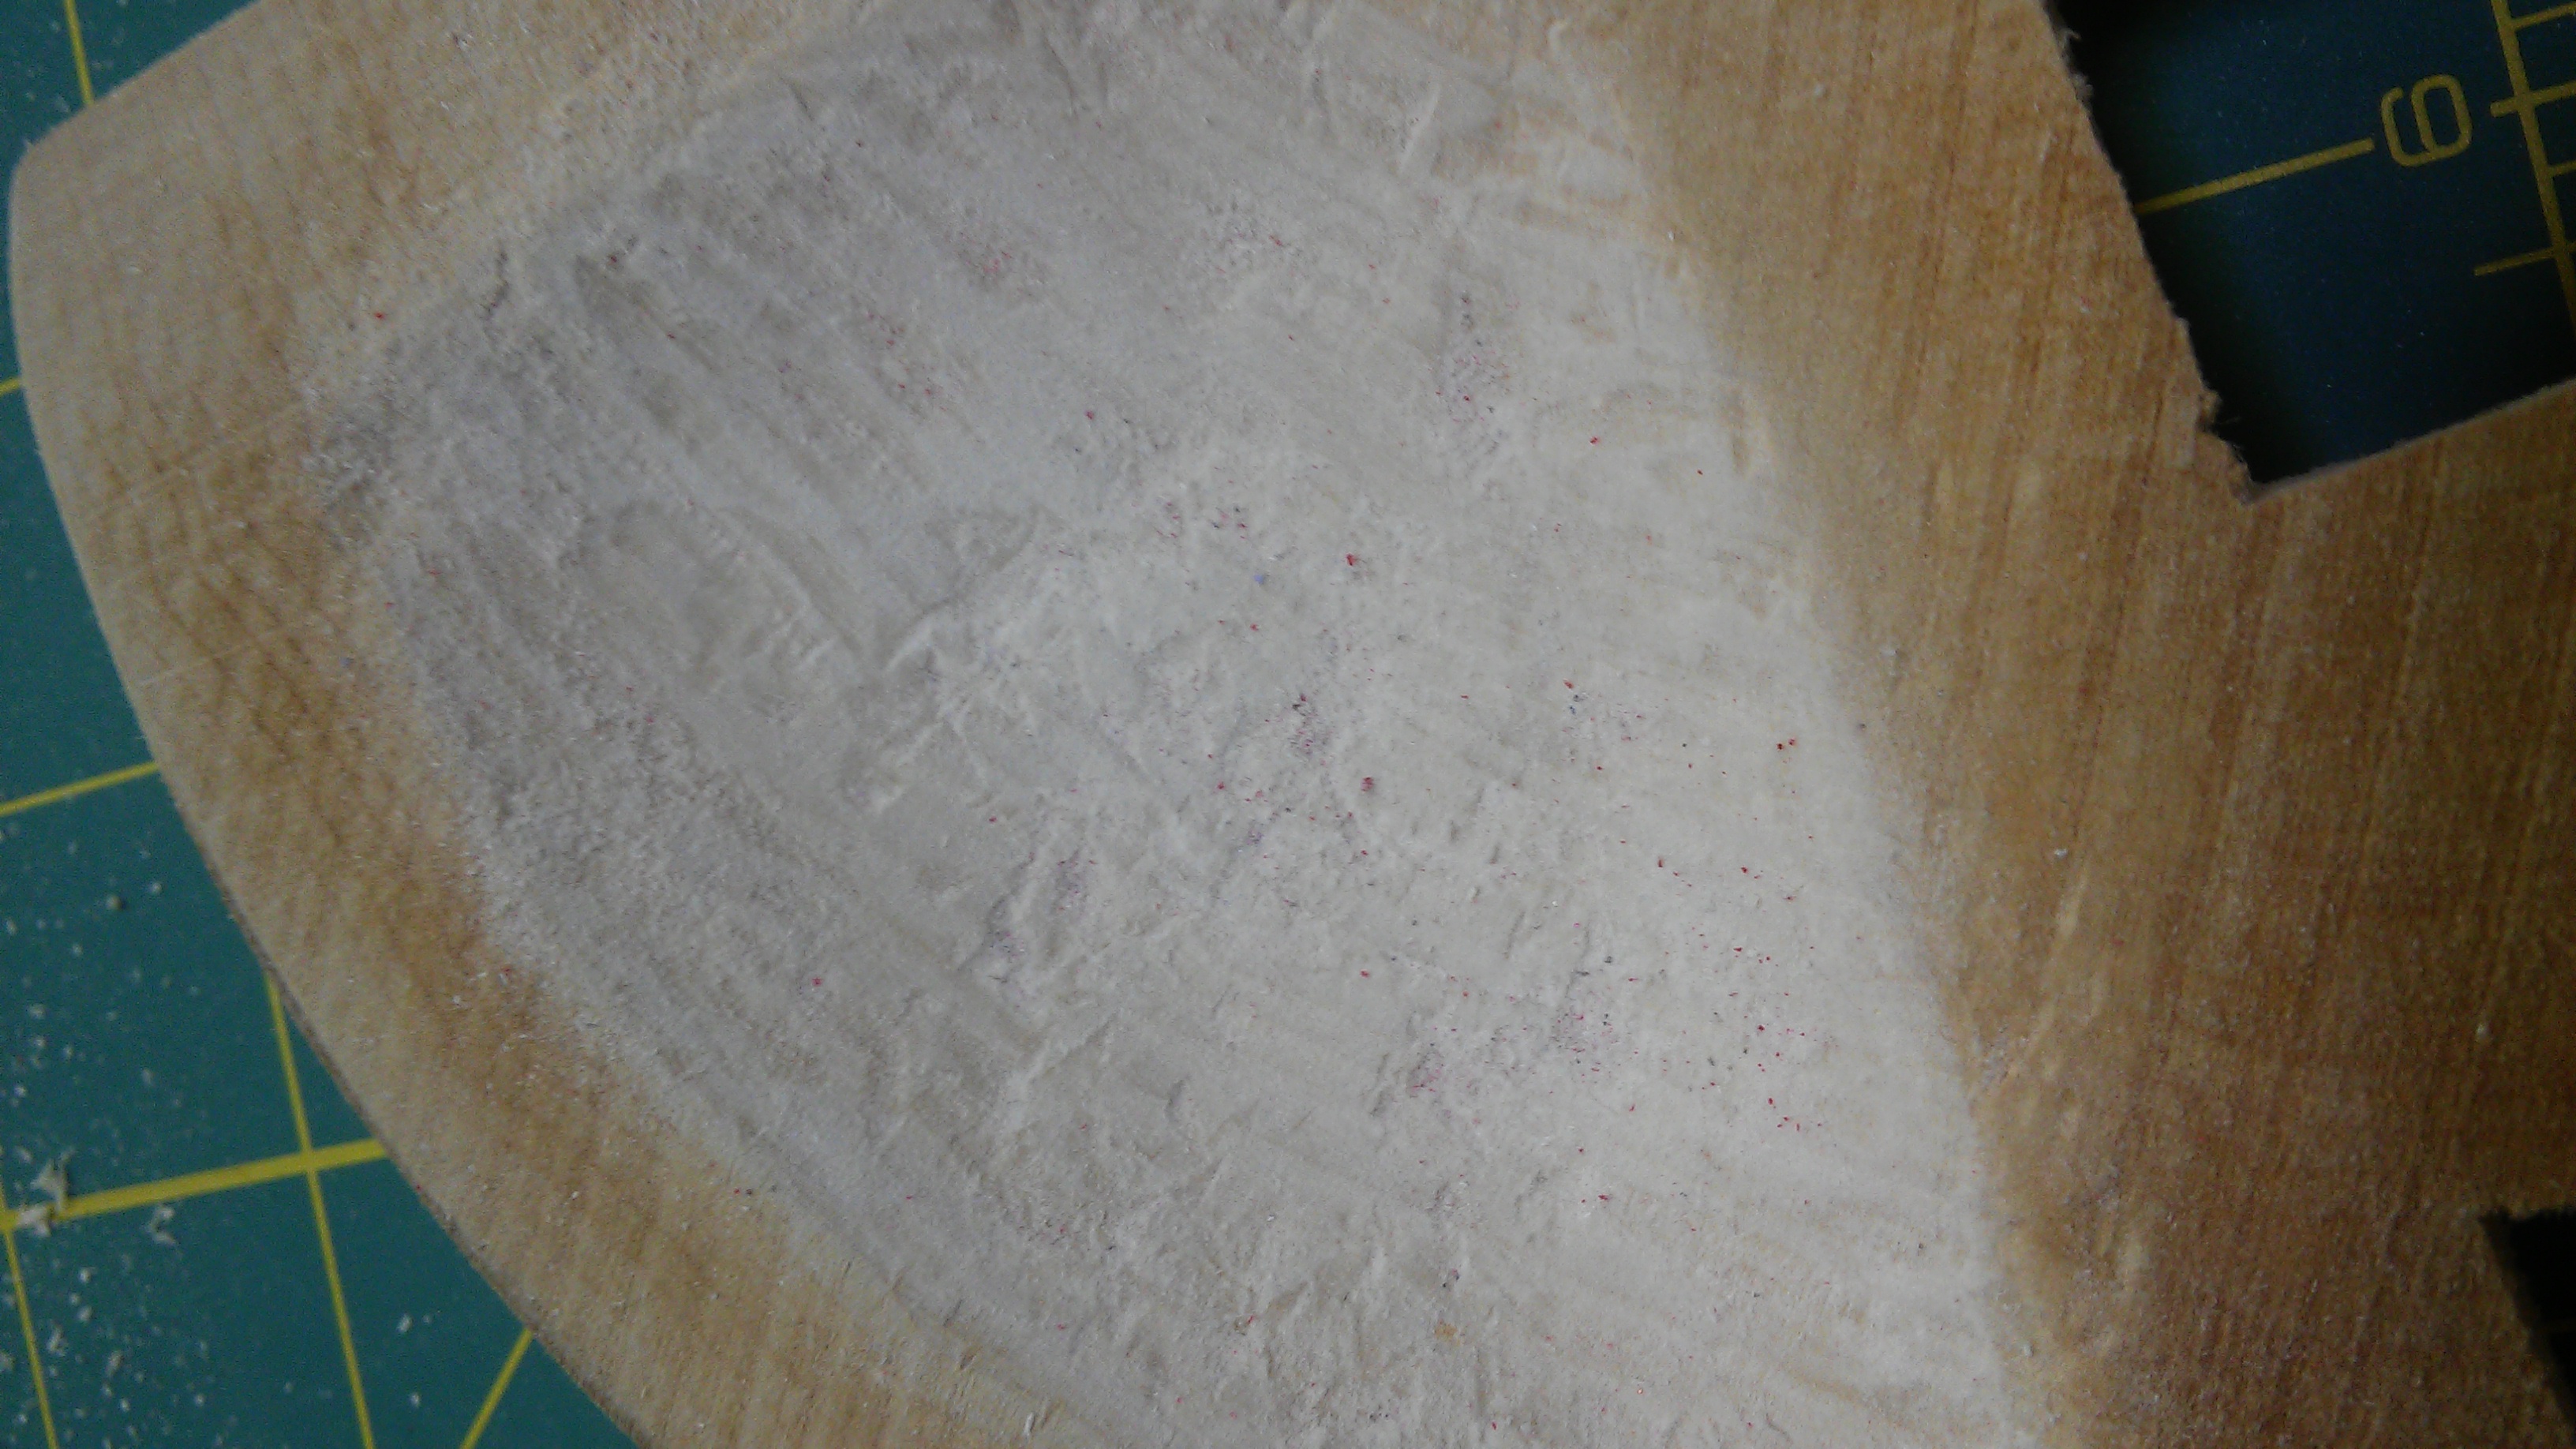
At a point, I also found myself alternating between chiseling and sanding. Sanding allowed me to create a temporarily smoother surface that the chisels could better travel on. Then I’d chisel more, sand, chisel, and keep alternating until I gave up or became satisfied with the depth of the piece. In the end, I did become satisfied with the depth considering it probably wasn’t close to accidentally cracking the wood from creating too thin a wall between the bottom of the bowl and the base of the project. Then it was just sanding, sanding, sanding, until I got a smooth enough surface that I could be happy with. Or whose rough blemishes could easily be covered with a different tool like the wood burner.
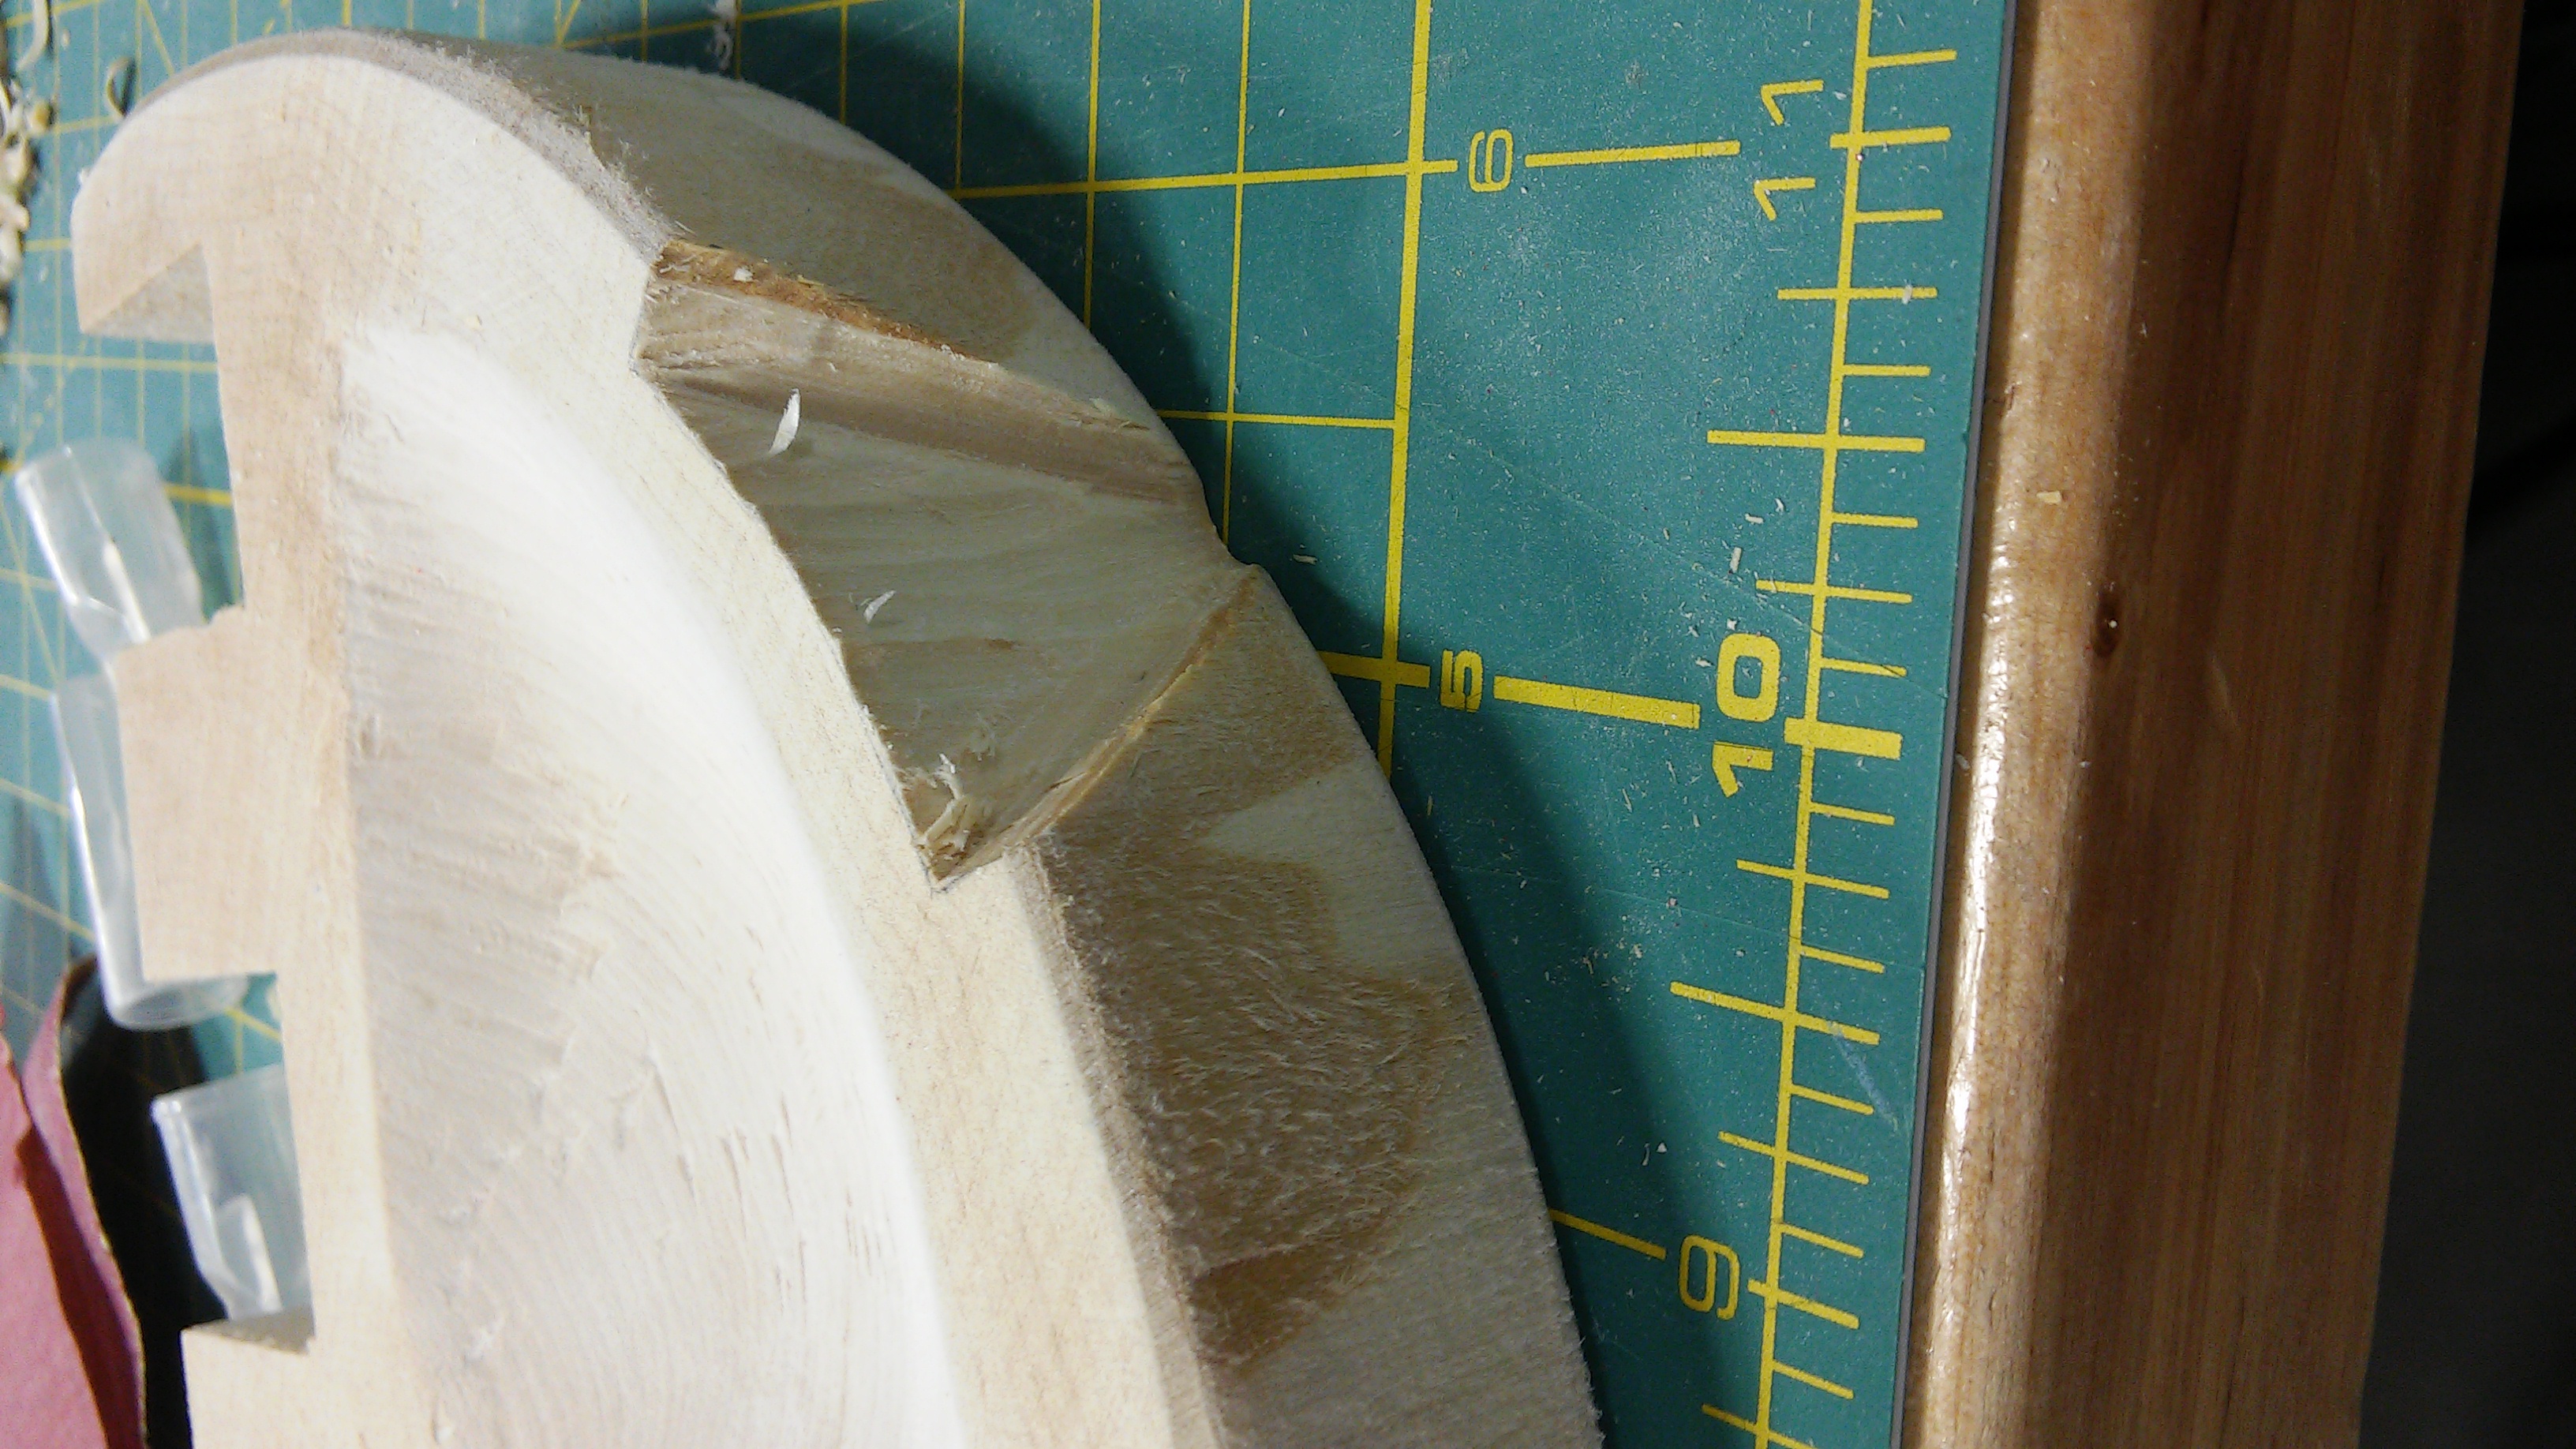
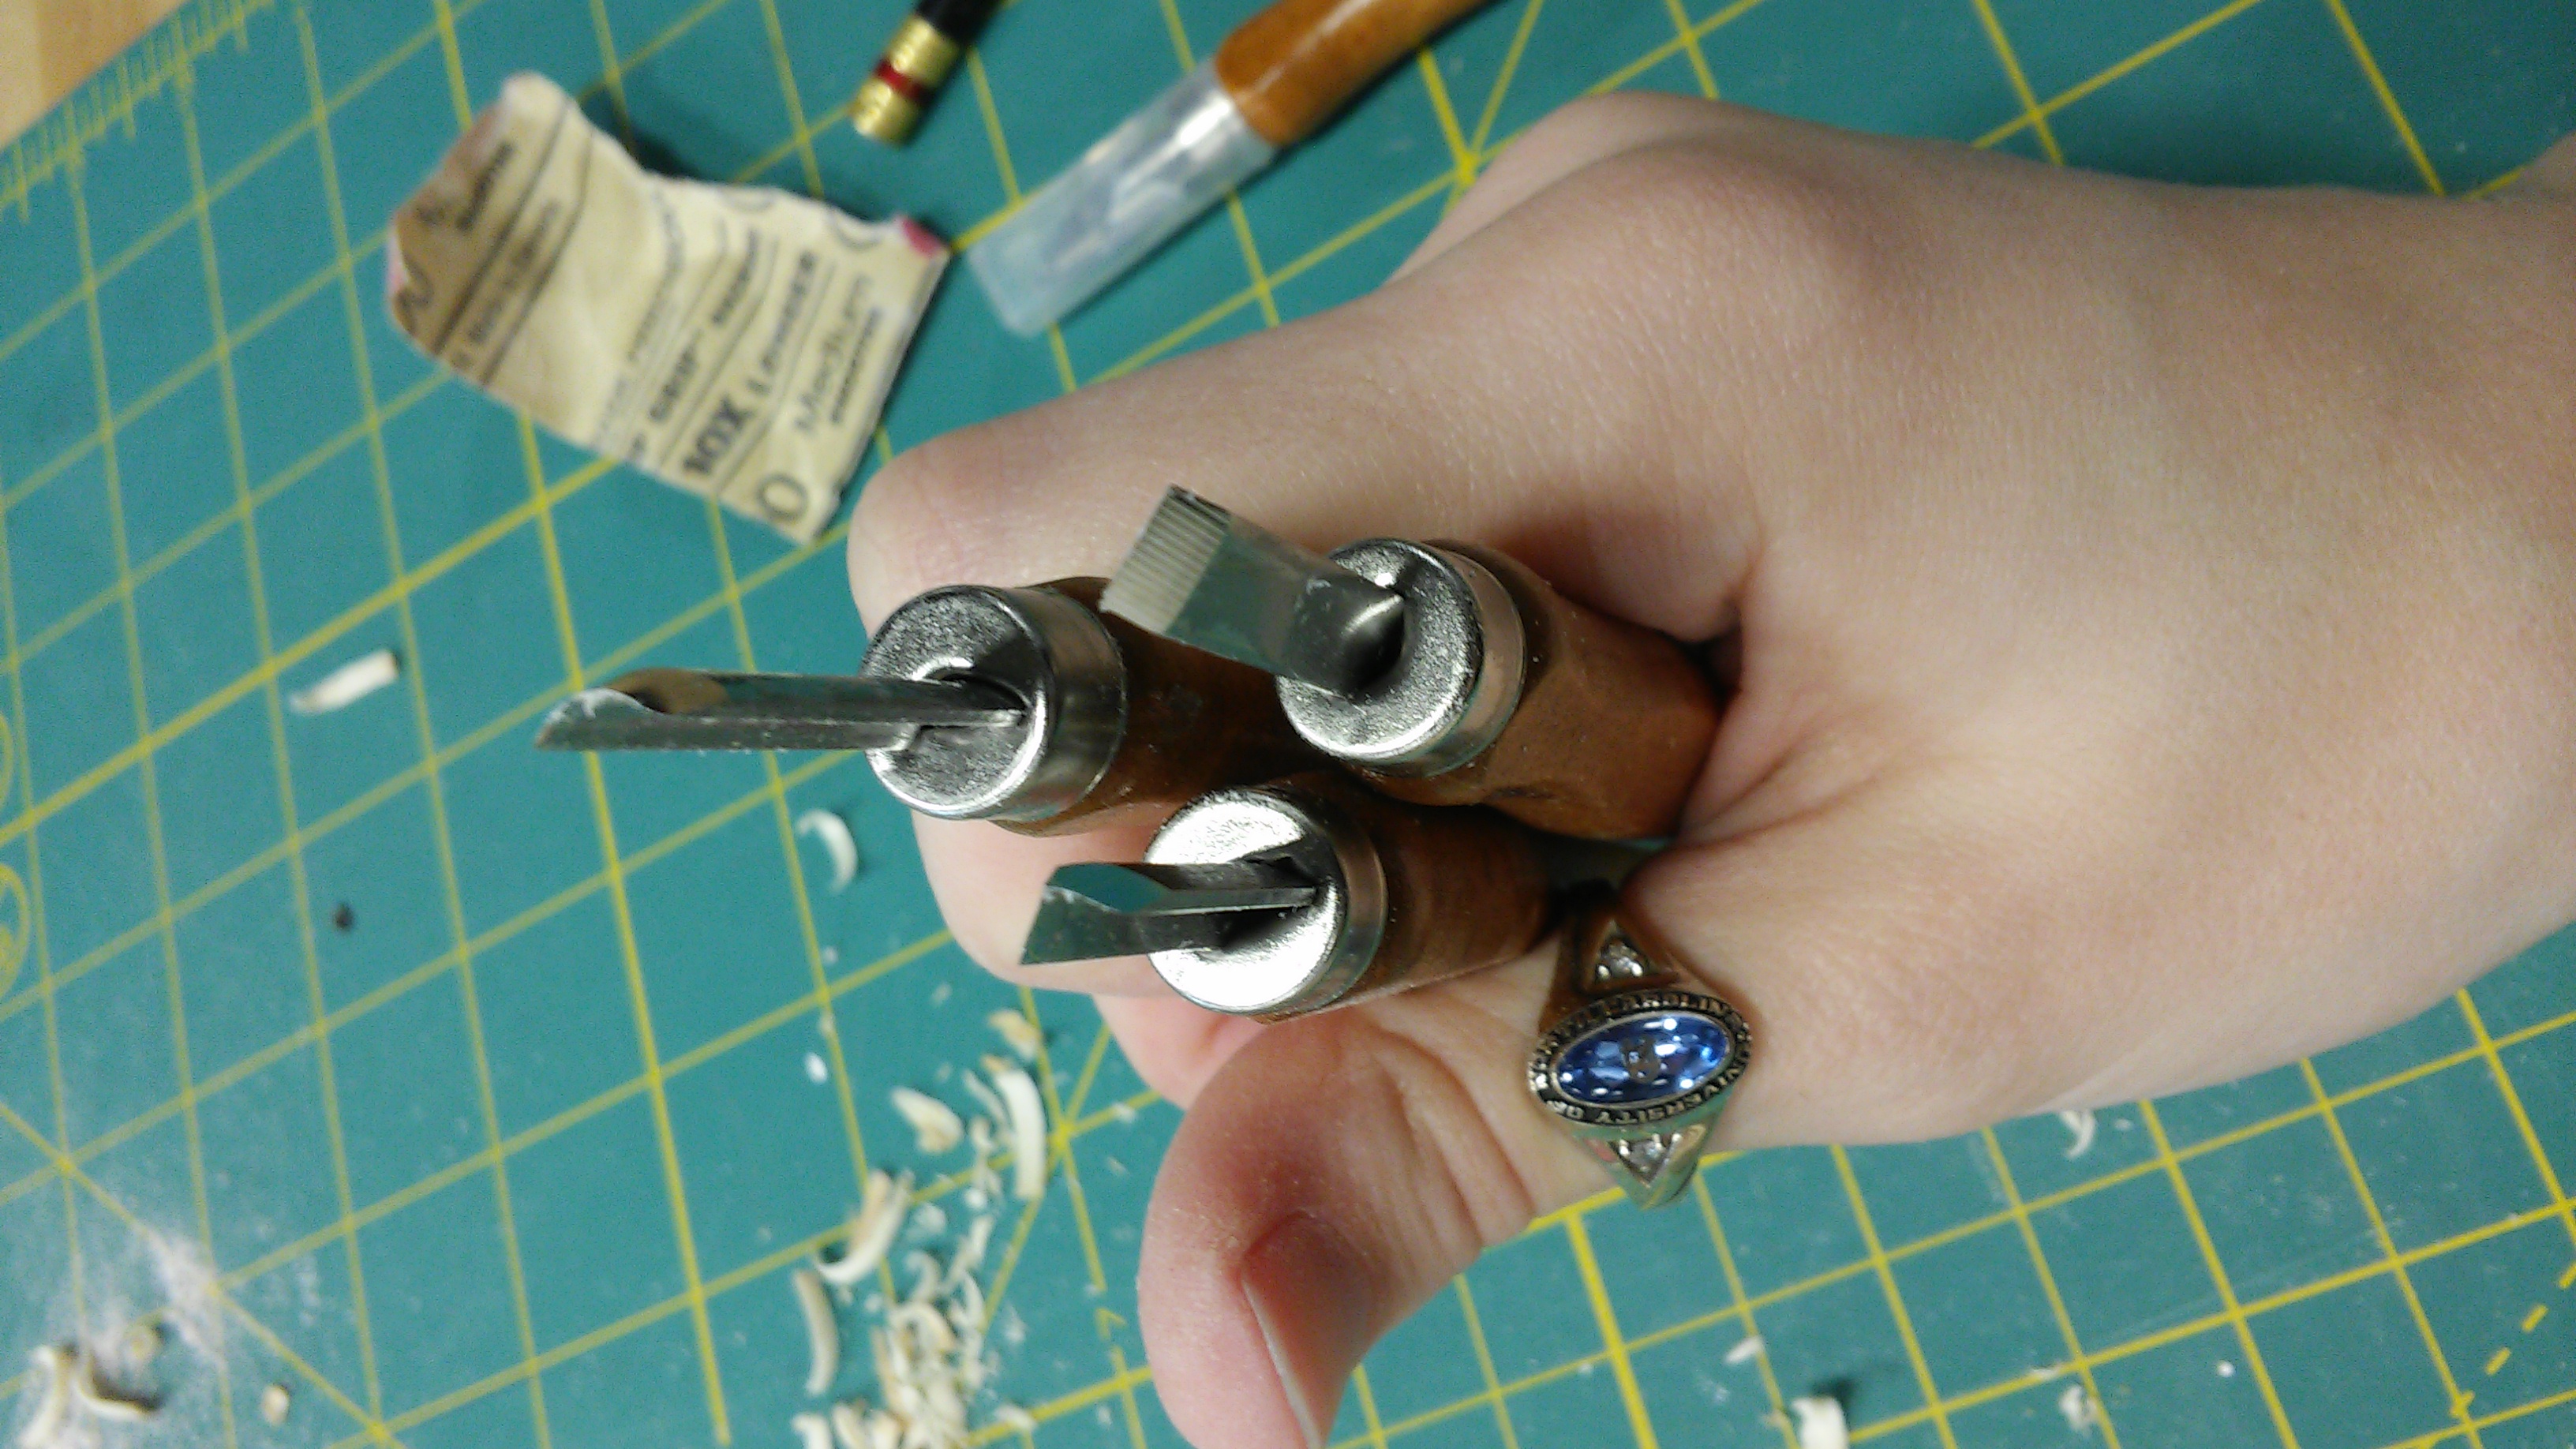
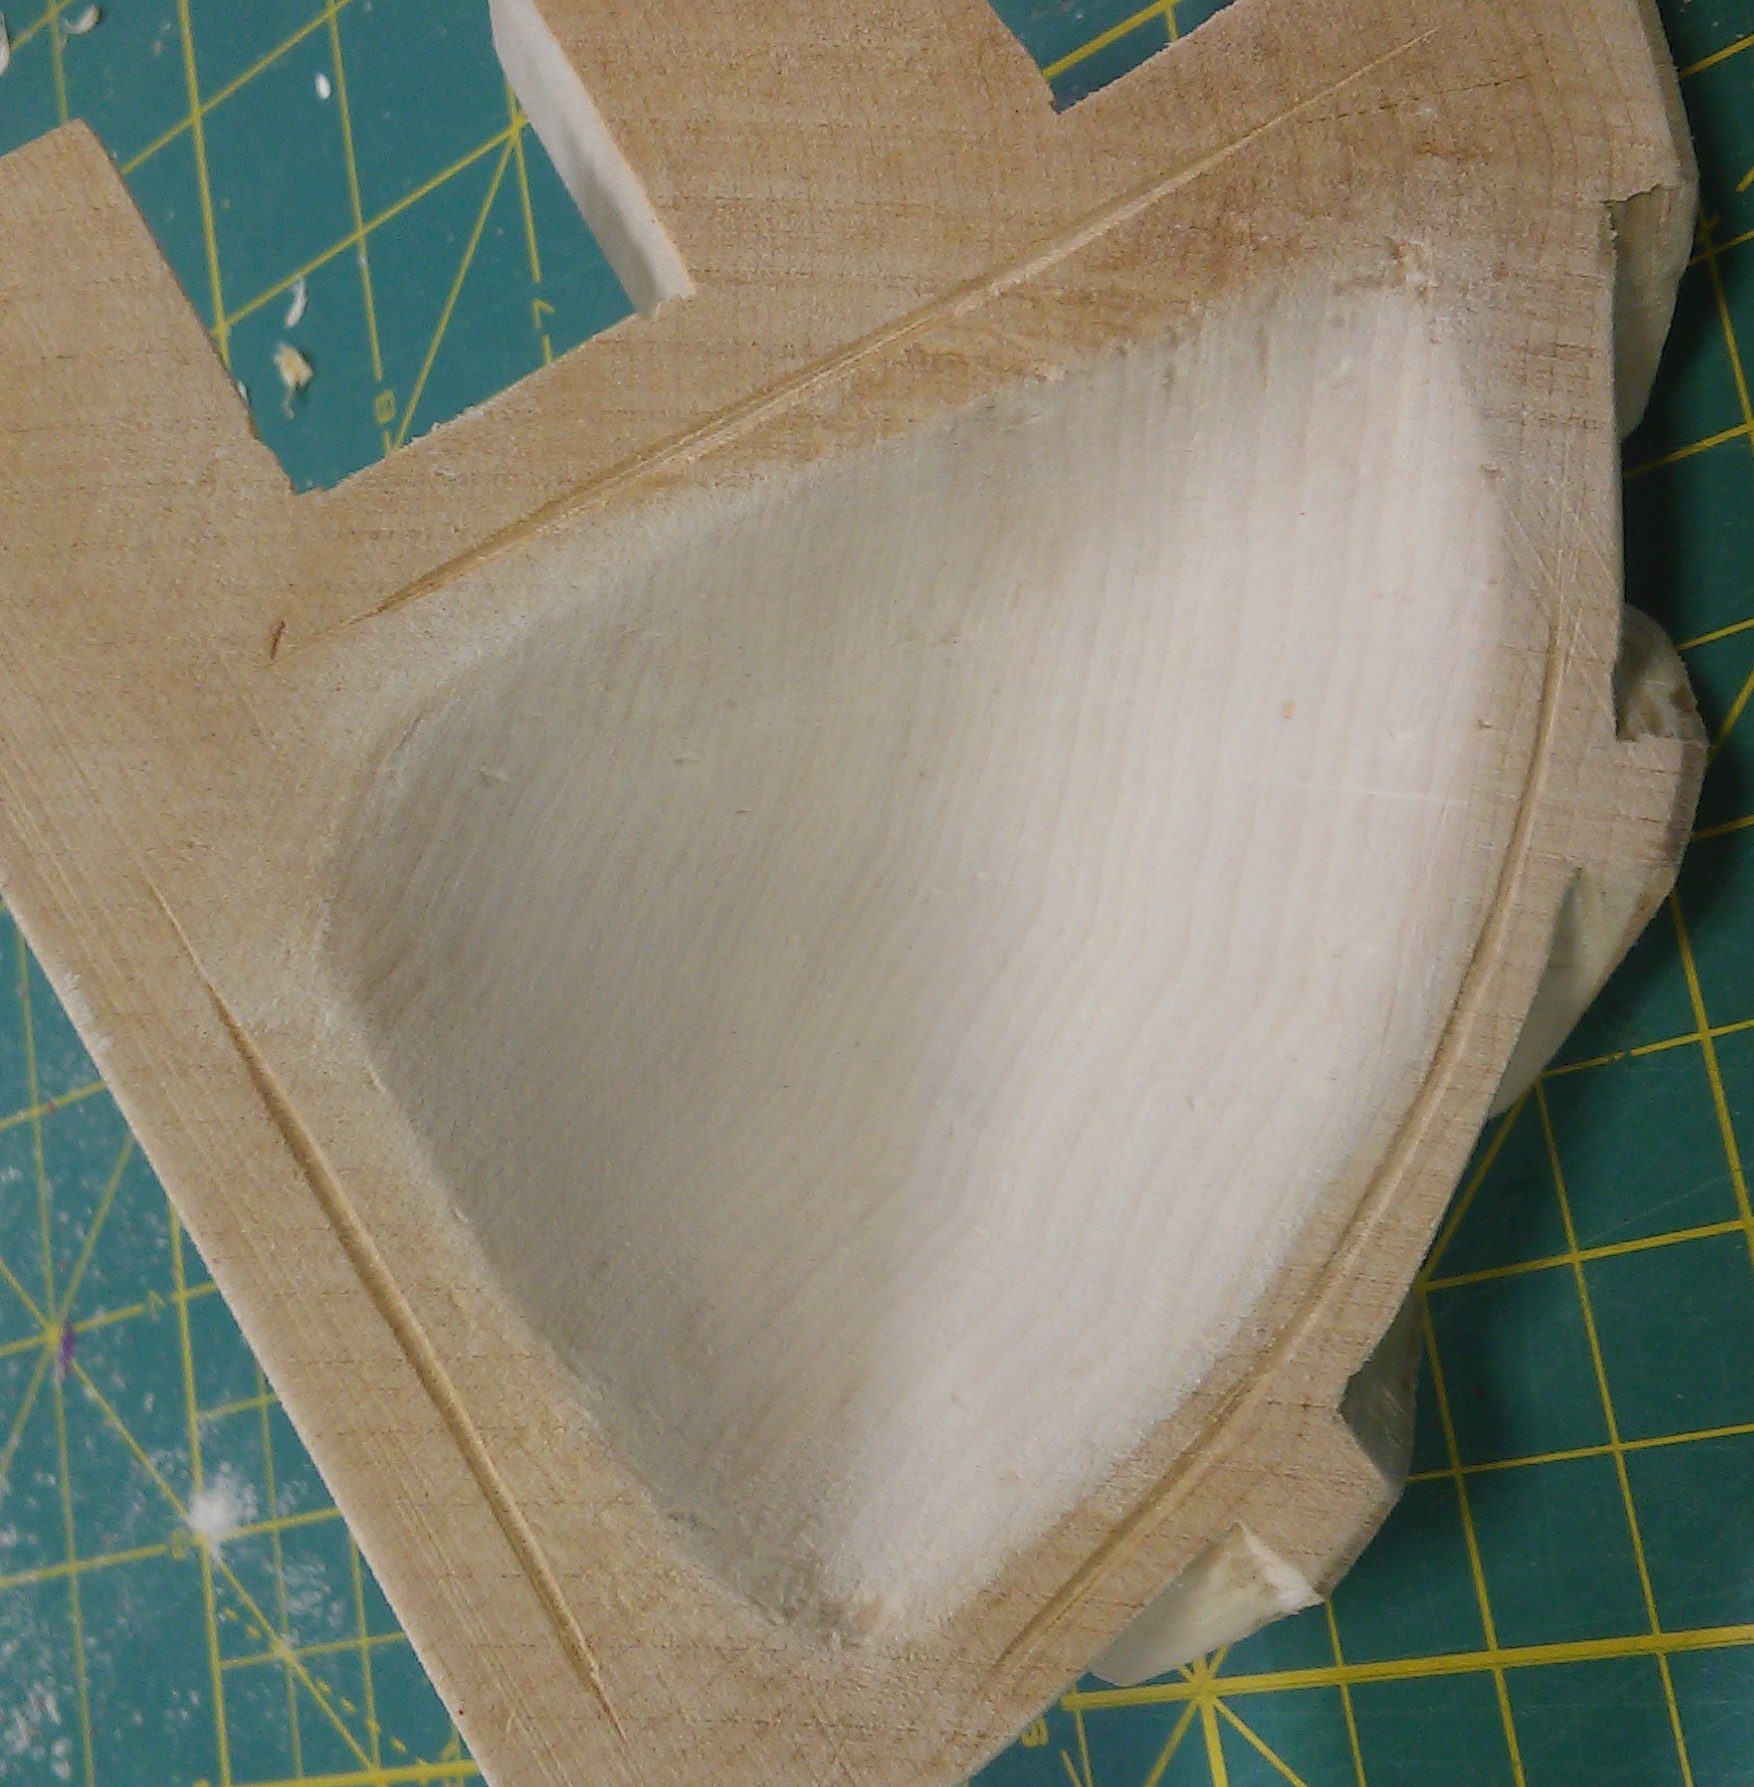
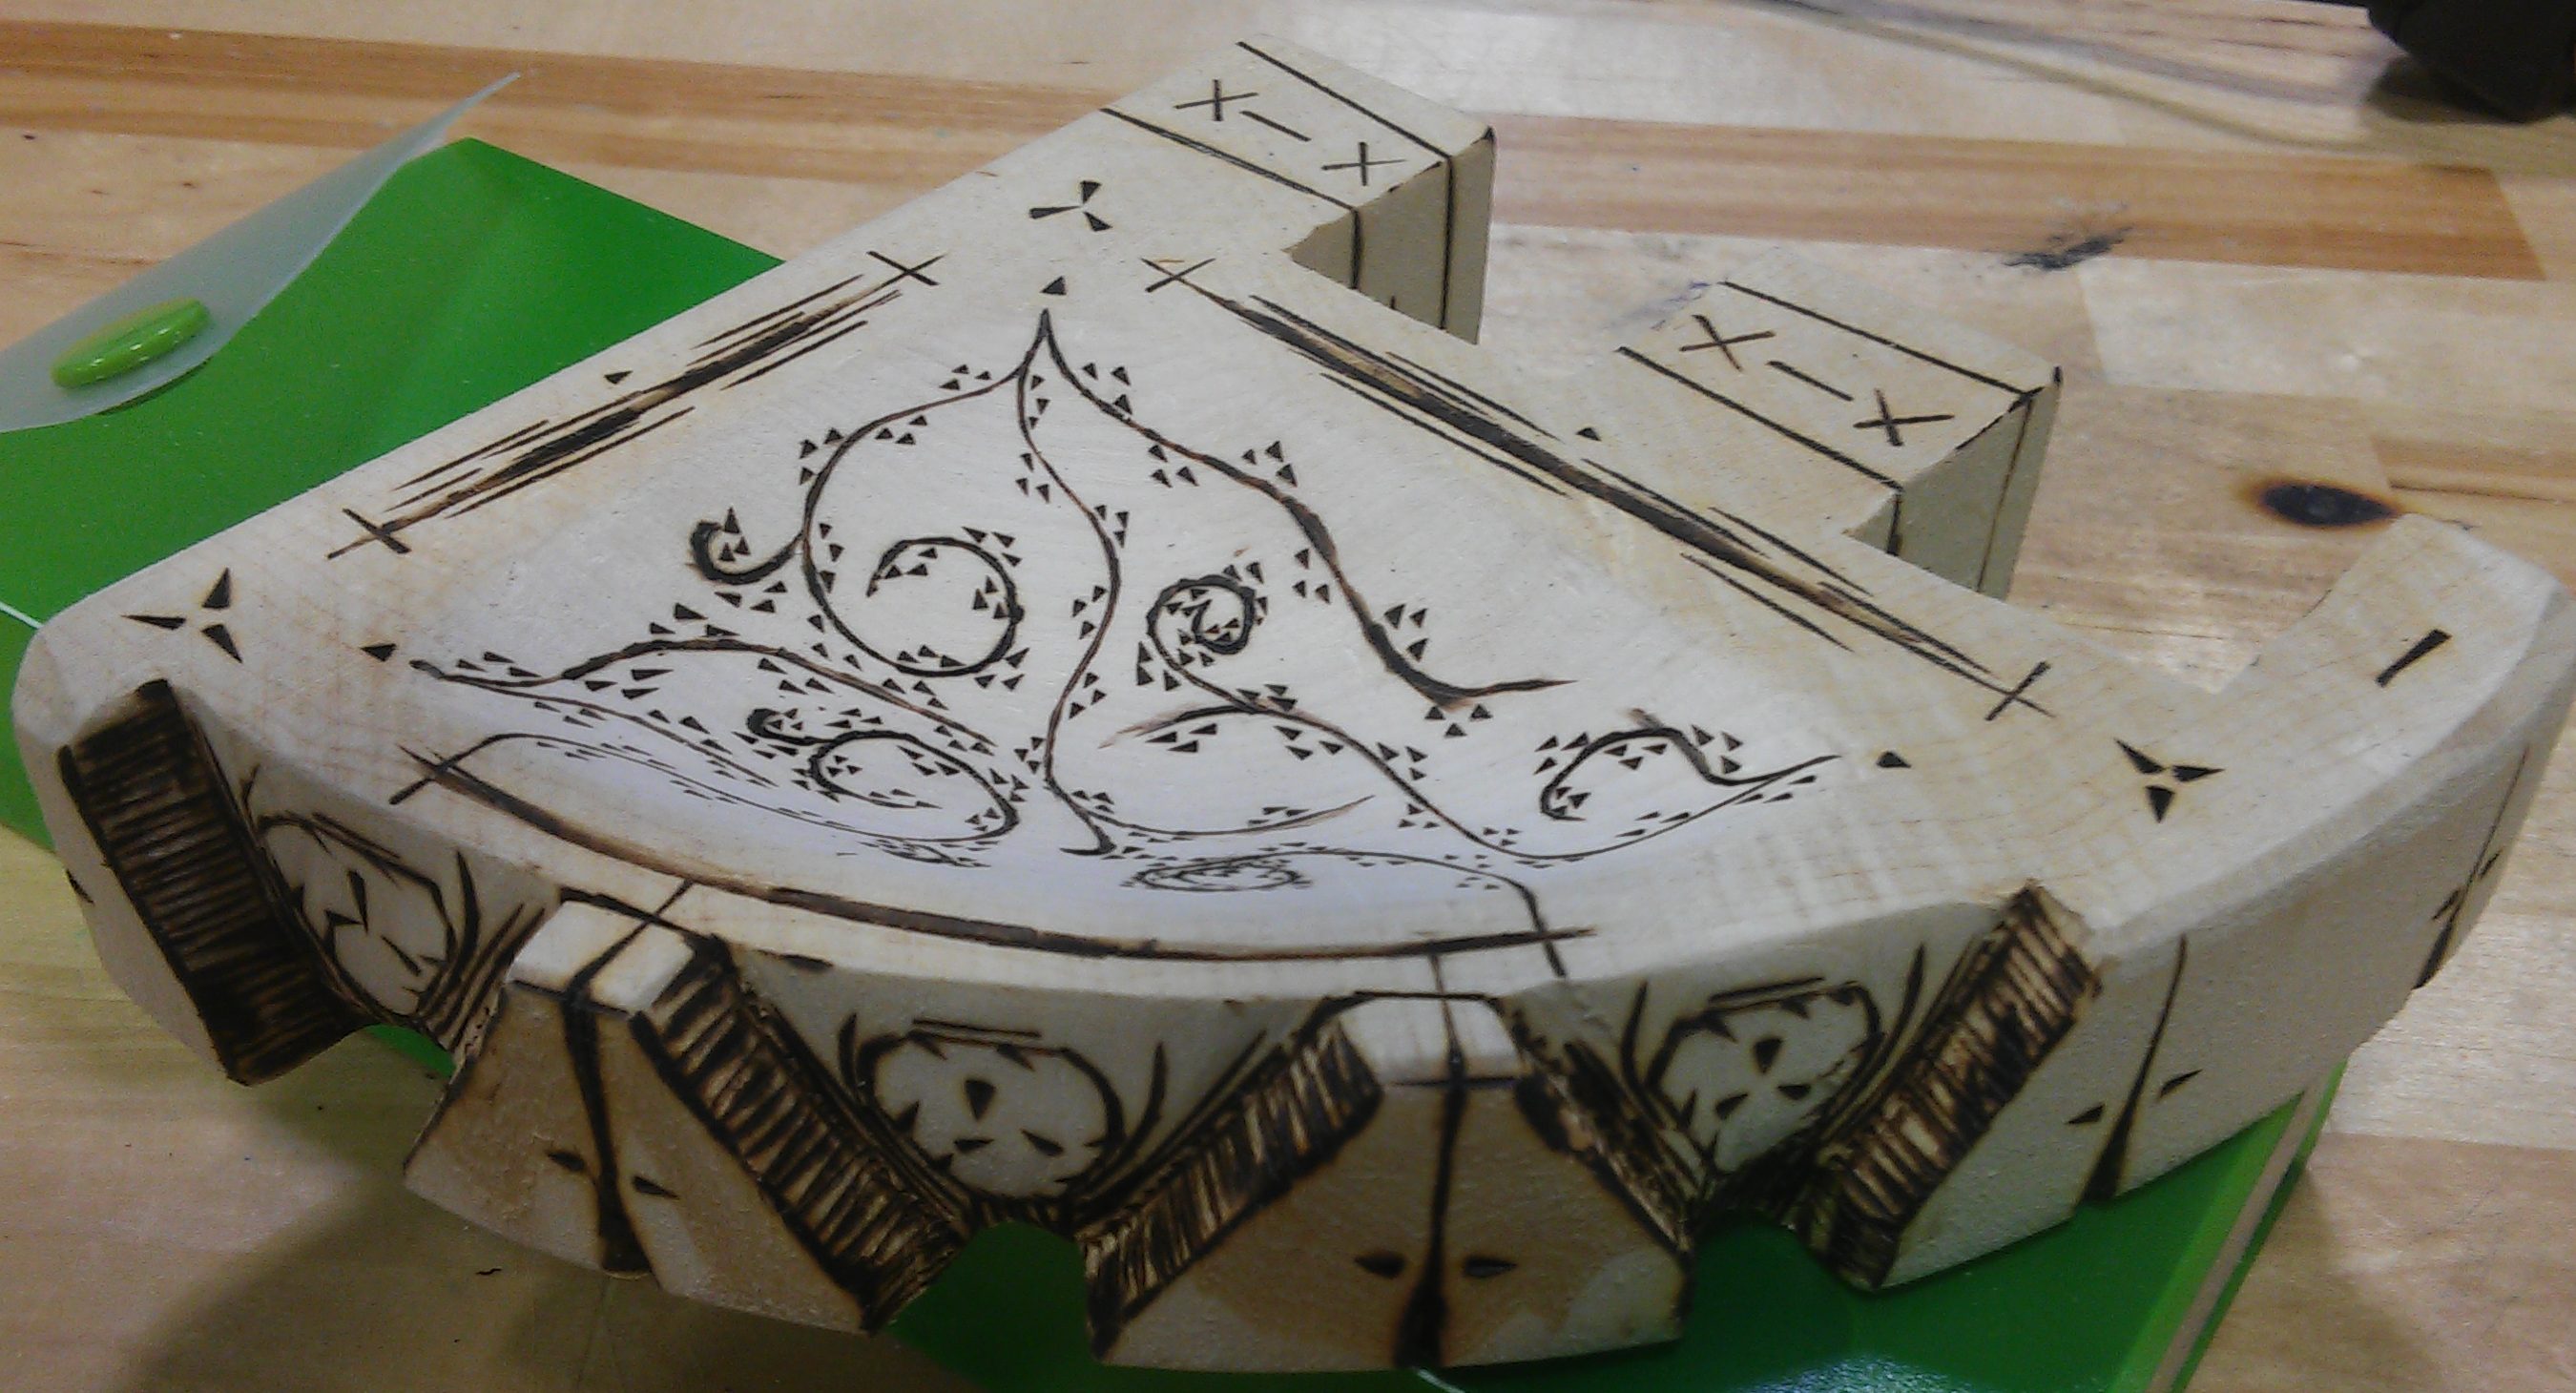
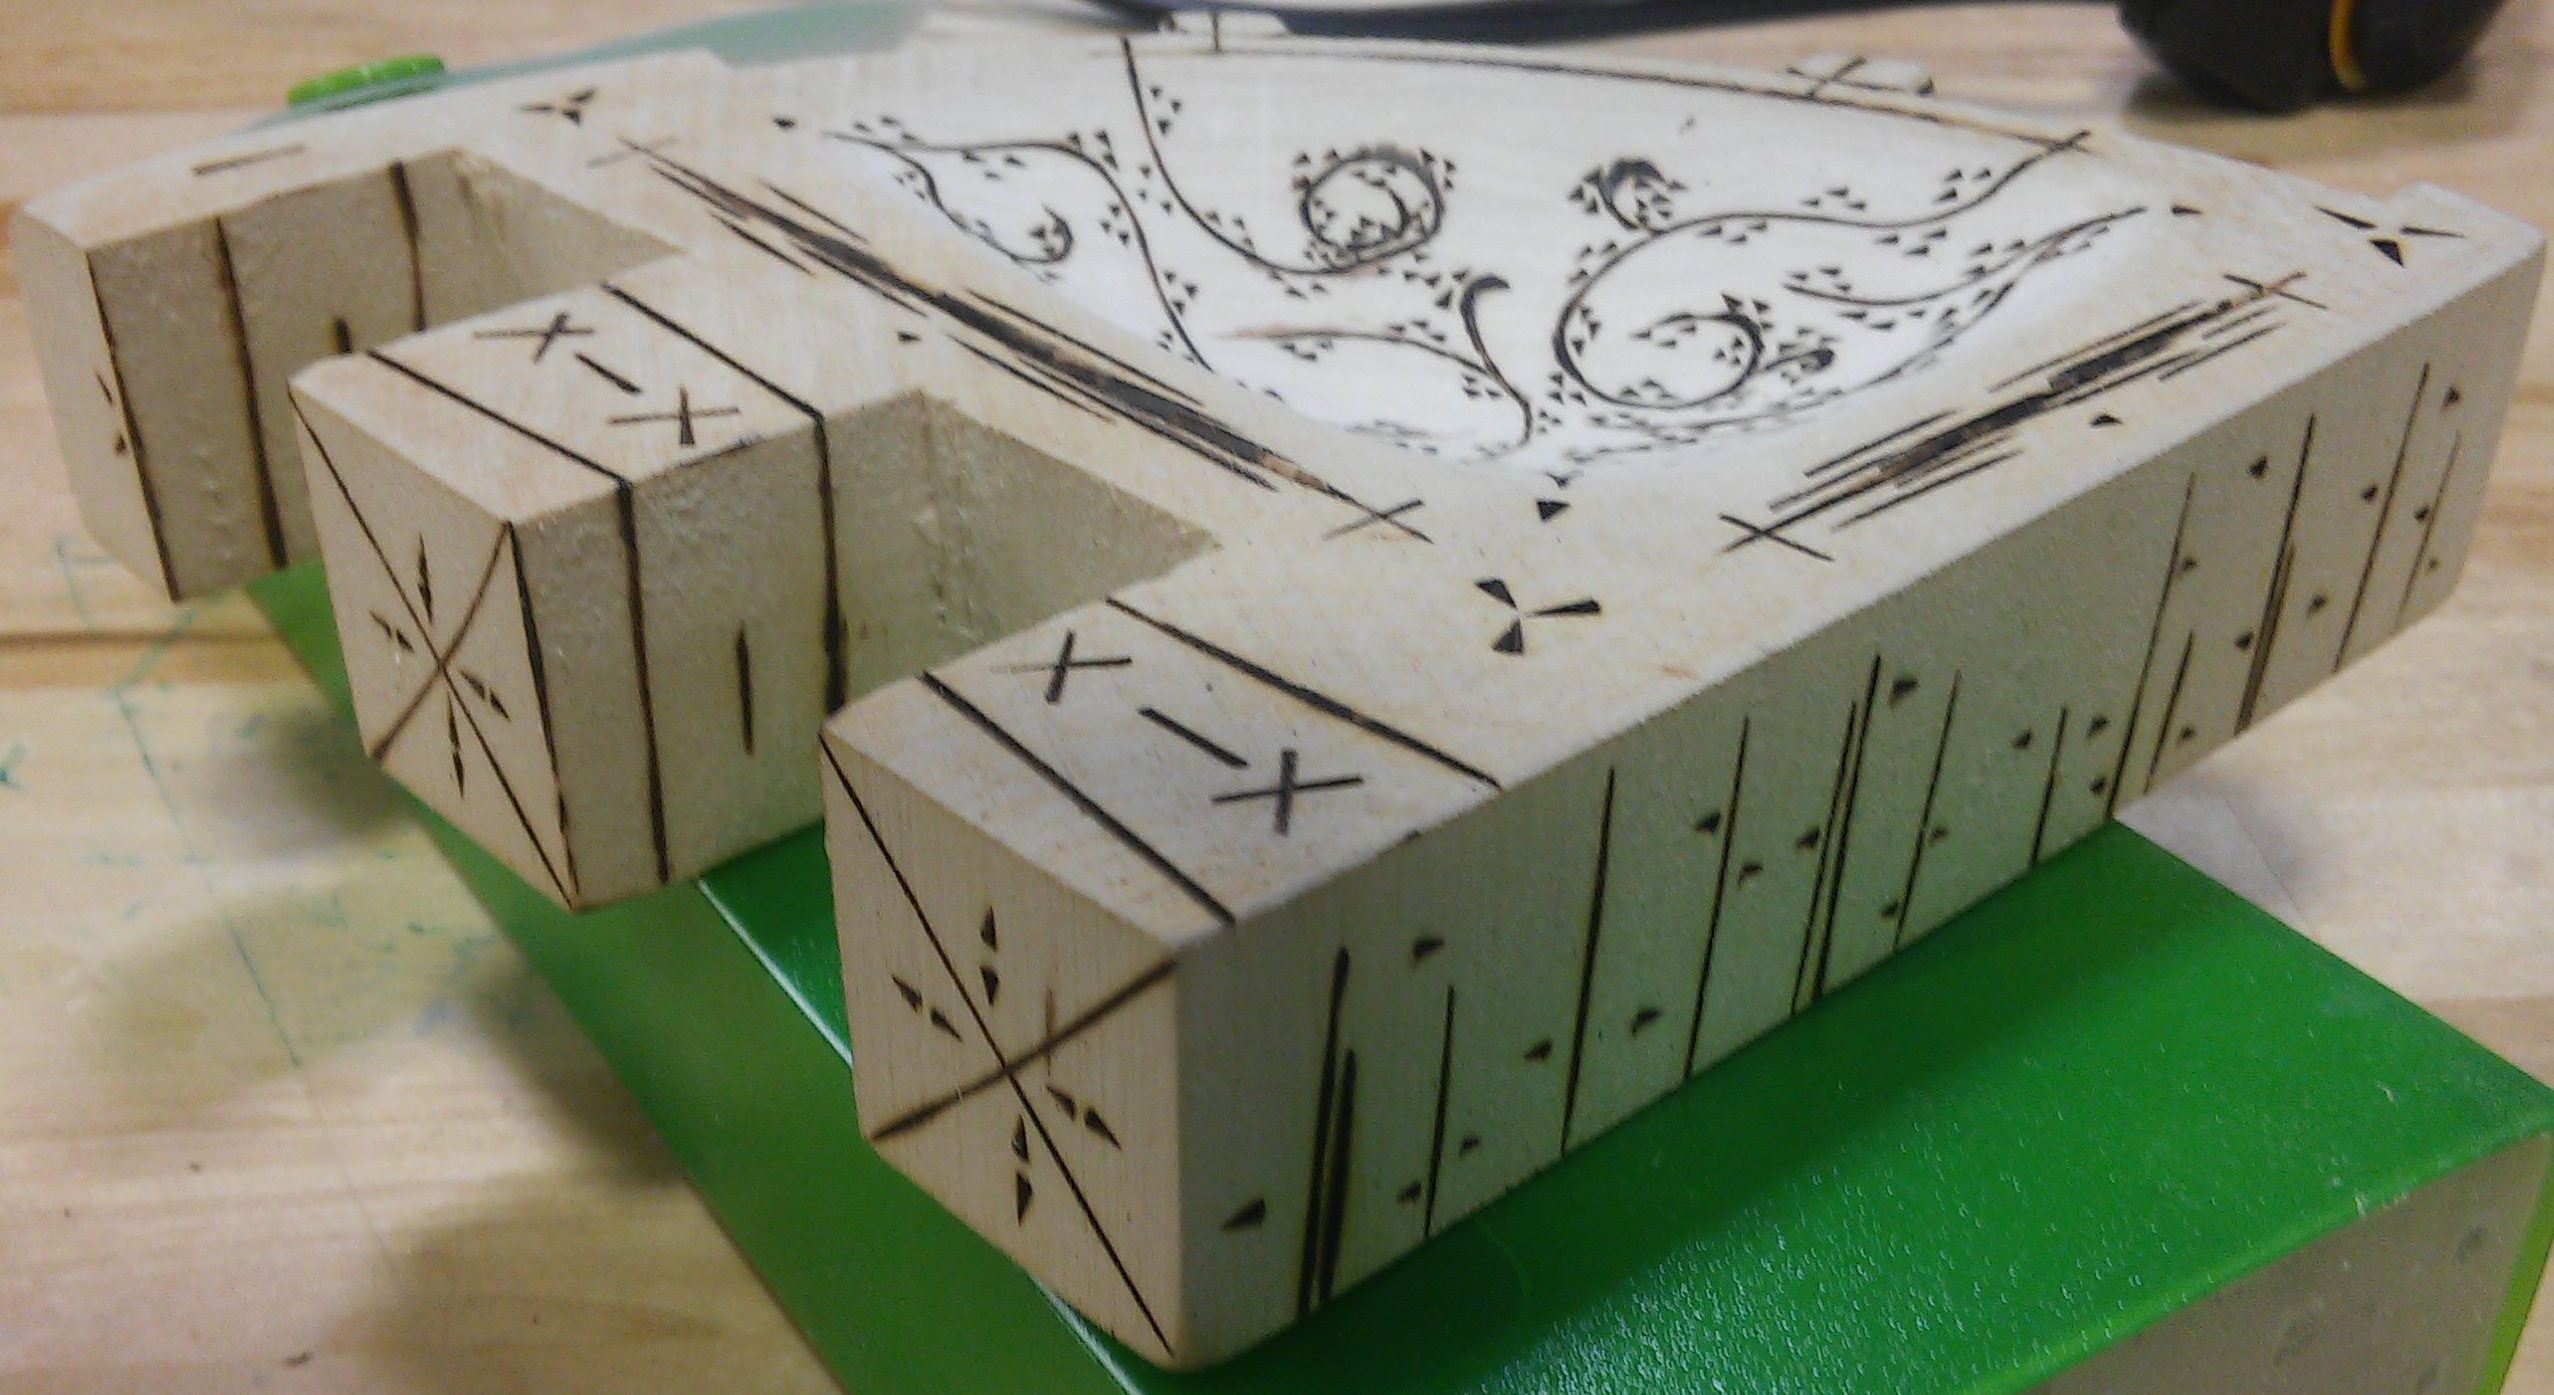
So with the basic function of the bowl in place, I took a while to decide exactly how I wanted to decorate it. I felt like I wasn’t finished with the chisels yet, still concerned with the transformation of the piece from raw wood to what would be the end of my project. I wanted to further alter its shape, so I came up with the idea for the wedges on the curved edge. And I was really looking forward to working with the grain rather than against it. I started with one just to get an estimate of how much time I’d be working with, and I was thrilled that the chisel slid like butter in comparison to what I’d been working with. I outlined in pencil the area I wanted to carve out then got to work. I started with carving out the basic triangle as I had outlined it before going back in and adding dimension, the curved edge that gave the illusion of a rounded bottom like an actual bowl. And when the first wedge came out great and within reasonable time, I replicated the shape in triplicate. What became essential for this part of the project was the variety of chisels I was using. I started with the rounded one that I’d used for the entirety of the bowl, carving out the triangle to the specified length. To get the corners, I used the chisel with the point. It also mostly made the right angle that I was looking for, another delightful accident that I wasn’t yet sure how I was going to accomplish. Then those straight sides were finished off with the chisel that had the flattest head that was small enough to fit into this part of the design.
So at this point, I was almost done with the chisel. I sanded those wedges down with coarse and fine grain sandpaper then went back in with the chisel and just added a few, more discrete, touches on the face and curved side of the project. At this point, I was working by whim and anticipating when I’d let myself move onto the wood burner. I knew that it would have to come last because of its permanence and the necessity it had for working on smooth surfaces. All the chiseling had to be finalized and all surfaces sanded. At this point, any lack of uniformity between each wedge was due unfortunately to chipping. When the chisels got down to those narrower edges near the base and got stuck, they took whole corners with them, so unfortunately the curved edge of my project isn’t the most uniform.
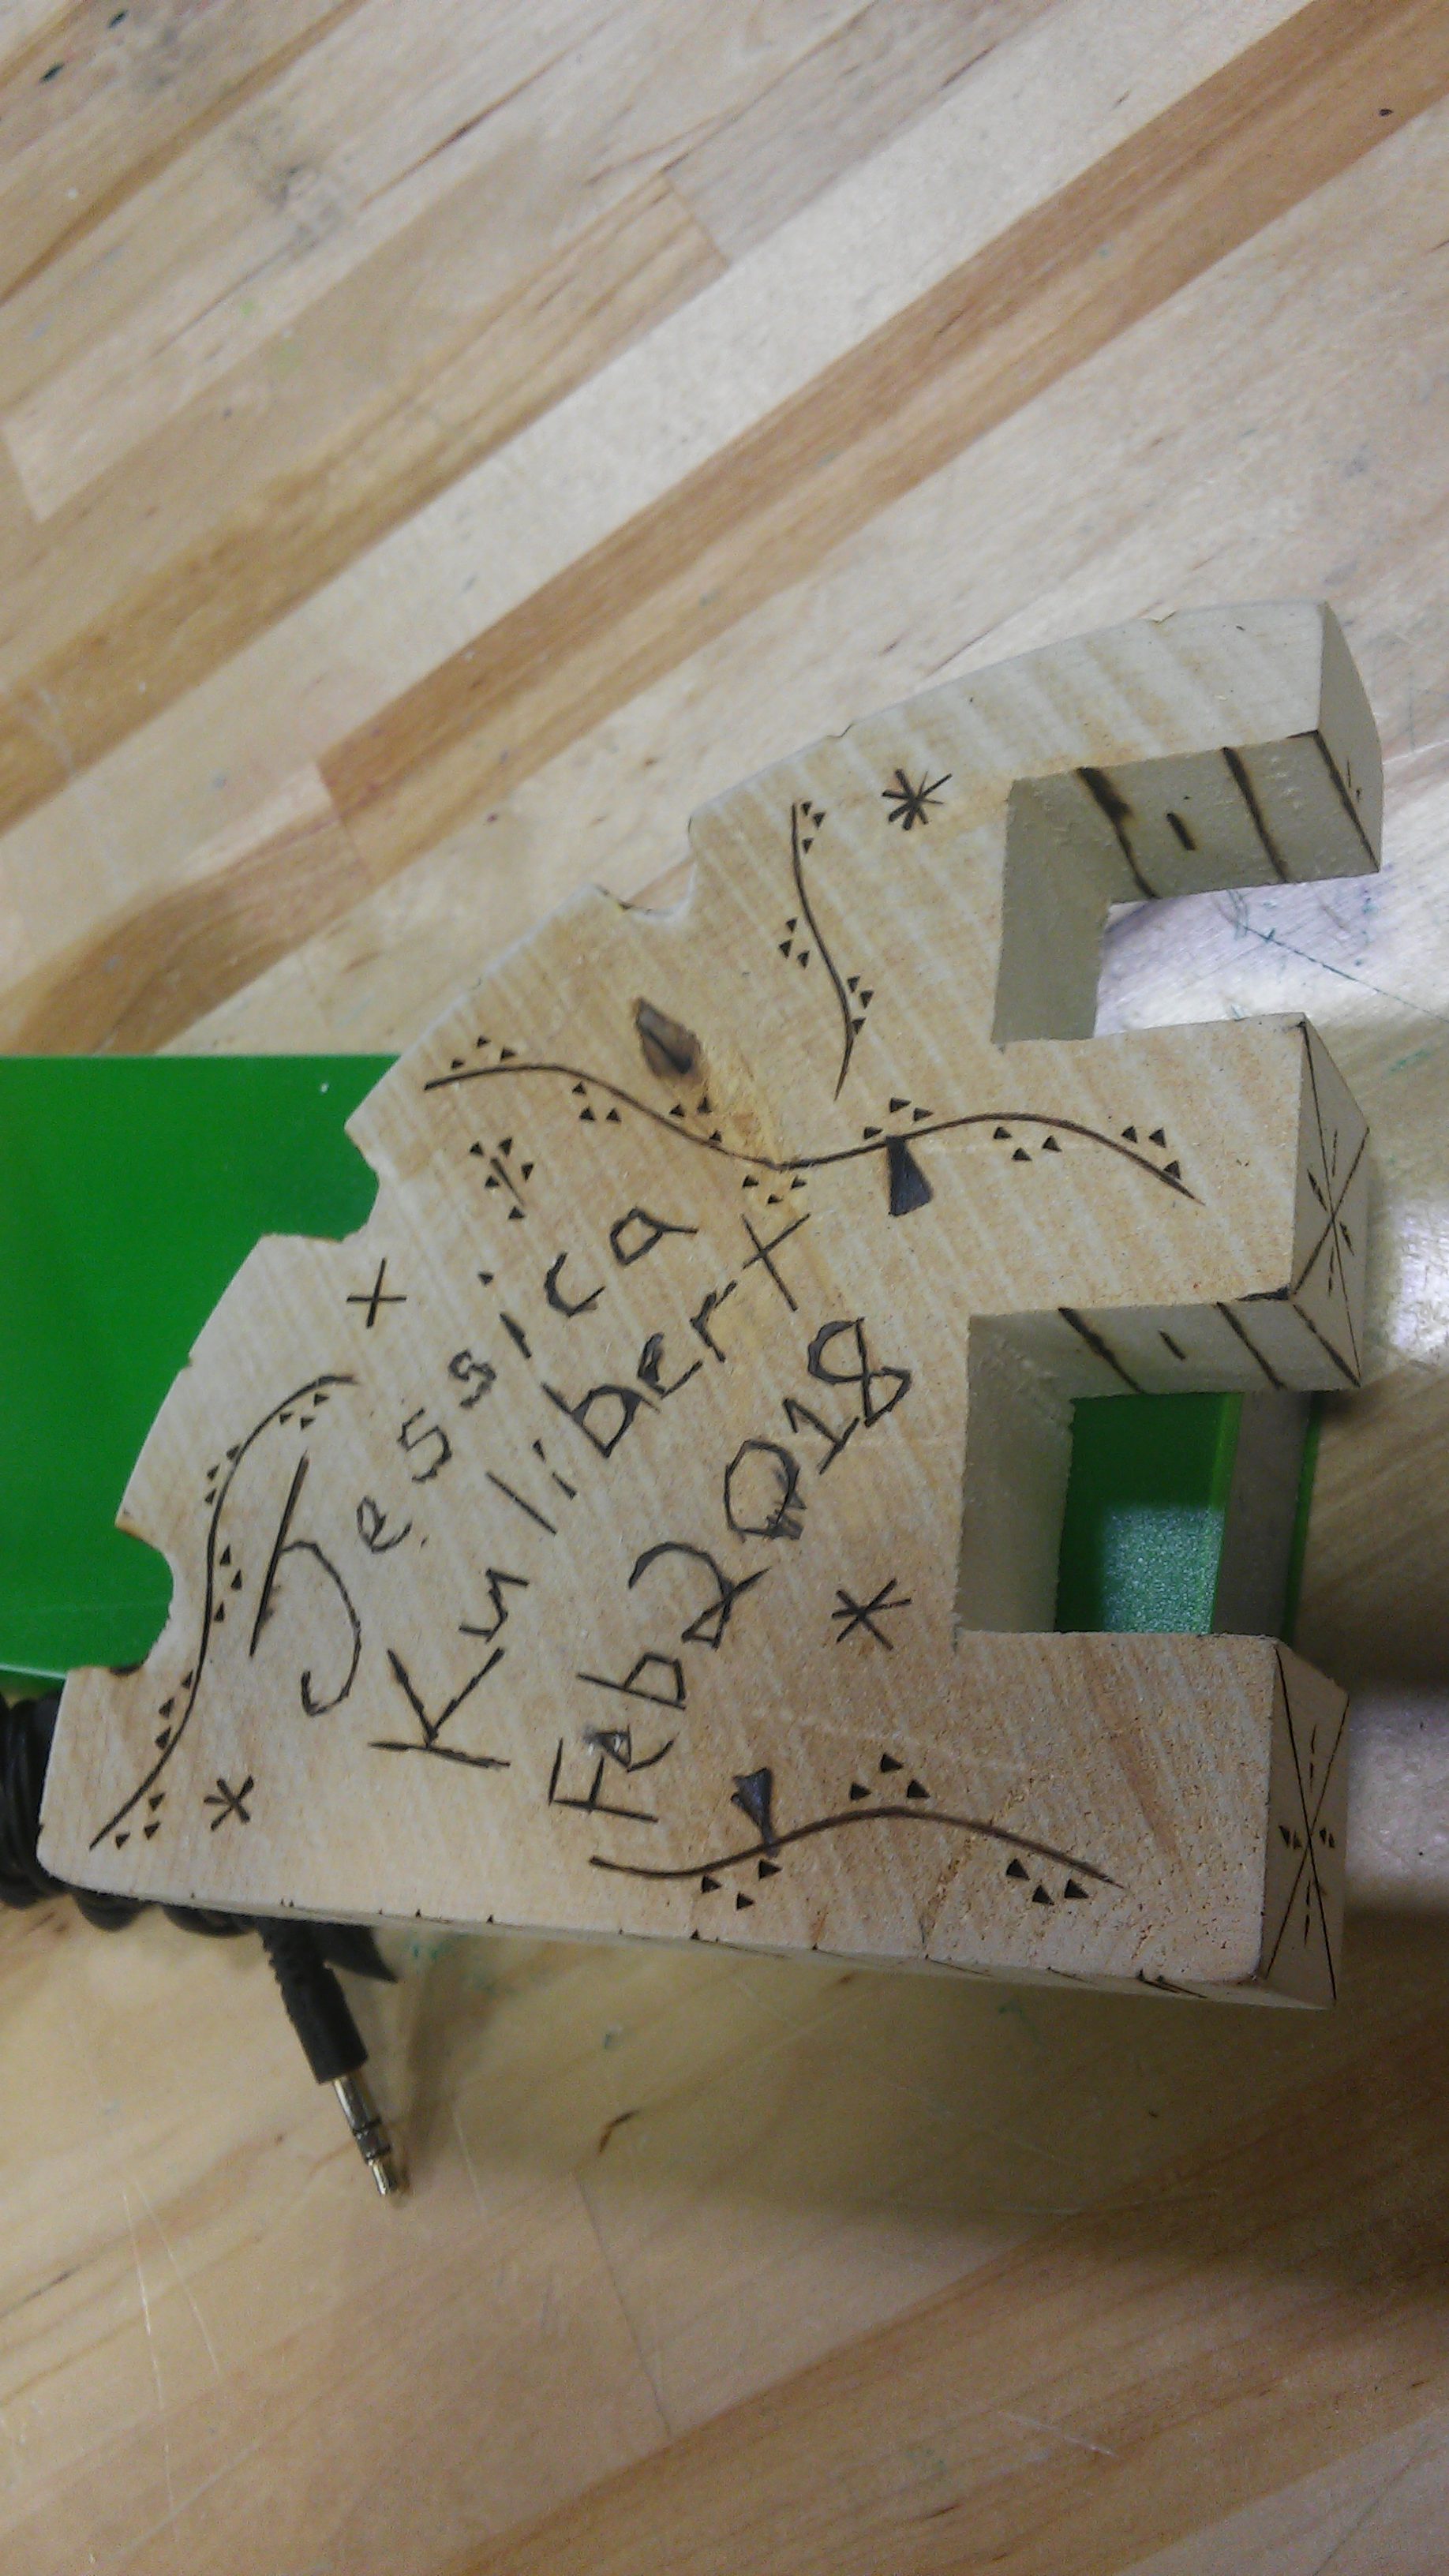
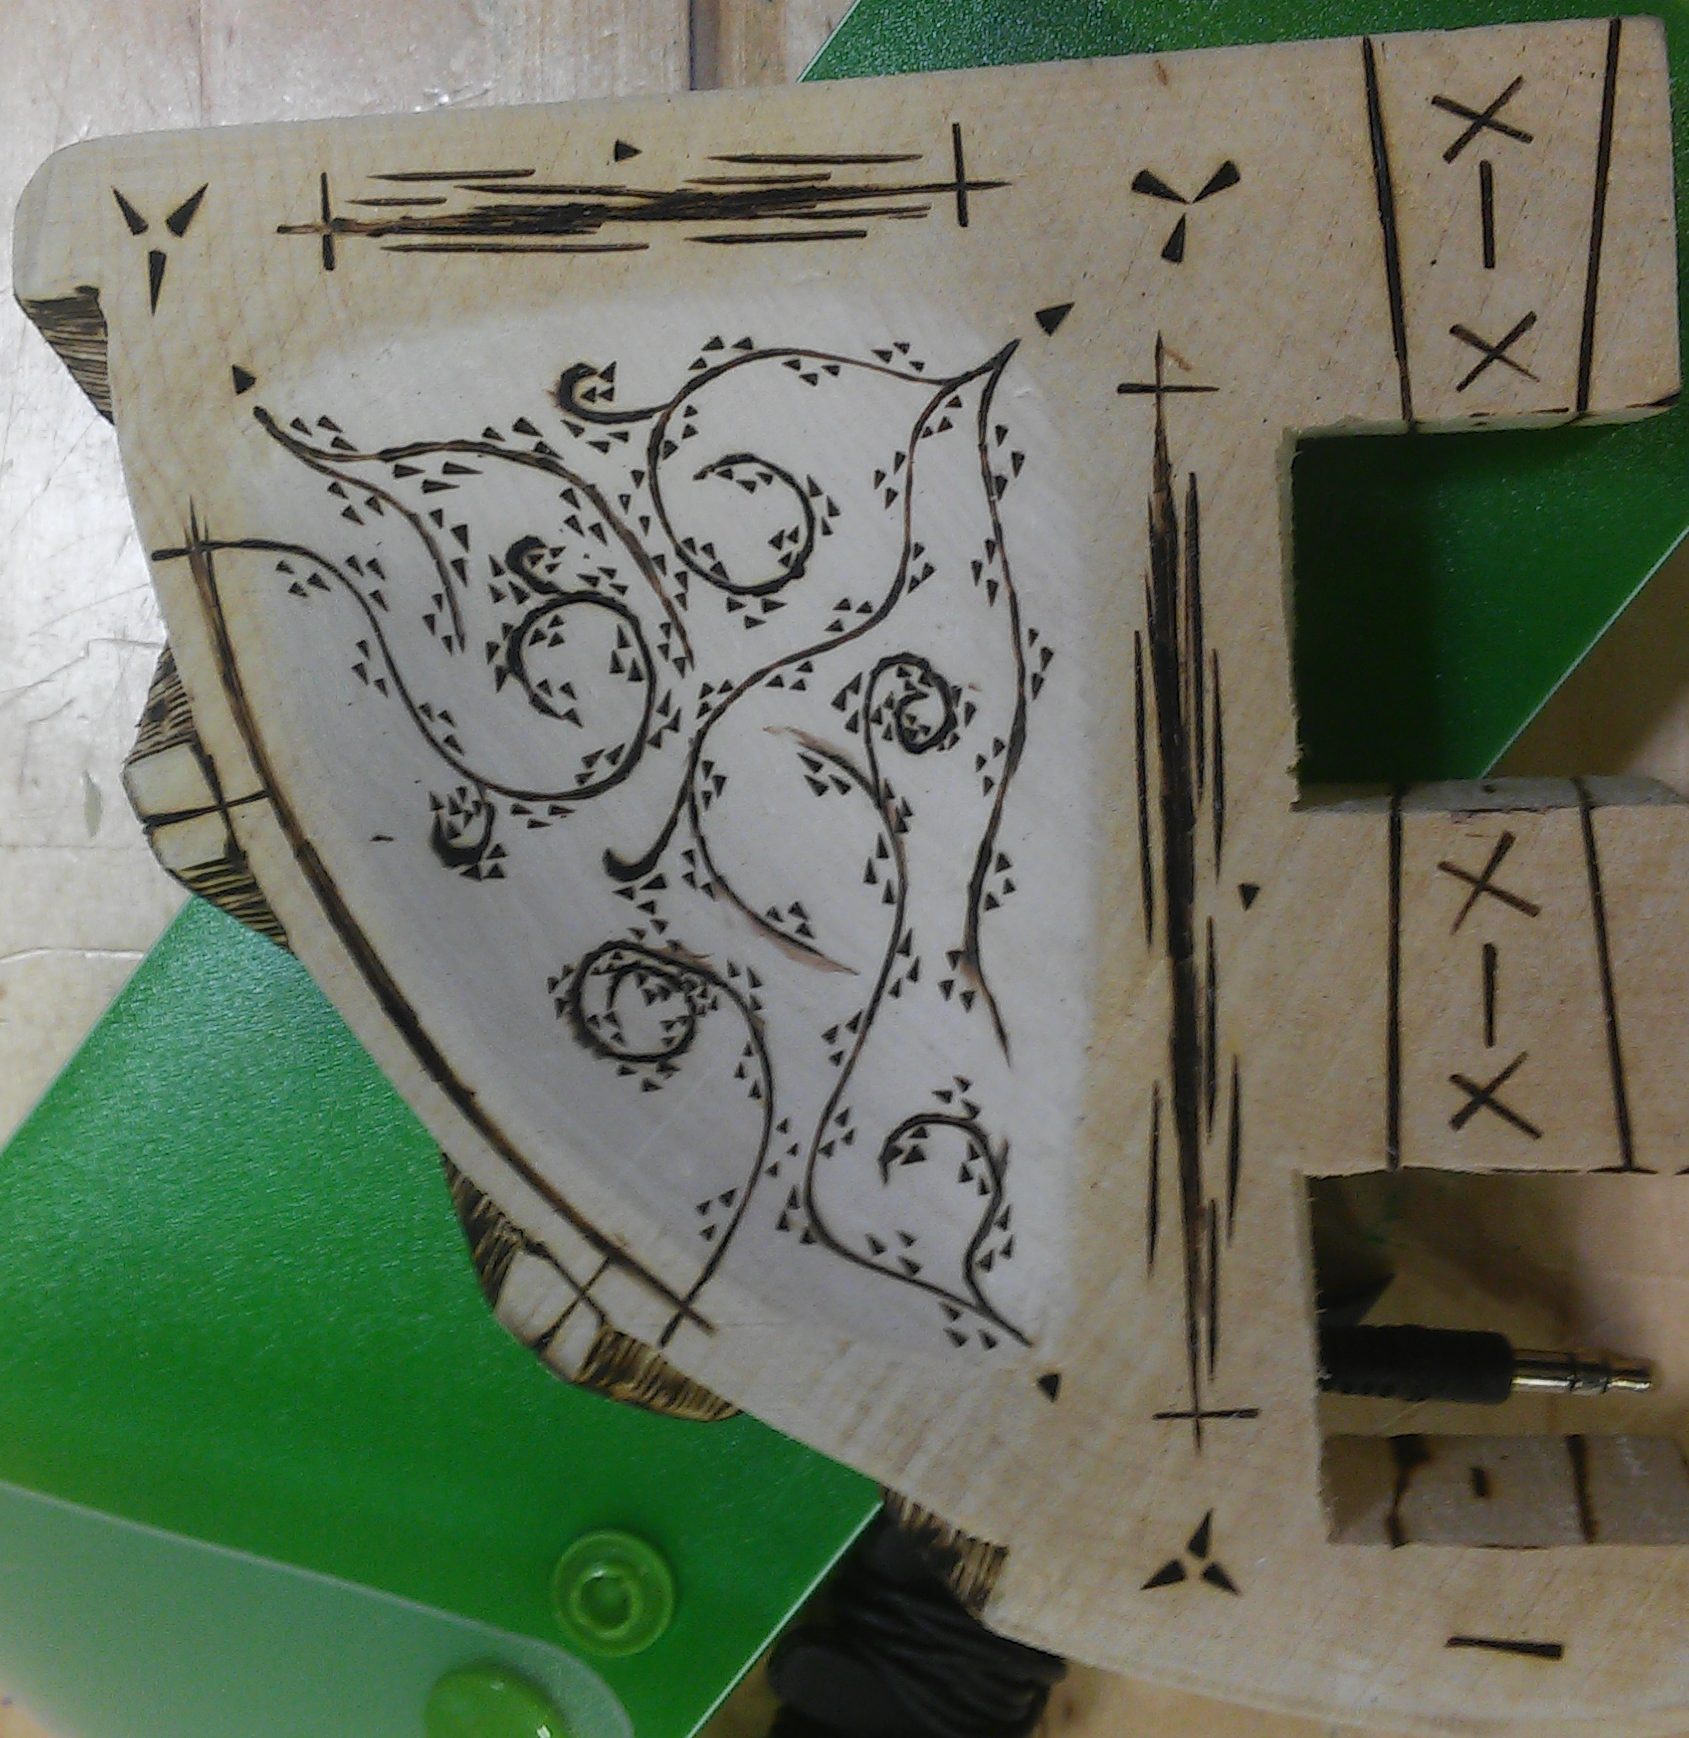
But finally I could set to work with the wood burner. By far it was the most anticipated part of the project simply because of how pleased I was with the preliminary initials block we did to prepare for this project. With a steady hand and patience, I knew I could do almost whatever I wanted. Not that I knew what that was yet. I started by putting my name on the bottom of the project and dating it because I intended to keep the finished product. Then I used the bottom to experiment with both straight lines and curved ones. When I found a design that I liked, I applied it wherever I wanted to the top or sides. The vine motif went into the basin while many of the straighter designs went around the edges. It was a sort of delightful organization. A structure juxtaposed with freeform that conformed to the particular surface it was on. I contemplated the futility of adding designs on the inside of the “teeth” where my project would join with Gabrielle’s, but I went with it in the end because the piece didn’t really feel finished or up to its potential otherwise. I’ll admit it’s also very easy to hide blemishes or mistakes with the wood burner. It made the chipped corners of the curved edge’s wedges look much more uniform.
All things considered, I had a lot of fun with this piece even if my strength was more in surface design that structural creativity. But you can’t deny its sturdiness, and this project was able to give me an actual grasp on the material and hobby that my dad loves so much. I learned a lot about the tools and became much more confident with using them rather than what felt like floundering with my initial approach. I severely enjoyed this piece, and part of my worries that this might be the most fun project of my entire semester.